Assembly
65
1 Condenser 3 Tension spring
2 Threaded clamping screw 4 Drive unit
1. Version glassware sets G1 and G3:
▪ Push the threaded clamping screw (2) over the condenser ange.
▪ Push the spring (3) over the condenser ange.
▪ Attach the condenser (1) to the drive unit (4) with the threaded clamping screw.
2. Version glassware set G5 (depending on coolant):
▪ Push the threaded clamping screw (2) over the cold trap jacket ange.
▪ Push the spring (3) over the cold trap liner ange.
▪ Screw the cold trap jacket with the threaded clamping screw to the drive unit.
▪ Insert the o-ring in the sealing groove of the cold trap jacket.
▪ Insert the PTFE centering ring in the cold trap jacket and insert the cold trap in-sert
(cold nger).
The ange is suctioned compressed by the vacuum and the system is closed vacuumtight
by the inserted o-ring.
Variante Glassatz G6 (Kühler für Rückussdestillation):
1
2
3
4
5
6
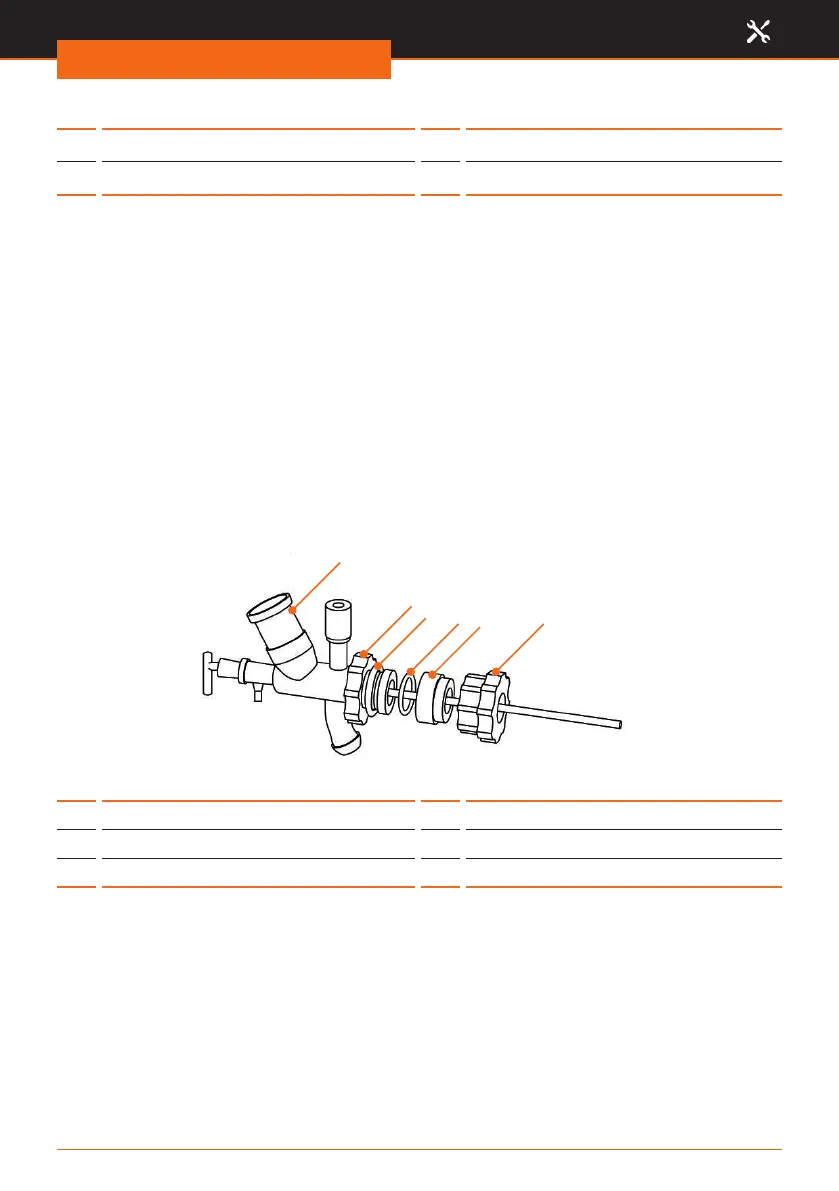
Illustratiion 4-11: Glassware G6
1 Center piece 4 Gasket G6
2 Threaded connection 5 G6 intermediate part (5)
3 Tension spring 6 G6 threaded coupling
▪ Push the threaded connection (2) over the condenser ange.
▪ Push the spring (3) over the condenser ange.
▪ Screw the G6 (6) gland on the drive head (Figure 4-10 (4).
▪ Insert the G6 intermediate part (5) with seal G6 (4) into the gland G6 (6).
▪ Screw the center piece (1) with the screw (2) on gland G6 (6).
▪ Insert the condenser in the upper cut on the center piece (1).





 To Next Page