Quick Start Guide REX 300 11
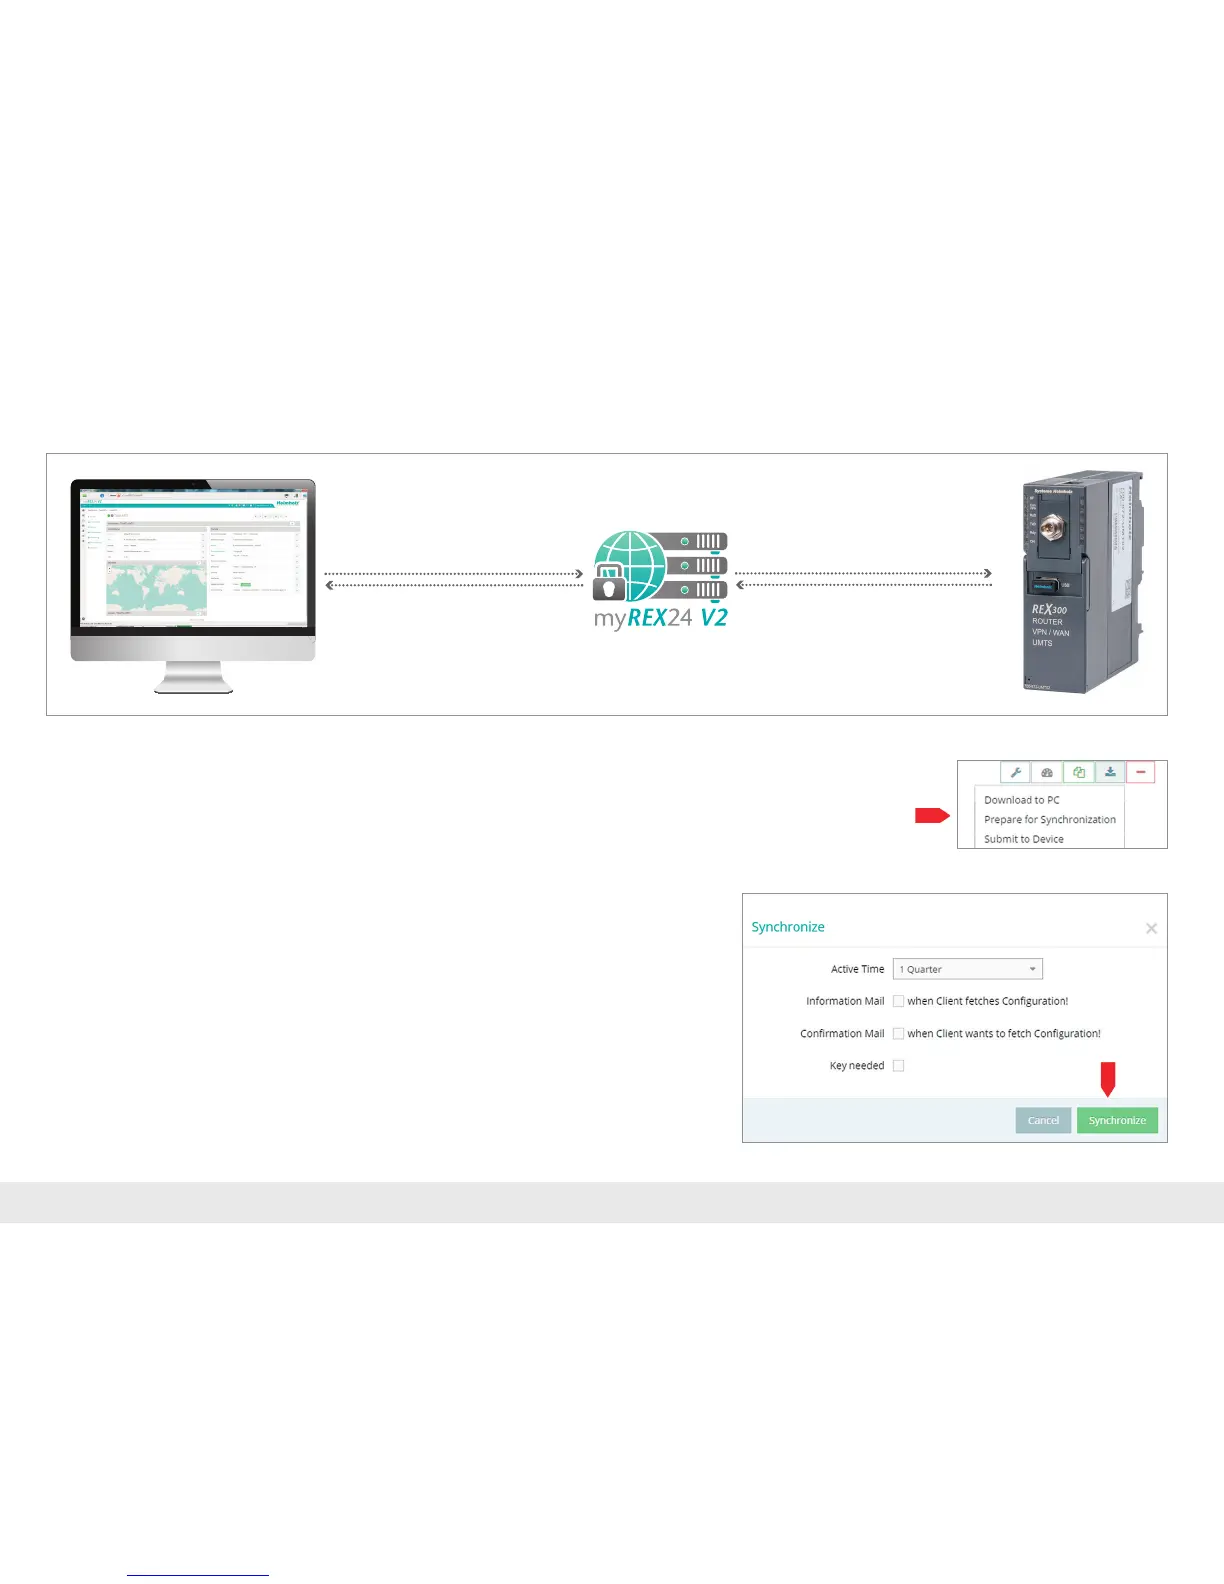
5.2 Transferautomaticcongurationthroughtheportal
5.2.1 File the REX 300 confi guration in the portal
As soon as the REX 300 router has established an Internet connection with the por-
tal,theREX300isveriedforyouraccountonthebasisofitsuniqueserialnumber.
ThecongurationdataisthentransferredautomaticallytotheREX300.Thismethod
isalsoidealintheeventthatyouneedtocarryoutretroactivechangestothedevice
settings.
Prerequisite/conditions:
- theREX300congurationwascreatedintheportal.Theserialnumberhasbeen
correctly entered.
- theREX300waspreconguredviathewebinterfacewiththeconnectiondata
(First Start Assistant, see next chapter 5.2.2).
- the REX 300 has a connection to the Internet
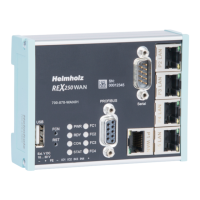
Clickonthesymbolfortheselectionofthetypeoftransferandthenon"Preparefor
Synchronization".
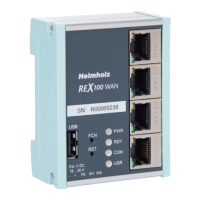
Nofurthersettingsarerequiredforthebasicconguration.Intheeventthatakey
hasbeenleftforthecreationofthecongurationdata,thiskeymustbeprovided
here.Clickon"Synchronize".
4. Automatic synchronization
1. Log in via shDIALUP
2. Create REX 300 configuration
and prepare for
synchronization
3. Carry out First Start Assistent
in the REX 300