14
T51002 E
InstallatIon, servIce and troubleshootIng Procedures
7. Check inside of spindle to ensure there is a
passage through the axle to allow installation of
air lines.
8. Select and complete this step for your axle type:
A. For all TIREMAAX
®
prepped INTRAAX
®
and
VANTRAAX
®
suspensions - locate the three
¼ inch pipe plugs in the axle wrap windows,
remove the plugs and proceed to AXLE
COMPONENT INSTALLATION on page 16. If
the axle does not have pre-drilled holes in the
axle wrap windows, proceed to Step 9 for hole
drilling details.
B. For Hendrickson TRLAXLE
®
Trailer Axles
- locate the three ¼ inch pipe plugs in
the middle of the axle, remove the plugs
and proceed to the AXLE COMPONENT
INSTALLATION on page 16. If the axle does
not have three pre-drilled holes in the middle
of the axle, proceed to Step 9 for hole drilling
details.
9. Using the information in Figure 6 or Figure 7, drill
and tap three ¼ inch - 18 NPT holes in the axle
wrap windows (on INTRAAX
®
and VANTRAAX
®
suspensions) or at the midpoint of the axle (on
Hendrickson TRLAXLE Trailer Axles).
NOTE: In most cases, it will be necessary to remove
the slack adjuster and camshaft to gain
access to the approved drilling area on
INTRAAX and VANTRAAX suspensions. Refer
to Hendrickson publication L496,
Wheel-End
Maintenance Procedures
(available at
www.hendrickson-intl.com/literature), for
complete slack adjuster and camshaft
removal instructions.
10. Remove the debris generated by the drilling and
tapping operations from inside the axle before
proceeding with AXLE COMPONENT INSTALLATION
on page 16.
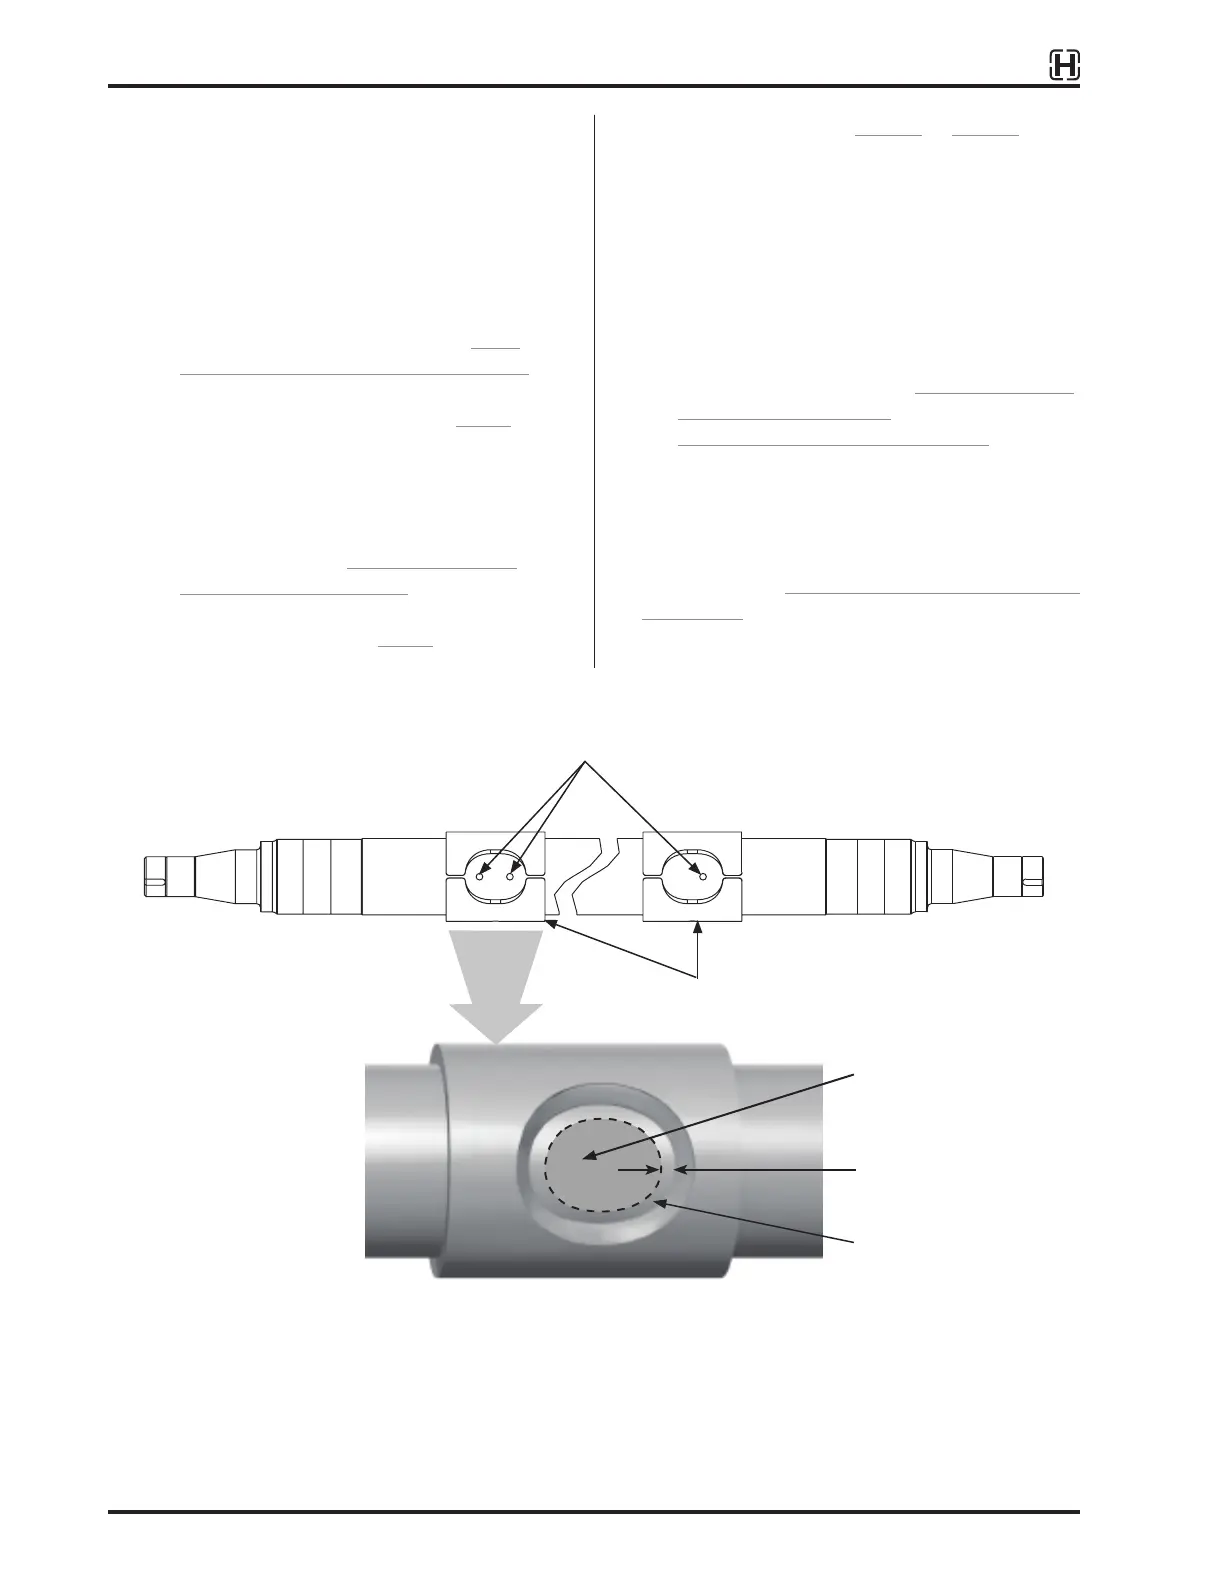
Drill three
7
/
16
inch (0.438") holes
through one side and tap ¼-18
NPTF-1 thread per ANSI B1.20.3
Figure 6: INTRAAX
®
/ VANTRAAX
®
suspension axle drilling details
IMPORTANT: As shown above, the edge of any
hole must be a minimum of ½ inch
(12 mm) away from the edge of the
fillet weld that surrounds the wrap
window.
NOTE: If pre-drilled by Hendrickson, the second hole
in the window wrap is on the roadside and
accommodates an axle vent assembly. These
holes must be within the approved drilling
area, but spaced far enough apart to allow
90° elbow fittings to be threaded into them.
½ inch minimum
from window edge.
Approved
drilling area
DO NOT drill
Axle Wrap
 Loading...