Maxima XTEND AX ‑ 3
10. Turn power switch on.
OPERATIONAL SETUP
1. Press Start button for 2 seconds to enter set‑up mode.
2. “Compressed air on” will appear on LCD display conrming compressed air is on.
3. Press Start button to show handpiece purge/dry time. The default time is set to 45 seconds. Press “1” to decrease or “3” to increase
purge/dry time as needed.
NOTE: There are six time settings (30s/ 45s/ 60s/ 75s/ 90s/ 120s).
4. Press Start button again to display the buzzer setting. If the buzzer is set to “o,” press “1” to turn buzzer on.
5. Press Start button again to display compressed air setting. The compressed air setting should show 4.5 bar. If LCD display does not
show 4.5 bar, turn the Air Regulator counterclockwise to lower or clockwise to increase the air pressure until it is set at 4.5 bars.
OPERATION
• Wear appropriate personal protective equipment during use and cleaning.
Chuck maintenance
Note: Ensure bur is removed from handpiece before attempting
this step. It is recommended that handpiece or attachment chuck
be cleaned every 3 ‑ 4 maintenance cycles.
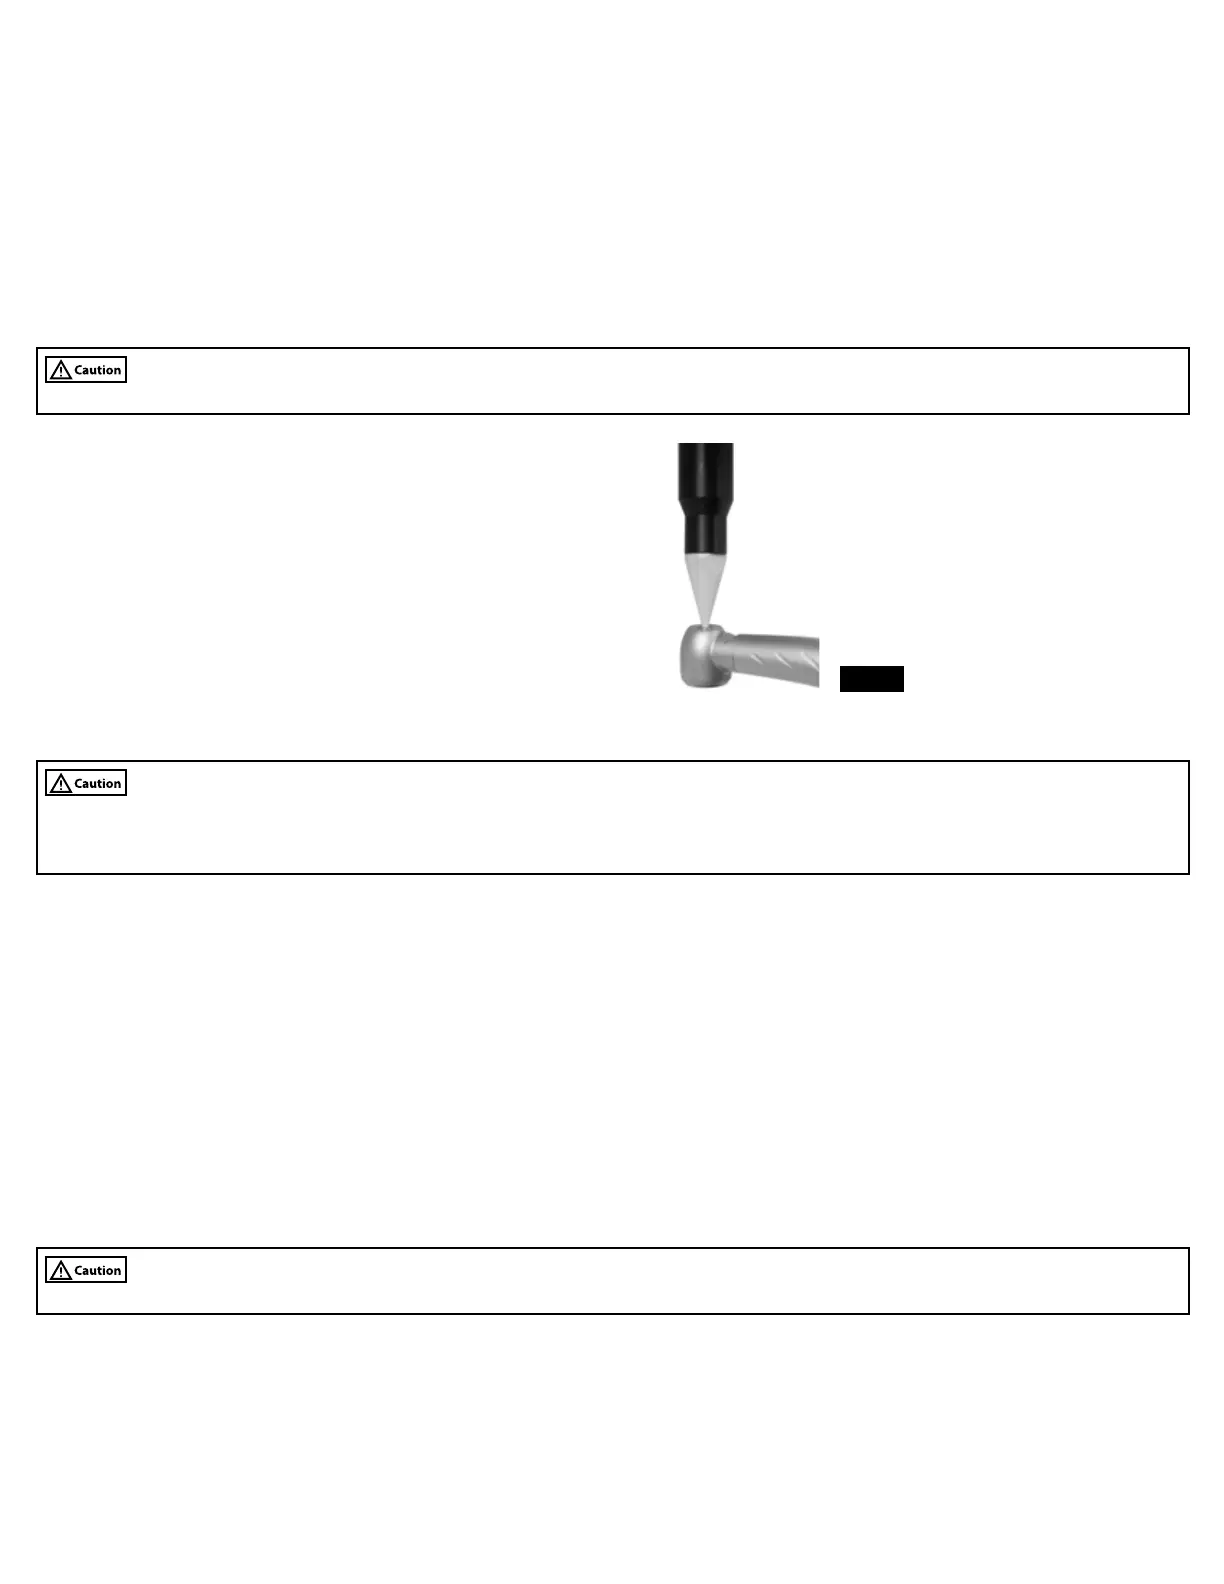
1. Open front door.
2. Place chuck opening against tapered end of chuck cleaning
nozzle (Fig. 6).
3. Press Start. LCD display will illuminate while in use.
4. Keep handpiece in place until beep sounds indicating that
cleaning cycle is completed.
FIG. 6
Handpiece and attachment maintenance
Attaching high-speed air-driven handpieces
• Ensure bur is removed from air‑driven high‑speed handpieces before using maintenance machine.
• Missing or improperly seated o‑rings on service adapter may cause handpiece to become stuck on adapter or o‑ring(s) may become
damaged.
1. Open front door of maintenance machine.
For quick connect style handpieces only
2. Attach required service adapter by inserting back of adapter into 4‑hole connector and nger tighten threaded nut.
3. Inspect service adapter to ensure that all o‑rings are properly seated in their grooves.
4. Push handpiece onto applicable service adapter.
For xed backend handpieces only
5. Insert xed backend handpiece into 4‑hole connector and nger tighten nut.
Attaching straight and contra angle attachments
1. Open front door.
2. Attach required low‑speed service adapter (if applicable) by inserting back of adapter into 4‑hole connector and nger tighten
threaded nut.
3. Push attachment onto applicable service adapter until it clicks and locks in place.
Handpiece and attachment lubrication and internal cleaning
• Be sure to only select maintenance station(s) that have handpiece(s) installed.
Note: Do not depress buttons or open front door of Maxima XTEND AX while machine is running, this will cause maintenance cycle to be
interrupted. If this occurs, open door completely to reset machine and then start lubrication and internal cleaning cycle again.
1. Close front door of maintenance machine.
2. Select maintenance station number(s) on the control panel by pressing the 1, 2 and/or 3 button(s) that correspond to stations with
handpiece(s) attached. Indicator lights will illuminate when station is activated for use.
3. Press Start button. Machine is now operating. LCD display will illuminate while in use.
4. Machine will beep when maintenance cycle is complete.
5. Remove handpiece(s) and/or attachment(s) from maintenance machine. To disconnect attachment(s), press the lever on the low‑speed
service adapter before removing.