16
Check the following list before turning the transmitter
on.
• Be sure there is a fully charged battery in the
transmitter.
• Insert the second battery in the charger and
connect the charger to a power source. Be sure
the power source is active at all times.
• Push in the E-Stop button.
• Be sure the motion pushbuttons, joysticks and/or
paddle levers are in their Off (neutral) positions.
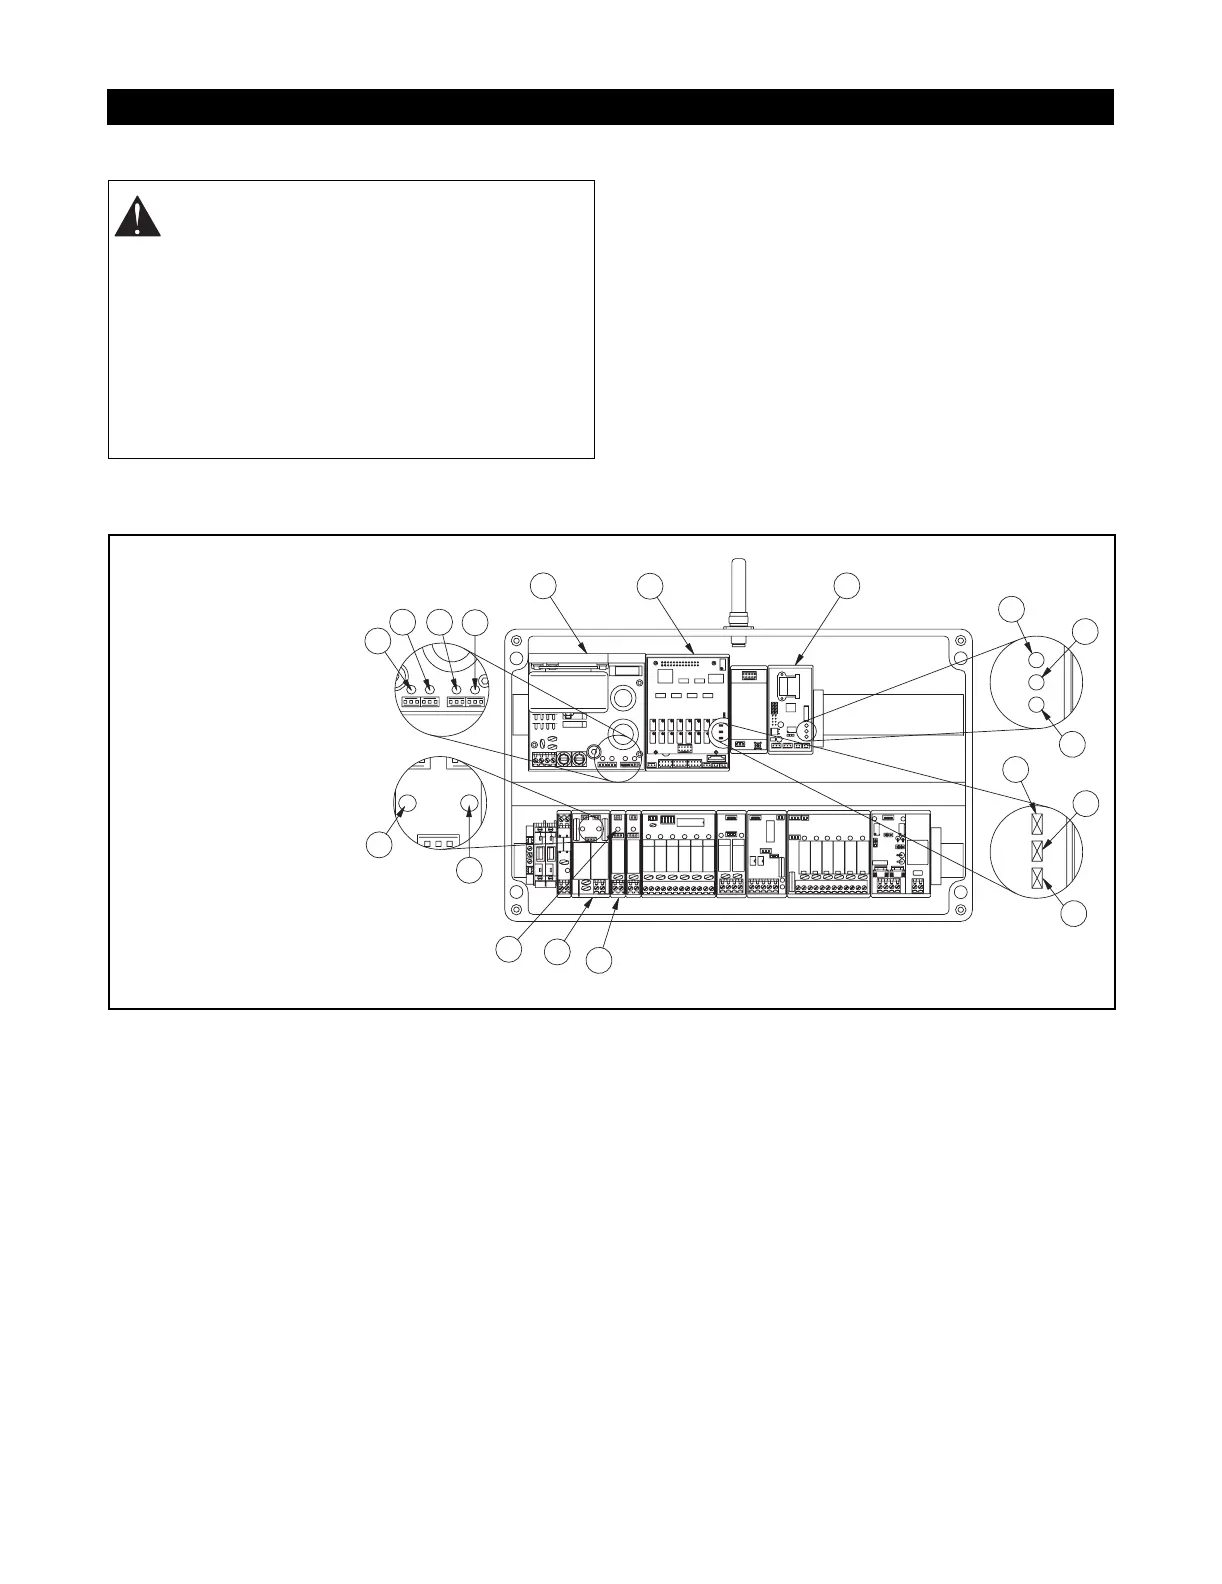
TEST THE RECEIVER
1. Remove the cover from the receiver.
2. Position yourself in front of the receiver so that all
LEDs and connections are visible.
3. Turn on power to the receiver. The CPU Standby
LED should flash yellow to indicate the
microprocessor is working properly. The LEDs
X1, X2, and X3 on the Power Pack should
illuminate.
4. Insert the key into the transmitter key switch and
turn to the ON position. The buzzer sounds to
indicate the diagnostic test in progress.The
buzzer sounds a second time to indicate
successful diagnostic testing.
5. Immediately following the diagnostic test, the
Telegram LED should flash on the Decoder and
E-Stop Decoder modules. This indicates that the
receiver is detecting a valid signal from the
transmitter.
6. Pull out the E-Stop pushbutton. The X4 LED on
the Power Pack should illuminate. The E-Stop
LEDs on the Decoder module and the E-Stop
Decoder module should illuminate.
7. Push in the E-Stop pushbutton. The X4 LED on
the Power Pack should go off. The E-Stop LEDs
on the Decoder module and the E-Stop Decoder
module should also go off.
8. Pull the E-Stop pushbutton out.
9. Press the Start/Horn pushbutton on the
transmitter. The Start Relay LED should
illuminate and the horn will sound. The main line
contactor is activated at this time.
10. Activate the motion pushbuttons, joysticks or
paddle levers to test the crane/machine functions.
TEST PROCEDURES
WARNING: FAILURE TO FOLLOW
INSTRUCTIONS could result in personal
injury and/or damage to equipment. Read and
understand the safety instructions in all
manuals provided.
Testing or service must be performed by
authorized personnel only.
There must be no load on the crane/machine.
Clear the crane/machine operating area of
obstructions.
P1 P2
P3 P4
P5 P6
P7 P8
P9 P10
P11 P12
P13 P14
1
2
3
4
5
6
15
14
12
7
8
9
10
8
9
10
11
13
1. Power Pack X1 LED
2. Power Pack X2 LED
3. Power Pack X3 LED
4. Power Pack X4 LED
5. Power Pack
6. Decoder Module
7. E-Stop Decoder
Module
8. CPU Standby LED
9. Telegram LED
10. E-Stop LED
11. Start Relay
12. SNZ E-Stop Module
13. Start Relay LED
14. E-Stop Decoder
E-Stop LED
15. Decoder E-Stop LED