EasyManuals Logo

HIKVISION DS-2CD754FWD-E Installation Manual

HIKVISION DS-2CD754FWD-E
68 pages
To Next Page IconTo Next Page
To Previous Page IconTo Previous Page
Page #12 background imageLoading...
Page #12 background image
Installation Manual of Network Camera
5
2
Auto-iris interface
3
Bracket mounting holes
4
F1+ F1-, F2+ F2- ,F3+ F3-: Alarm output interface
5
T1,T2,T3, T4,GND: Alarm input interface
6
D+, D-: RS-485 interface
7
10M/100M self-adaptive Ethernet interface
8
VIDEO OUT/HDMI: Video output interface
9
RESET: Reset button
10
TXD, RXD, GND: RS-232 interface
11
Power supply interface
12
POWER: Power LED indicator
13
SD: SD card slot
14
AUDIO IN: Audio input interface
15
AUDIO OUT: Audio output interface
16
Ground
Notes:
To reset the default parameters to the camera, you need to press and hold the RESET button
and power on the camera. After the power on of the camera, you must still press and hold the
Reset button for about 20 seconds.
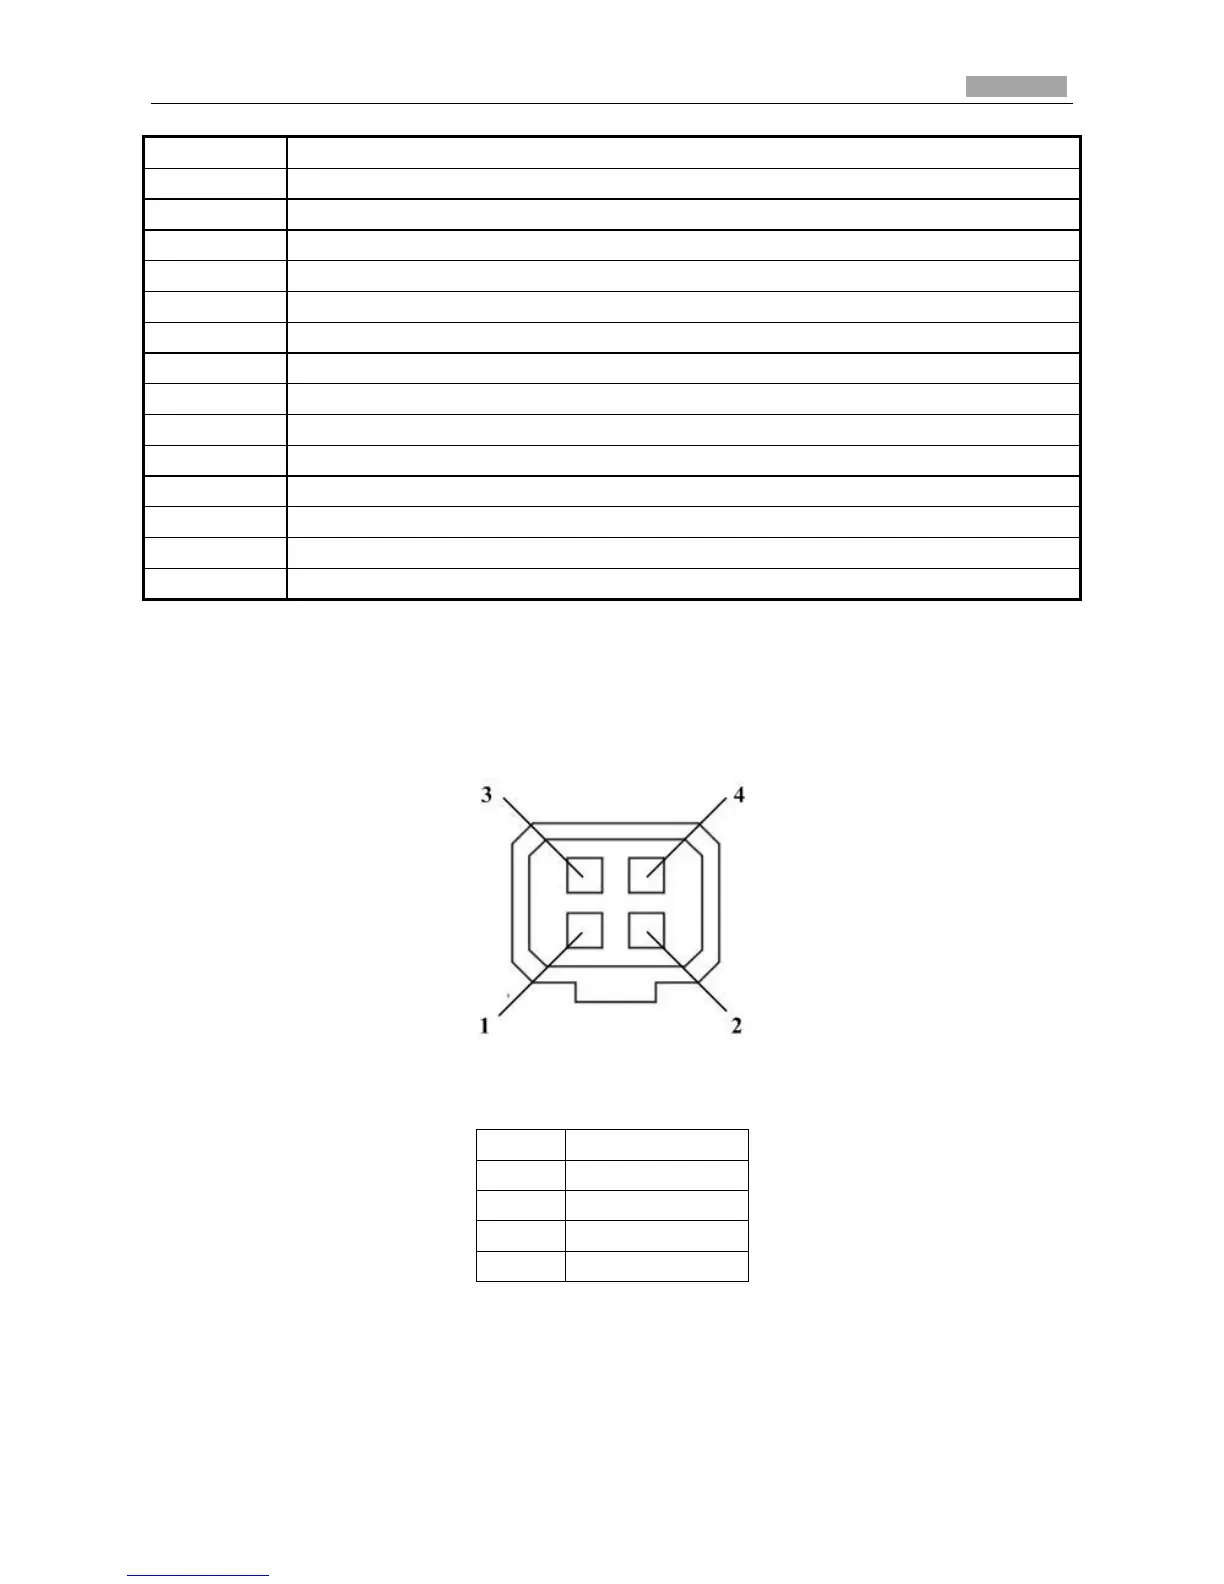
The type of auto-iris interface is shown in Figure 2-7, and the definition of each pin is shown
below:
Figure 2-7 Auto-iris Interface
Table 2-4 Pins
DC-driven
Damp-
Damp+
Drive+
Drive-
Damp+, Damp-, Drive+ and Drive- pins are used when the auto-iris is driven by DC.
Camera wiring Diagram:

Other manuals for HIKVISION DS-2CD754FWD-E

Questions and Answers:

Question and Answer IconNeed help?

Do you have a question about the HIKVISION DS-2CD754FWD-E and is the answer not in the manual?

HIKVISION DS-2CD754FWD-E Specifications

General IconGeneral
BrandHIKVISION
ModelDS-2CD754FWD-E
CategorySecurity Camera
LanguageEnglish

Related product manuals