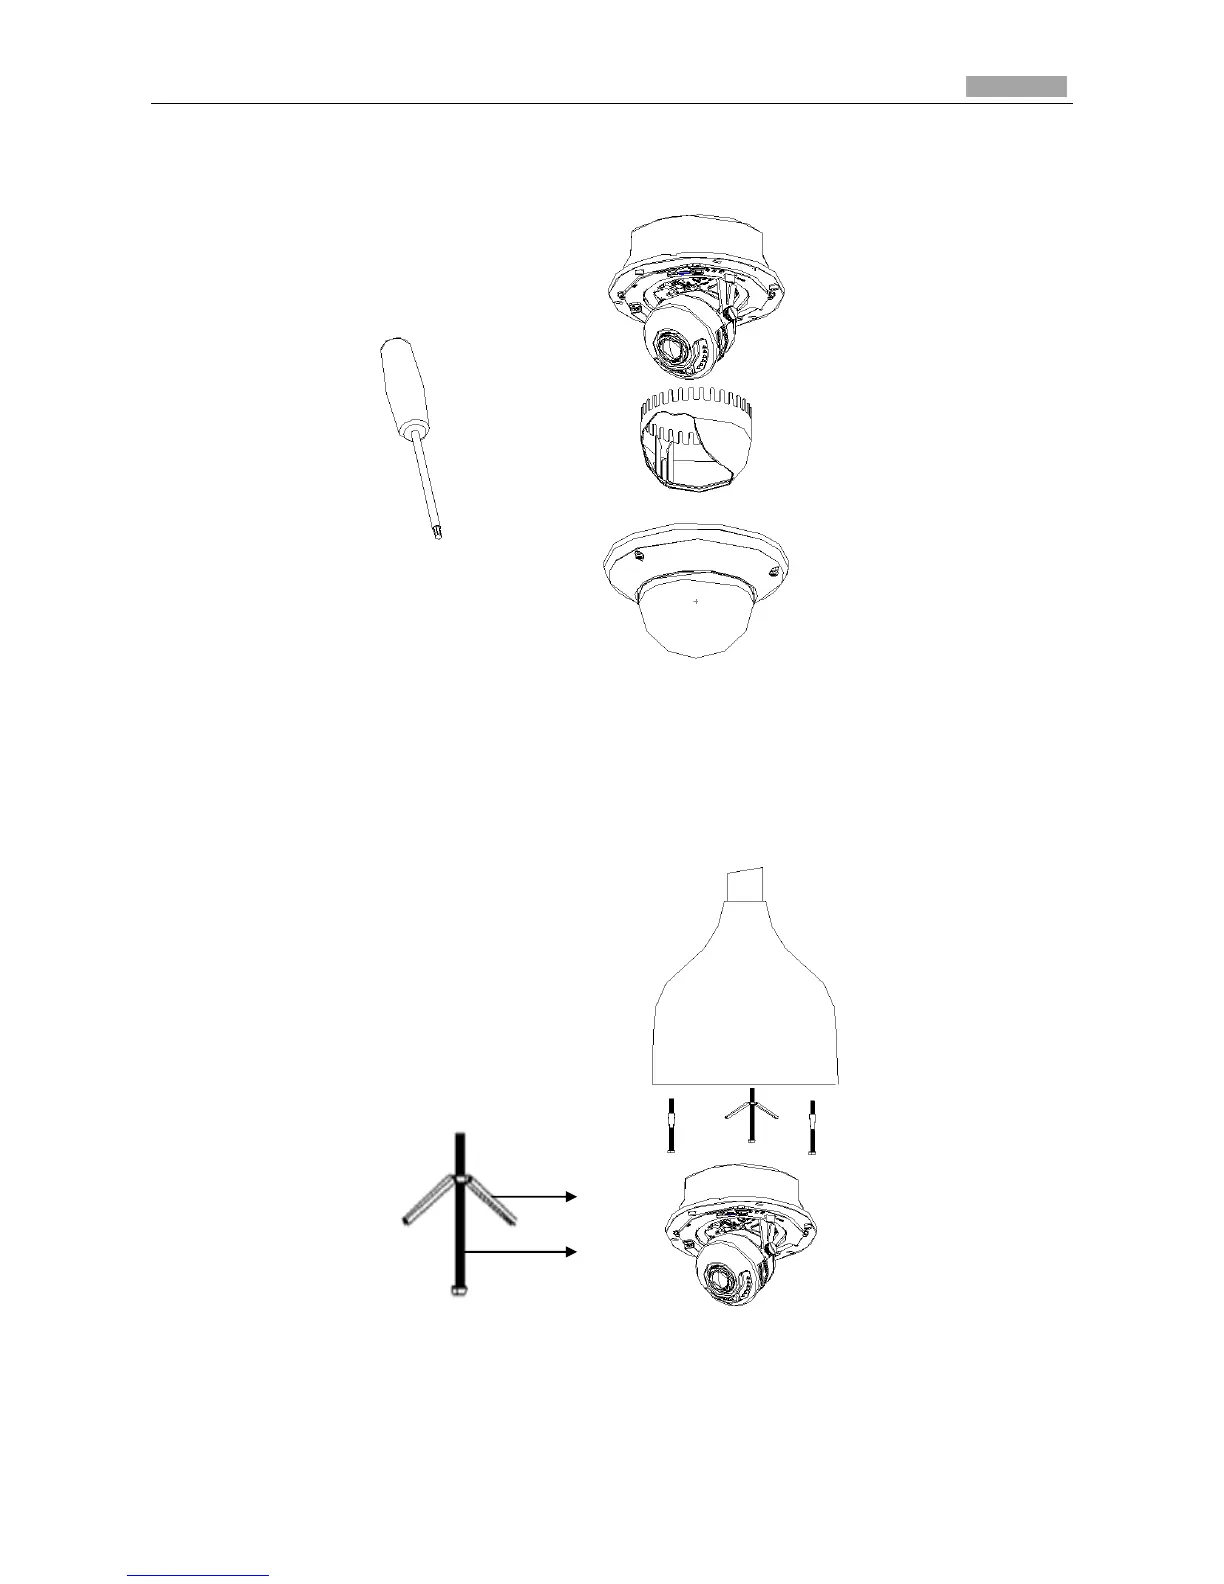
2. Loosen the set screws with the hex key (supplied) to remove the lower dome; remove the dome
liner.
Figure 3-48 Remove the Lower Dome
3. Rotate the toggle to remove it from the toggle bolt; insert the bolt into the toggle bolt hole on
the dome module and use the screw driver to rotate the bolt slightly but not tightly; Reinstall
the toggle and push the dome module to the mounting hole on the bracket with toggle bolts
aligned with the screw holes on the bracket.
Figure 3-49 Secure the Camera
4. Fasten the toggle bolt and the toggle will automatically secure the dome module to the bracket.
5. After connecting the network cable and power cable, view the image of the camera over the
 Loading...