DS-3WF0AC-2NT User Guide
26
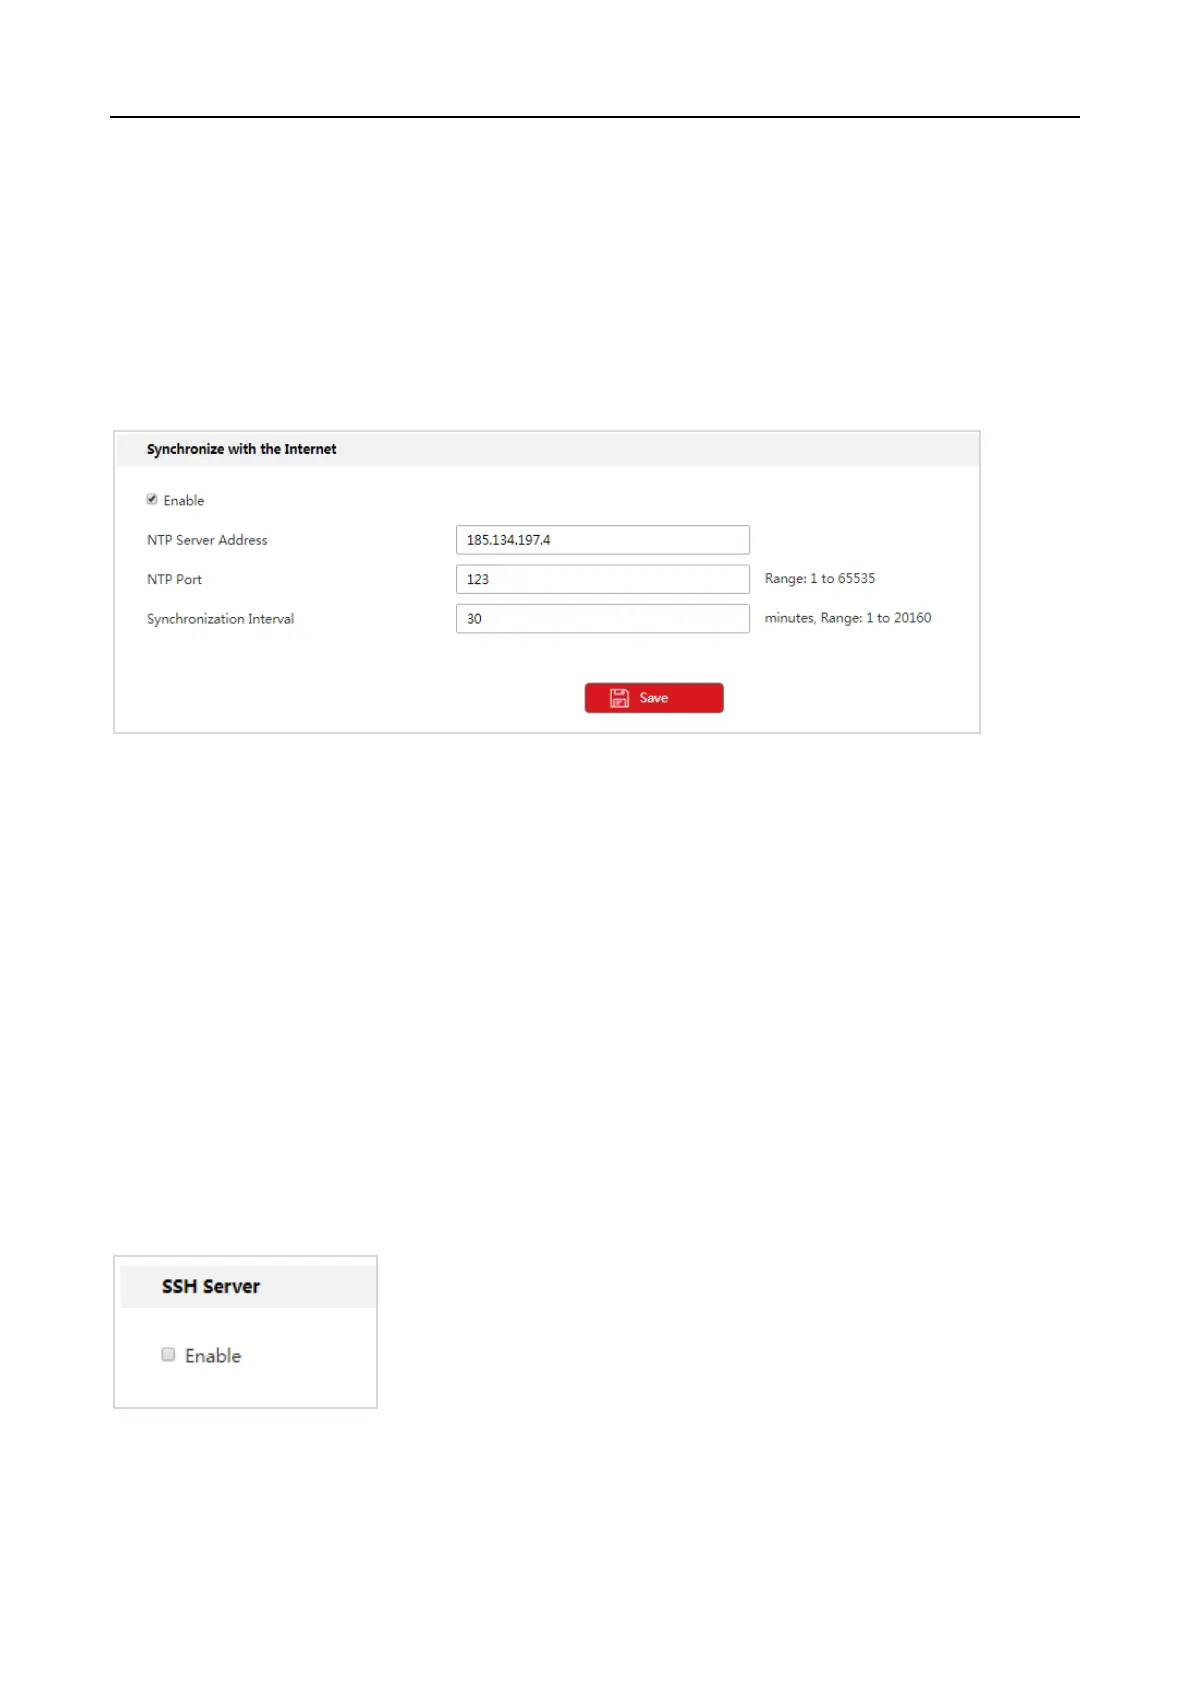
Step 2 Check the Enable box.
Step 3 Enter the IP address of the NTP server, which is 185.134.197.4 in this example.
Step 4 Enter the NTP port. The default is 123.
Step 5 Set a synchronization Interval at which the wireless bridge synchronize its time with the
internet.
Step 6 Click Save.
----End
6.3 Basic Service
Log in to the web UI and choose System > Basic Service.
In this module, you can set the SSH function, and export system logs.
6.3.1 SSH server
Log in to the web UI, choose System > Basic Service.
Secure Shell (SSH) uses encryption and authentication mechanisms to achieve remote access and
file transmission services.
This wireless bridge supports SSH server, and allows SSH client to connect to it.
SSH server is disabled by default.
Assume that you want to log in to the wireless bridge (192.168.1.35) and configure it form the
computer installed with the SSH client software.

 Loading...