Network Traffic Camera • User Manual
27
Figure 6-8 Manual Synchronization
Step 7 (Optional) you can also check Synchronize with PC. The camera time is synchronized with the
time of your computer.
Step 8 Click Save to save the settings.
NTP Synchronization
Step 9 Select Synchronization Mode as NTP Synchronization.
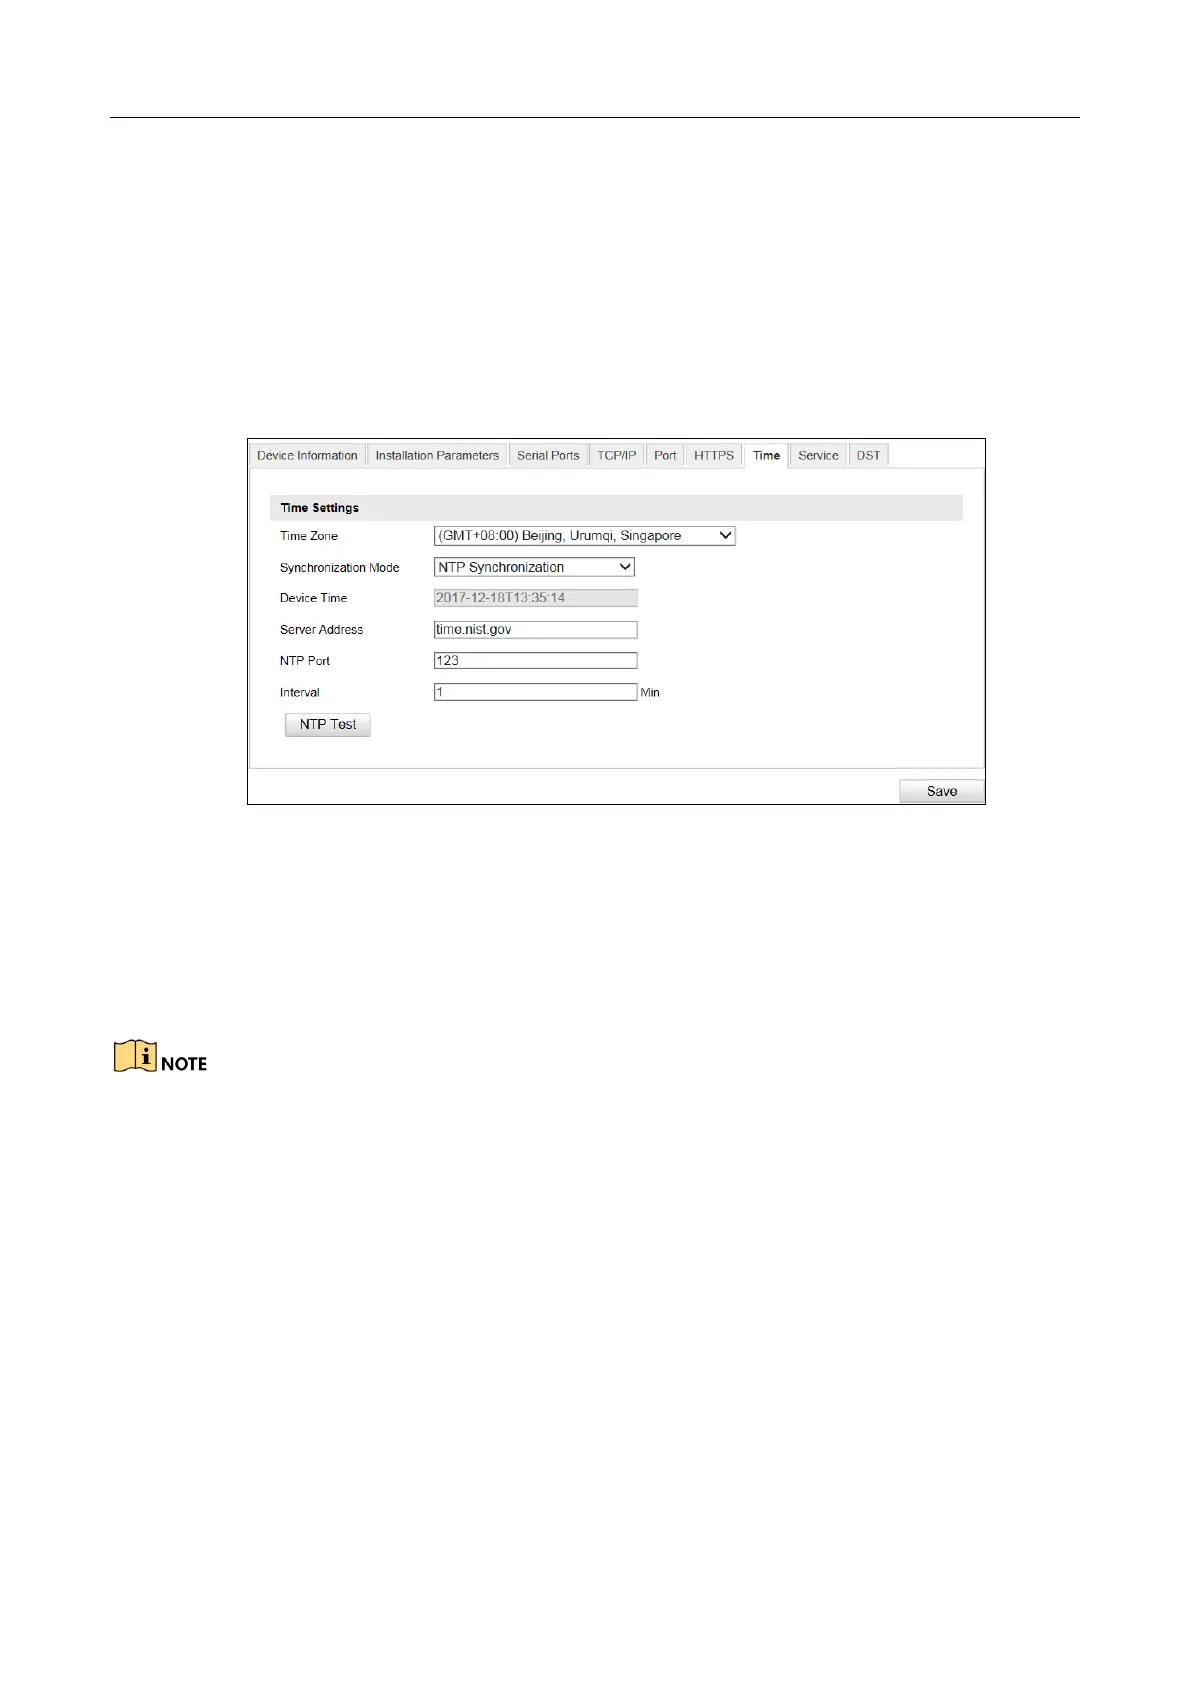
Figure 6-9 NTP Synchronization
Step 10 Configure the following settings:
Server Address: IP address of NTP server.
NTP Port: Port of NTP server.
Interval: The time interval between the two synchronizing actions with NTP server.
If the camera is connected to a public network, you should use a NTP server that has a time
synchronization function, such as the server at the National Time Center (IP Address:
210.72.145.44). If the camera is set in a customized network, NTP software can be used to
establish a NTP server for time synchronization.
Step 11 Click Save to save the settings.
Configuring DST (Daylight Saving Time)
Step 12 Go to Configuration > Device Configuration > System Configuration > DST.
Step 13 Check Enable DST.
Step 14 Set Start Time, End Time, and DST Bias.
Step 15 Click Save to save the settings.
 Loading...