*2100246*
2100246 English 7
Noise information
Sound power level (L
WA
)
98.8 dB(A)
Emission sound pressure level (L
pA
)
87.8 dB(A)
Uncertainty (noise values) (K
pA
and K
WA
)
3 dB(A)
Total vibration
Hammer drilling in concrete (a
h, HD
) B 22/2.6 LiIon (02)
13.1 m/s²
B 22/8.0 Li-Ion
9.6 m/s²
Uncertainty (K)
1.5 m/s²
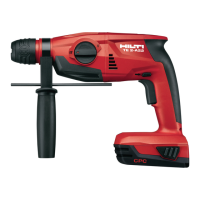
4.3 Battery
Battery operating voltage
21.6 V
Ambient temperature for operation
−17 ℃ … 60 ℃
Storage temperature
−20 ℃ … 40 ℃
Battery charging starting temperature
−10 ℃ … 45 ℃
5 Operation
5.1 Preparations at the workplace
WARNING
Risk of injury by inadvertent starting!
▶ Before inserting the battery, make sure that the product is switched off.
▶ Remove the battery before making any adjustments to the power tool or before changing accessories.
Observe the safety instructions and warnings in this documentation and on the product.
5.1.1 Fitting the side handle 2
1. Release the side handle clamping band by turning the handle grip.
2. Slide the side handle clamping band over the tool holder from the front and into the recess provided.
3. Bring the side handle into the desired position.
4. Tighten the side handle clamping band by turning the handle grip.
5.1.2 Fitting the battery 3
1. Push the battery into the battery interface on the tool until it is heard to engage with a click.
2. Check that the battery is seated securely.
5.1.3 Removing the battery 4
1. Press the release buttons on the battery.
2. Pull the battery out toward the rear.
5.1.4 Fitting the accessory tool 5
1. Apply a little grease to the connection end of the accessory tool.
▶ Use only the recommended grease supplied by Hilti. Use of the wrong grease can result in damage
to the tool.
2. Push the accessory tool into the chuck as far as it will go (until it engages).
3. After fitting the accessory tool, grip it and pull it in order to check that it is securely engaged.
▶
The product is ready for use.
5.1.5 Removing the accessory tool 6
CAUTION
Risk of injury by the accessory tool! The accessory tool might be hot or have sharp edges.
▶ Wear protective gloves when changing the accessory tool.
▶ Pull the chuck back as far as it will go and remove the accessory tool.

 Loading...