Home Automation
Rules
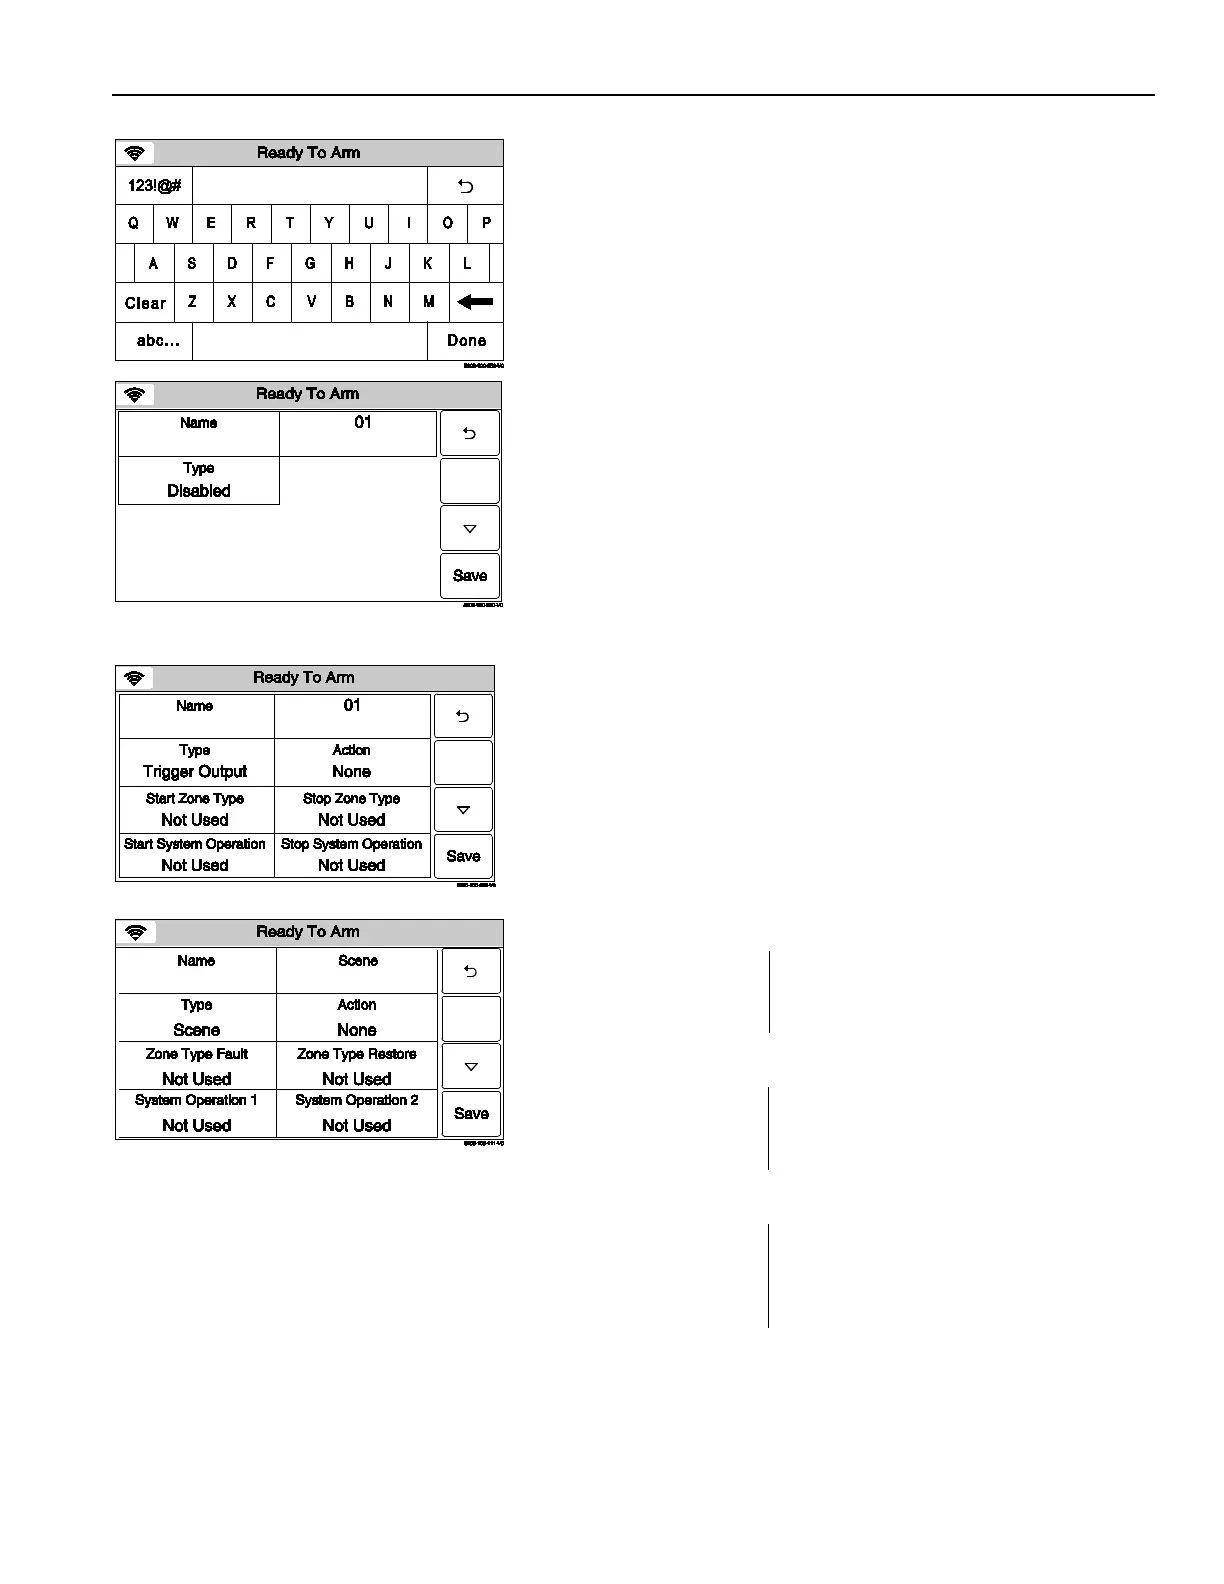
4. Select the “Name” key
and then enter up to 13 characters of
text on the displayed keyboard to assign a name to the Rule.
Note:
Select the “ABC…” key to switch the keyboard between
upper/lower case or the “123!@#” key to switch to numbers.
5. Once you are finished, select “Done”. The system returns to the
Rules screen.
6. Select the “Type” button. Dependant upon what features are
programmed in your control the system toggles between the
following Types:
Disabled
Trigger Output
Scene (displayed when Z-Wave has been enabled)
To Ph. 1 (Message to Phone 1) (L5210/L5210-CN only)
To Ph. 2 (Message to Phone 2) (L5210/L5210-CN only)
To Ph. 1 & 2 (Message to Phone 1 & 2) (L5210/L5210-CN only)
Depending upon the Type selected, the system displays
several new programming fields. If Scene is selected, you must
program a scene in order for it to run.
OR
7. Select “Action”. Dependent upon the Type selected previously,
the system scrolls between several options:
None
Permanent On
On for 2 sec
Pulsing
Send (L5210/L5210CN only)
Run Scene*
* If Scene was selected in step 6, you must select Run Scene.
8. Select “Start Zone Type” OR “Zone Type Fault” (if Scene was
selected in the Type field). The system displays the following
options (dependent upon the Type that was selected):
Use the “” “” buttons to scroll to second page of zone type
options.
Use the “” “
” buttons to scroll to third page of zone type
options.
- 15 -
 Loading...