Do you have a question about the Honeywell Notifier ID60 Series and is the answer not in the manual?
Information on related documentation for installation and configuration.
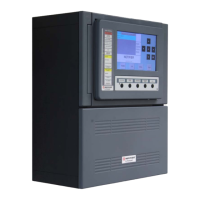
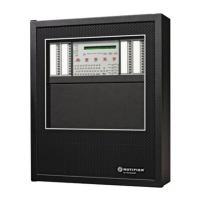
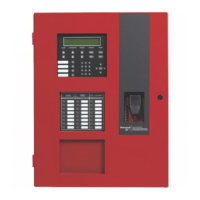
Overview of the panel's capabilities, loop capacity, and connectivity.
Lists and describes abbreviations used for various device types in the manual.
Instructions for cleaning the panel case using a soft, damp cloth.
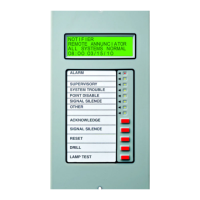
Details the function pushbuttons, numeric/cursor keys, and keyswitch on the panel.
Explains the function of zone status, panel/system LEDs, and visible/audible indicators.
Describes automatic panel actions upon detecting a fire alarm condition.
Explains the panel's behavior and user actions during a fire alarm with a delay.
Details automatic panel actions and operator responses for a pre-alarm condition.
Describes automatic panel actions and operator responses when a fault occurs.
Explains panel behavior and indicators during a power supply failure.
Describes panel operation and display for a plant alarm condition.
Explains messages related to the status of the Fault Output relay circuit.
Overview of operator actions, required access levels, and panel controls.
Details the LCD display features and normal status messages.
Explains the function and conditions for the panel's internal buzzer.
Explains the use of Level 2 and Level 3 access codes for panel operation.
Describes the function of the keyswitch for enabling Level 2 access.
Details the operation of the MUTE BUZZER pushbutton.
Explains the function of the EXTEND DELAY pushbutton.
Explains the function of the END DELAY/EVACUATE pushbutton.
Details the operation of the SILENCE/RESOUND pushbutton for alarms.
Explains how to use the RESET pushbutton to clear conditions.
Describes the function of the numeric keys at different access levels.
Explains the use of the '<4' button for cancellation.
Explains the use of the menu button to access Level 2 options.
Provides a map of the available Level 2 user option menus.
Introduces the tests available at Access Level 2.
Details how to test the panel LEDs using the Test menu.
Details how to test the LCD display using the Test menu.
Explains how to perform a walk test on individual zones.
Details how to manually run the automatic device testing function.
Explains how to test internal and SLC loop outputs.
Allows users to disable/enable system parts like zones and outputs.
Details how to disable/enable specific zones or devices within zones.
Allows disabling/enabling of sounders, extinguishant systems, and relays.
Explains how to activate/deactivate Day Mode delays.
Allows cancellation or initiation of panel delay functions.
Allows the user to enter or edit the system time and date.
Details how to enter or edit the current time on the panel.
Details how to enter or edit the current date on the panel.
Allows viewing of system parameters like log, devices, faults, etc.
Details how to view all logged events on the panel.
Explains how to view information about devices on the loop.
Details how to view active faults on the system.
Explains how to view active input events or plant alarms.
Details how to view current loop-based input disablements.
Explains how to view the number of times the panel entered alarm.
Details how to view voltages of various system parts.
Explains how to view system and loop part numbers and revision levels.
Information on system configuration for engineers.
Details how to print event logs and disablements.
Details daily, weekly, quarterly, and annual testing recommendations.
Guidance on battery replacement frequency and disposal.
Instructions for cleaning the panel case safely.
| Mounting | Wall Mount |
|---|---|
| Humidity | 10% to 93% non-condensing |
| Output | Relay outputs |
| Operating Voltage | 24 VDC |
| Operating Temperature Range | 32°F to 120°F (0°C to 49°C) |
| Material | Metal |
| Type | Intelligent Addressable Fire Alarm Control Panel |