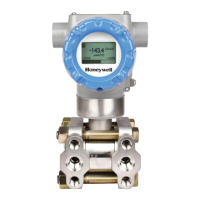
SmartLine Pressure Transmitter
16 Quick Start Installation Guide December 2016
TRIM THE TRANSMITTER
Procedure to Trim the Transmitter
For a transmitter with a small differential pressure span, you must ensure that the
transmitter is vertical when mounting it. You do this by leveling the transmitter side-
to-side and front-to-back. See Figure 5 for suggestions on how to level the
transmitter using a spirit balance. You must also zero the transmitter by following
the steps in this table.
Attach the transmitter to the mounting bracket but do not
completely tighten the mounting bolts
Connect a tube between the input connections in the high
pressure (HP) and low pressure (LP) heads to eliminate the
effects of any surrounding air currents.
Connect 24Vdc power to the transmitter. For HART/DE connect
a digital voltmeter to monitor the PV output.
Use applicable communicator to establish communications with
the transmitter. For DE transmitter use SFC, SCT, or MCT. For
Hart, use MCT or other Hart Communicator with applicable
Honeywell DD's. For Fieldbus, use NI FBUS tools with
applicable Honeywell DD's.
While reading the transmitter’s output on a communication tool
or a voltmeter, position the transmitter so the output reading is
at or near zero, and then completely tighten the mounting bolts.
The Local Display or applicable communicator can be used to
perform the Zero Corrects. This corrects the transmitter for any
minor error that may occur after the mounting bolts are
tightened.
Remove the tube from between the input connections, the
power, and the digital voltmeter or communication tool.
 Loading...
