2-11
Installing the Switch
Installation Procedures
Wall or Under-Table Mounting
You can mount the 24-port and 48-port switches on a wall with either the front
or rear panel facing up.
WARNING For safe operation, do not install the switch with side ventilation or
fan ducts facing up or down.
Caution The switch should be mounted only to a wall or wood surface that is at least
1/2-inch (12.7 mm) plywood or its equivalent.
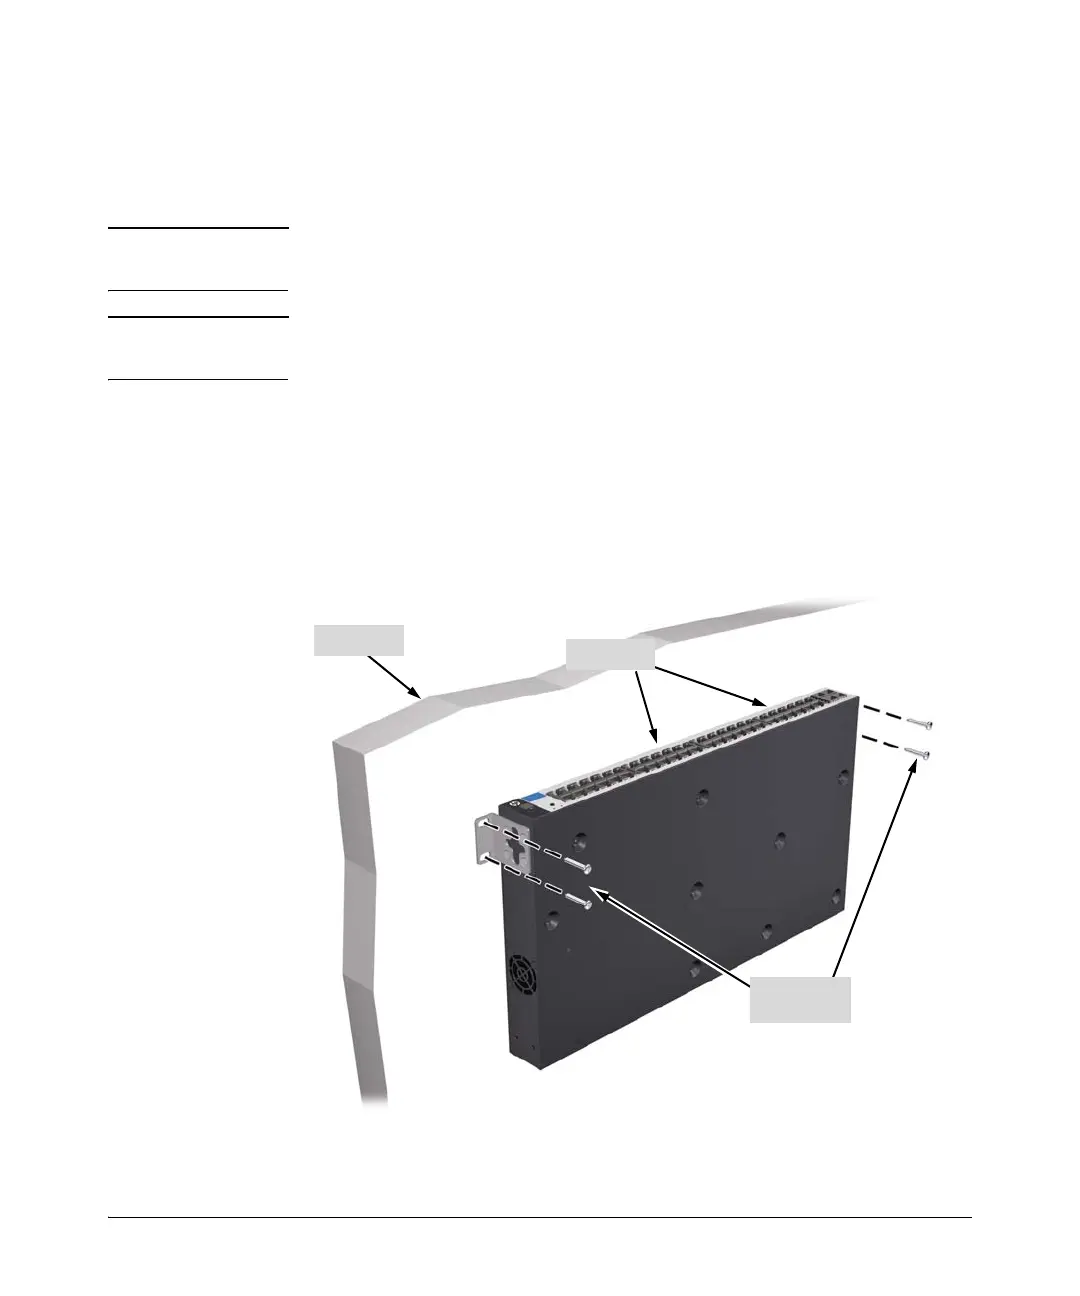
To mount the 24-port and 48-port switches, follow these steps:
1. Use a #1 Phillips (cross-head) screwdriver and attach the mounting
brackets to the switch with the included 8-mm M4 screws.
2. Attach the switch to the wall or wood surface with two 5/8-inch number
12 wood screws (not included).
Figure 2-5. Wall mounting of the switches
Wall
5/8-inch
wood screws
RJ-45 Ports

 Loading...