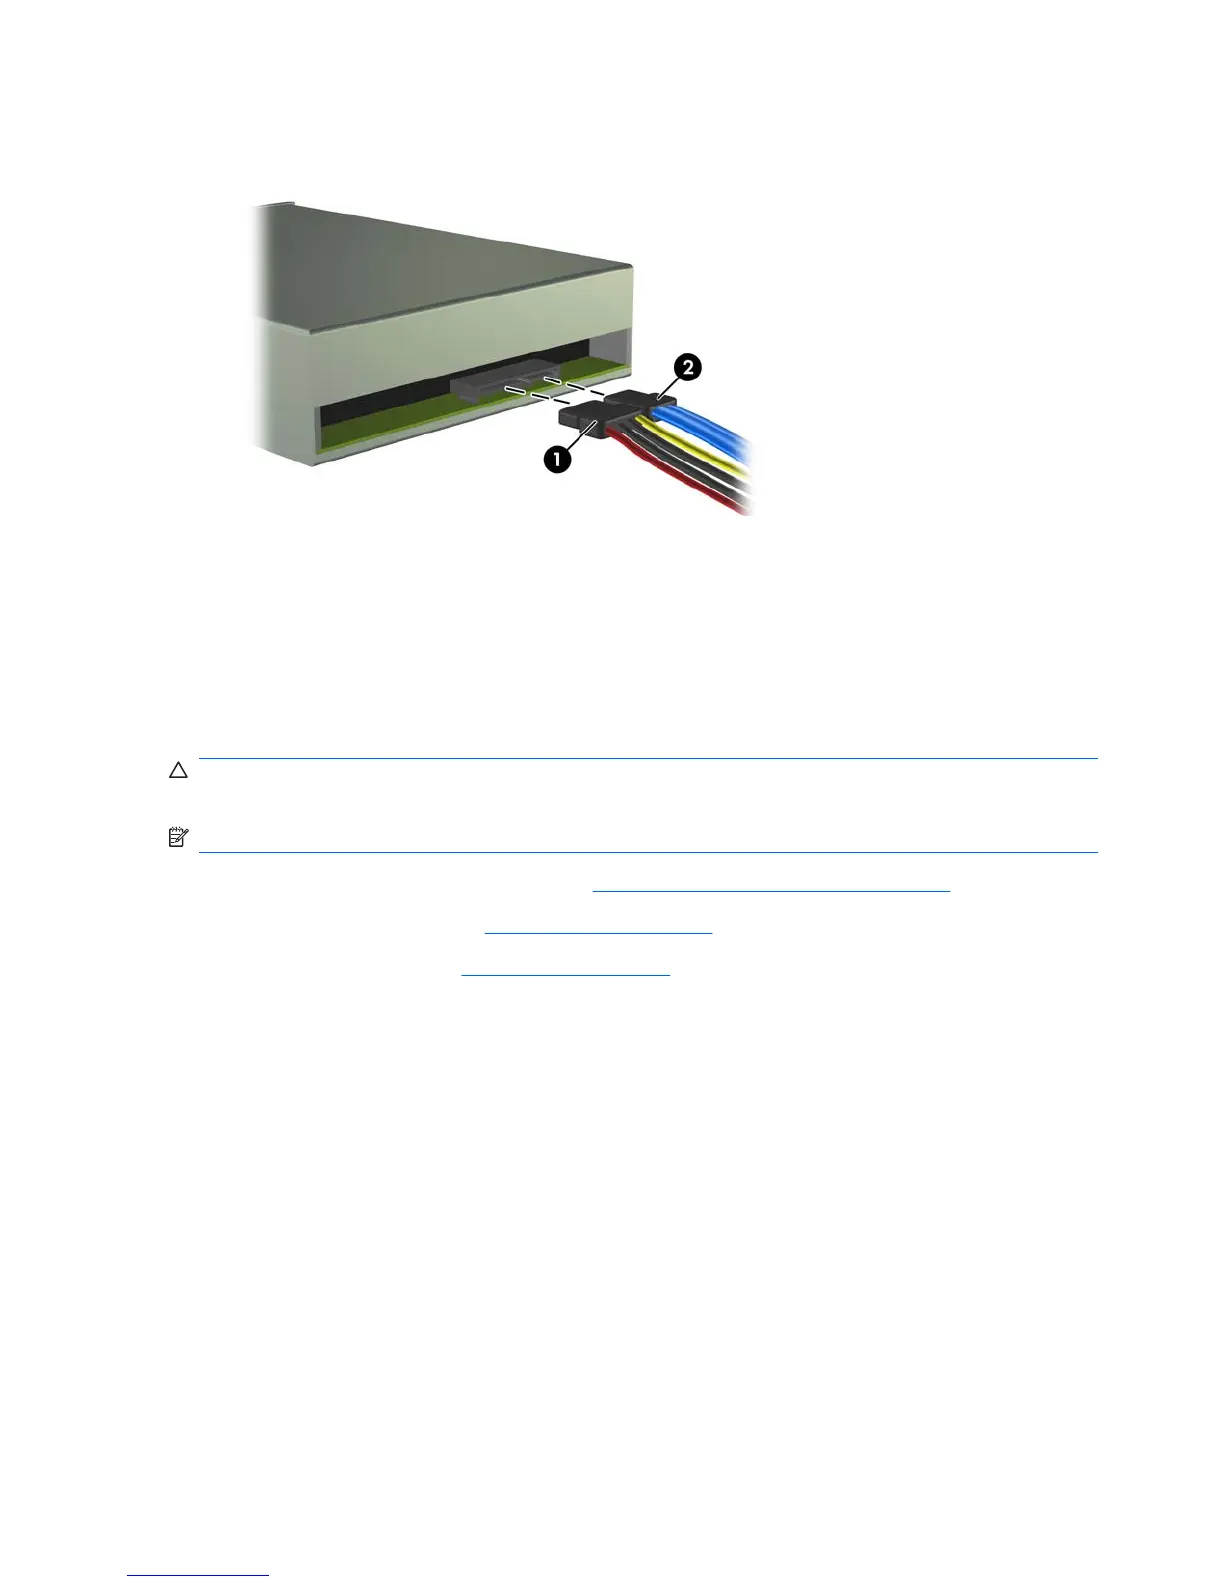
9. Connect the power cable (1) and data cable (2) to the rear of the optical drive.
Figure 7-20 Connecting the Power and Data Cables
10. Replace the front bezel and access panel.
11. Reconnect the power cord and turn on the computer.
12. Lock any security devices that were disengaged when the access panel was removed.
The system automatically recognizes the drive and reconfigures the computer.
Removing an External 3.5-inch Drive
CAUTION: All removable media should be taken out of a drive before removing the drive from the
computer.
NOTE: The 3.5-inch drive bay may contain a media card reader.
1. Prepare the computer for disassembly (Preparation for Disassembly on page 29).
2. Remove the access panel (
Access Panel on page 30).
3. Remove the front bezel (
Front Bezel on page 31).
48 Chapter 7 Removal and Replacement Procedures Microtower (MT) Chassis
 Loading...