EasyManuals Logo

HP Elite x2 1013 G3 User Manual

HP Elite x2 1013 G3
107 pages
To Next Page IconTo Next Page
To Previous Page IconTo Previous Page
Page #60 background imageLoading...
Page #60 background image
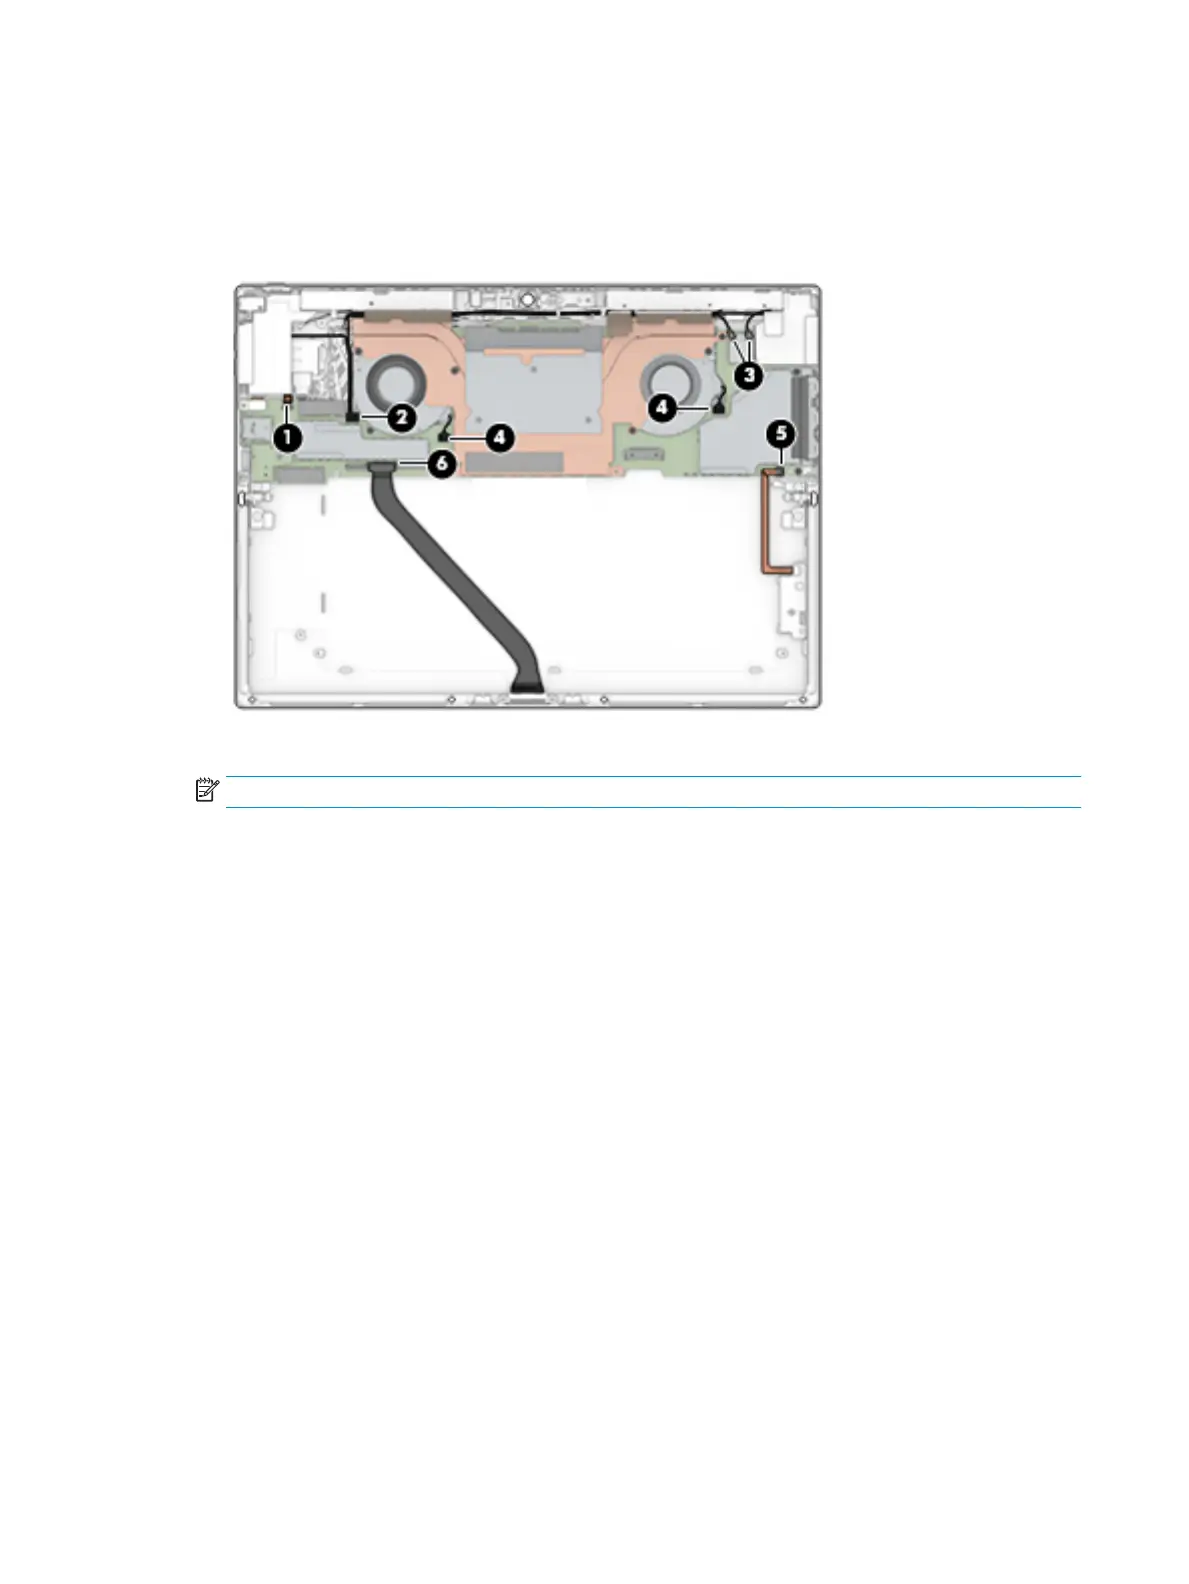
(3) WLAN antenna cables
(4) Fan cables
(5) Hall sensor board cable
(6) POGO cable
2. On models with a SIM card installed, remove the SIM tray (1).
NOTE: If a SIM blank is installed, it must be removed after the system board is removed.
3. Remove the Phillips M1.6×1.6 screw (2) that secures the volume cable, and then disconnect the cable
from the system board ZIF connector (3).
4. Loosen the three Phillips screws in the middle of the heat sink (4).
5. Remove the two Phillips M1.6×2.0 screws (5) from the USB bracket.
6. Remove the four Phillips M1.6×2.0 screws (6) from the top of the system board.
7. Remove the Phillips M1.6×3.0 screw (7) from the right fan.
52 Chapter 6 Removal and replacement procedures for Authorized Service Provider parts

Table of Contents

Questions and Answers:

Question and Answer IconNeed help?

Do you have a question about the HP Elite x2 1013 G3 and is the answer not in the manual?

HP Elite x2 1013 G3 Specifications

General IconGeneral
Display Size13 inches
Resolution3000 x 2000
Operating SystemWindows 10 Pro
Battery LifeUp to 10 hours
GraphicsIntel UHD Graphics 620
Front Camera5 MP
Rear Camera8 MP
CameraFront: 5 MP, Rear: 8 MP
ProcessorIntel Core i5 or i7
RAM8GB or 16GB
Storage256 GB / 512 GB / 1 TB SSD
Ports2 x USB-C, 1 x headphone/microphone combo
WirelessBluetooth 4.2
SecurityFingerprint reader, IR camera

Related product manuals