Display assembly
To remove and disassemble the display assembly, use these procedures and illustrations. Before removing the
display assembly, you can remove the system board, heat sink, and fans as an assembly so you do not have to
disturb the thermal material.
Full hinge-up displays are not available as spare parts. Spare parts for displays are available only at the
subcomponent level.
NOTE: You can remove the bezel, display panel, and camera module without removing the display
assembly from the computer. For more information, see Display subcomponents (without removing the
display) on page 43.
Before removing thedisplay panel, follow these steps:
1. Prepare the computer for disassembly (see Preparation for disassembly on page 36).
2. Remove the bottom cover (see Bottom cover on page 36).
3. Disconnect the battery cable from the system board (see Battery on page 37).
4. Remove the system board, heat sink, and fan assembly (see System board, heat sink, fan combination on
page 48).
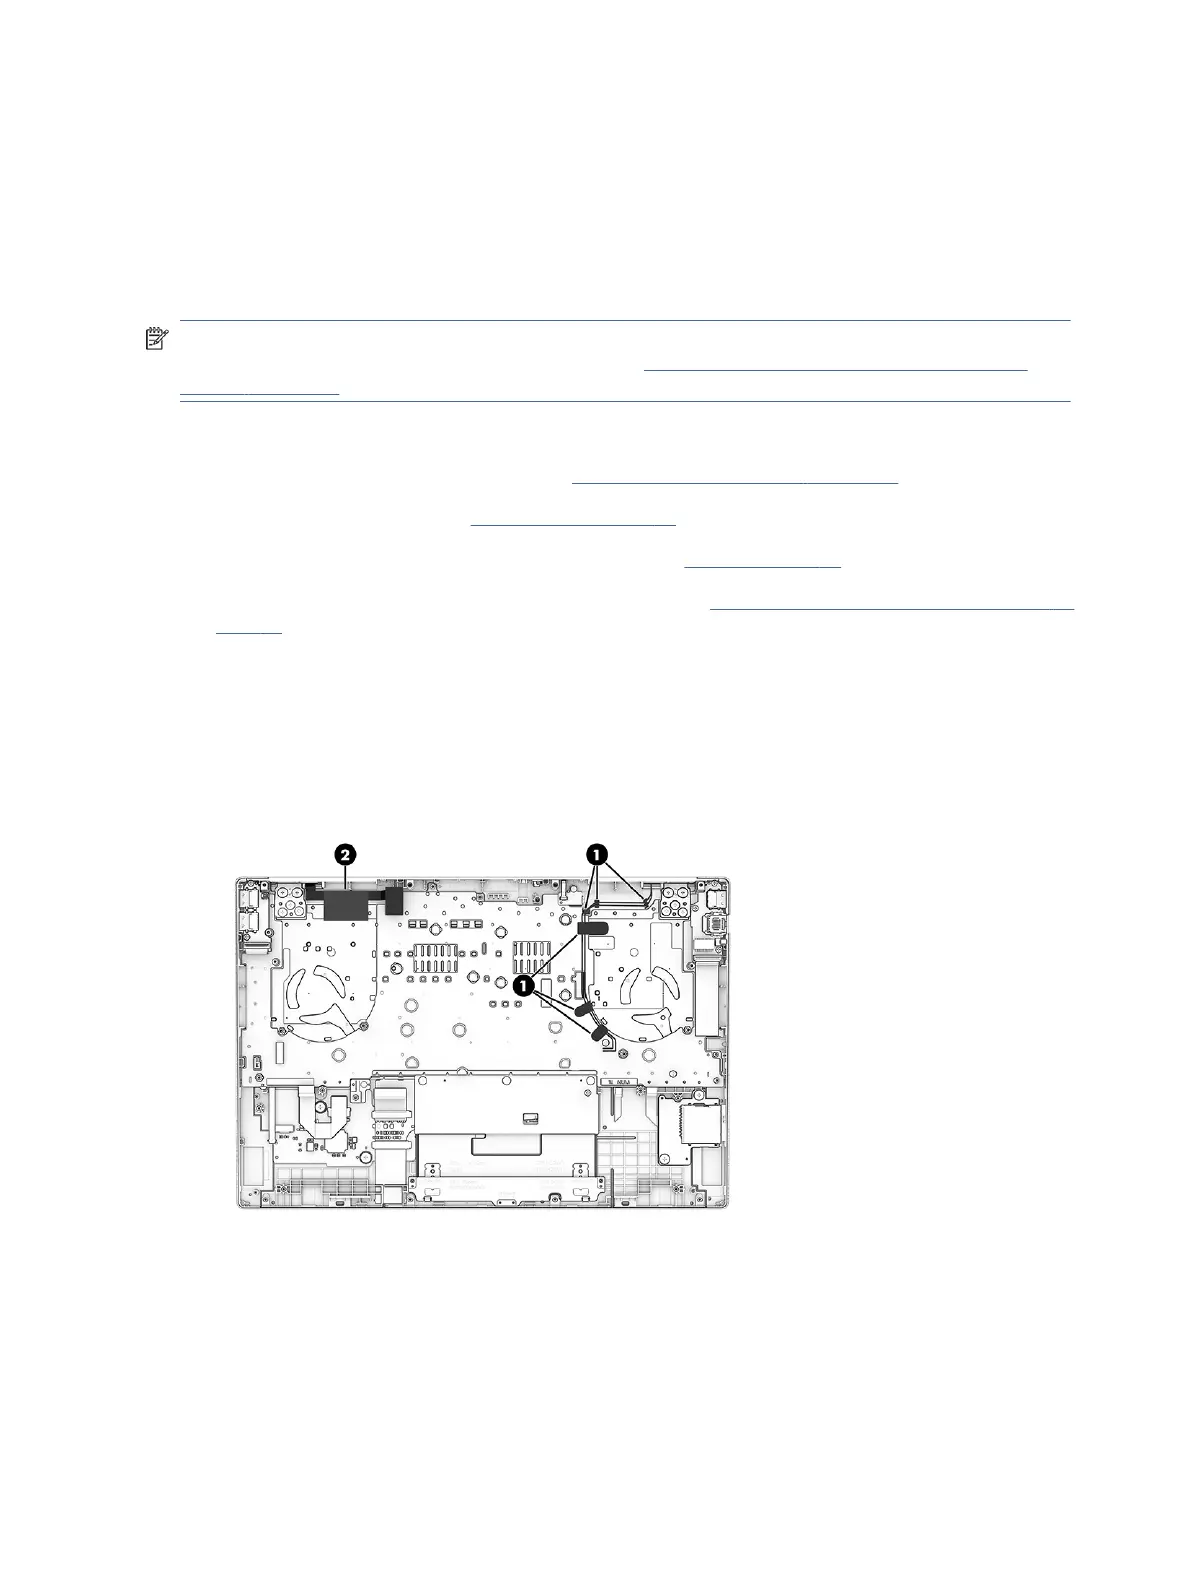
Remove the display assembly:
1. Disconnect the wireless antenna cables from the WLAN module and remove the cables from the tabs,
clips, and guides on the computer (1).
2. Disconnect the display cable from the system board ZIF connector and remove the tape that secures the
cable to the computer (2).
3. Remove the four Phillips M2.0 × 3.0 screws (1) and the six Phillips M2.5 × 3.5 screws (2) that secure the
display assembly to the computer.
4. Open the display to an approximate 45° angle (3).
56
Chapter 6Removal and replacement procedures for authorized service provider parts
 Loading...