2-12 Removal and Replacement HP Omnibook XE3 (Technology Codes GE and GD)
Removing the Keyboard
(HP Authorized Service Providers Only)
Required Equipment
•
#0 Phillips screwdriver.
•
Small flat-head screwdriver.
Removal Procedure
1.
Unplug the AC adapter, if present, and remove the battery.
2.
Remove the keyboard cover (page 2-10).
3.
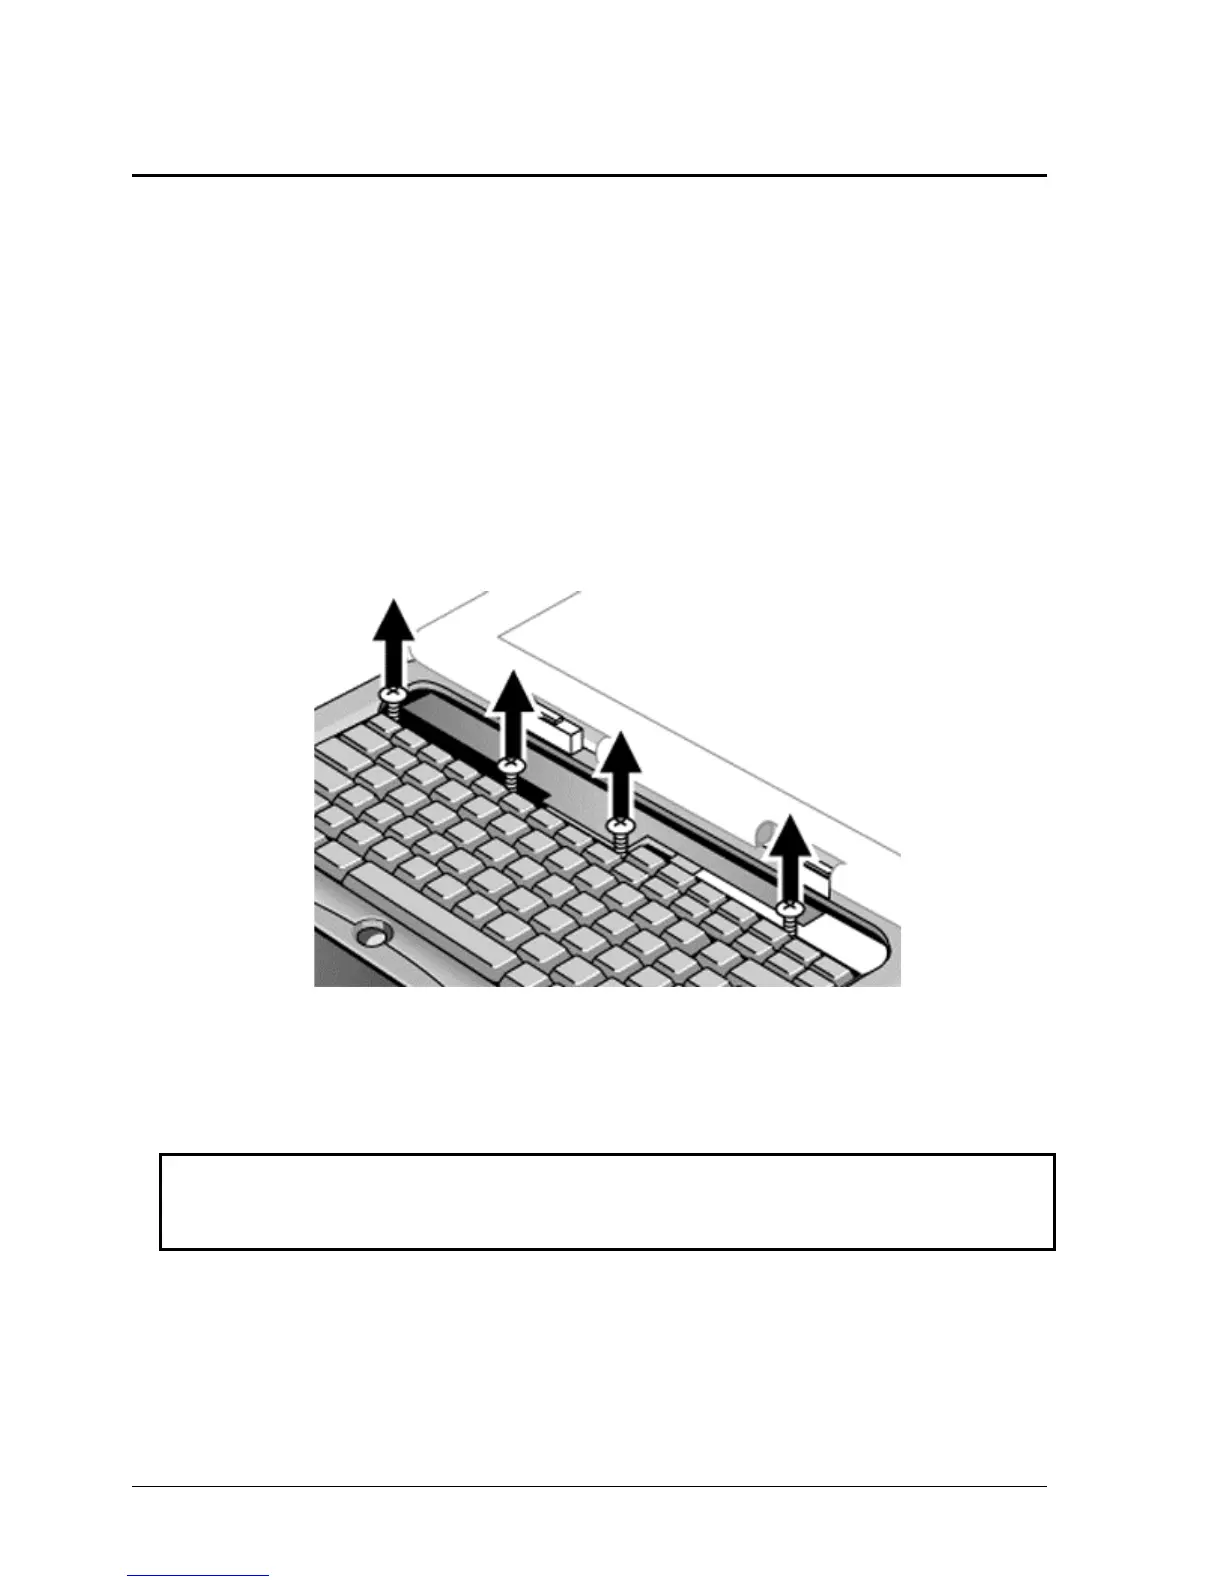
Loosen the four retaining screws along the top of the keyboard (the keyboard retains the screws).
Figure 2-8. Loosening the Keyboard Retaining Screws
4.
Raise the top of the keyboard, then lift the keyboard up and out of the notebook. Be careful not to
pull on the ribbon cable connecting the keyboard to the notebook.
Caution
Be careful not to touch the heatsink until it has cooled. It could be hot if the notebook was running
recently.
5.
Lay the keyboard face down on the top case, forward of its normal position, and disconnect the
ribbon cable from the motherboard.

 Loading...


