HP Omnibook XE3 (Technology Codes GE and GD) Removal and Replacement 2-29
Removing the Heatsink Assembly (with Fan)
(HP Authorized Service Providers Only)
Required Equipment
•
#0 Phillips screwdriver.
Removal Procedure
1.
Unplug the AC adapter, if present, and remove the battery.
2.
Remove these additional assemblies:
•
Keyboard cover (page 2-10).
•
Keyboard (page 2-12).
•
Display assembly (page 2-18).
•
Top case (page 2-22).
•
Hinge saddle set (page 2-25).
3.
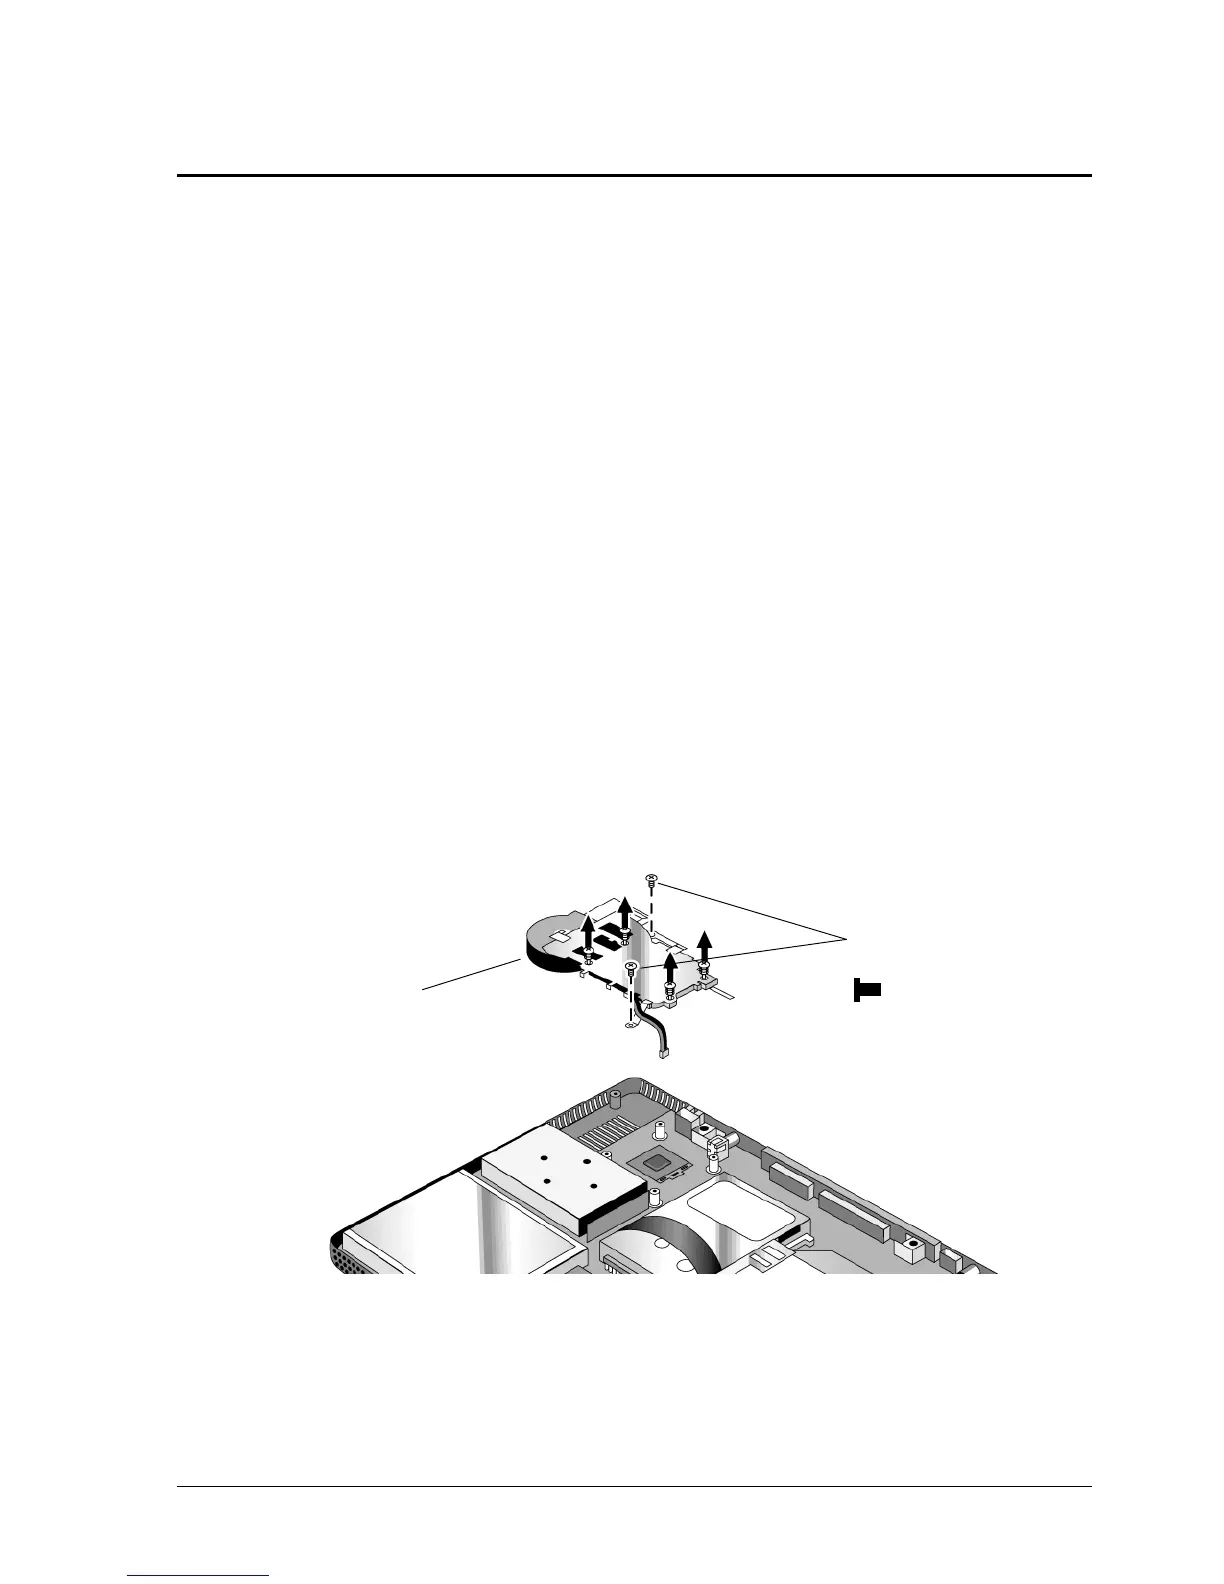
Disconnect the fan cable from the motherboard.
4.
Loosen the four retaining screws with springs attached to them (the heatsink retains these screws).
5.
Remove the two remaining screws.
6.
Lift the heatsink out of the notebook.
Figure 2-20. Removing the Heatsink Assembly
Reassembly Notes
•
Make sure the fan cable is not pinned under the assembly.
•
Make sure the thermal pad on the heatsink is not damaged, and replace if necessary.
Heatsink with screws
and springs
Screws,
M2.5x4 mm
2

 Loading...


