HP Omnibook XE3 (Technology Codes GE and GD) Removal and Replacement 2-31
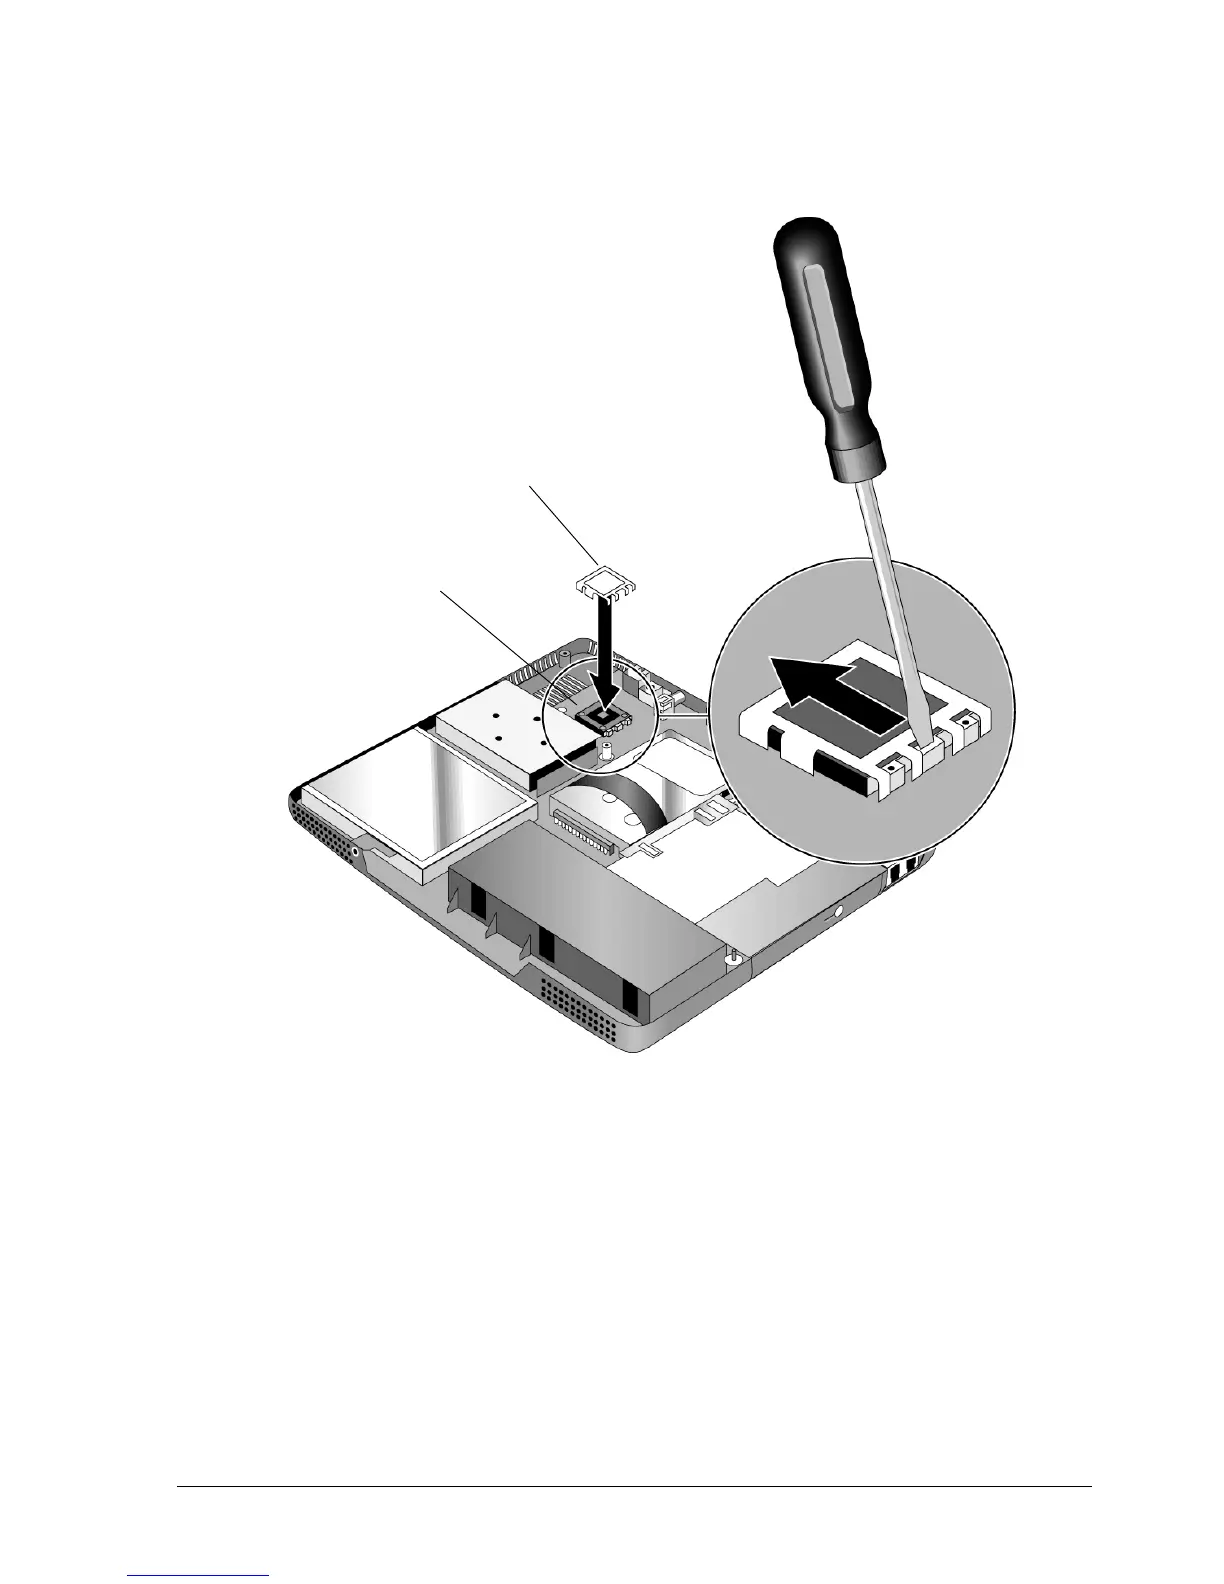
Figure 2-21. Removing the CPU Module
Reassembly Notes
•
Two of the CPU module’s corners have no pins, and two corners of the CPU socket have no holes.
Align the module for reinstallation accordingly.
•
Make sure none of the module’s pins are bent or otherwise damaged.
•
Make sure the round pads on top of the CPU module are intact, and replace if needed.
•
Insert the tip of a flat-blade screwdriver into the notch marked LOCK on the CPU mount bracket,
and tilt the screwdriver toward the CPU. Make sure the screwdriver applies pressure to the CPU
removal tool, and not to the CPU itself.
CPU module
CPU remove/install tool