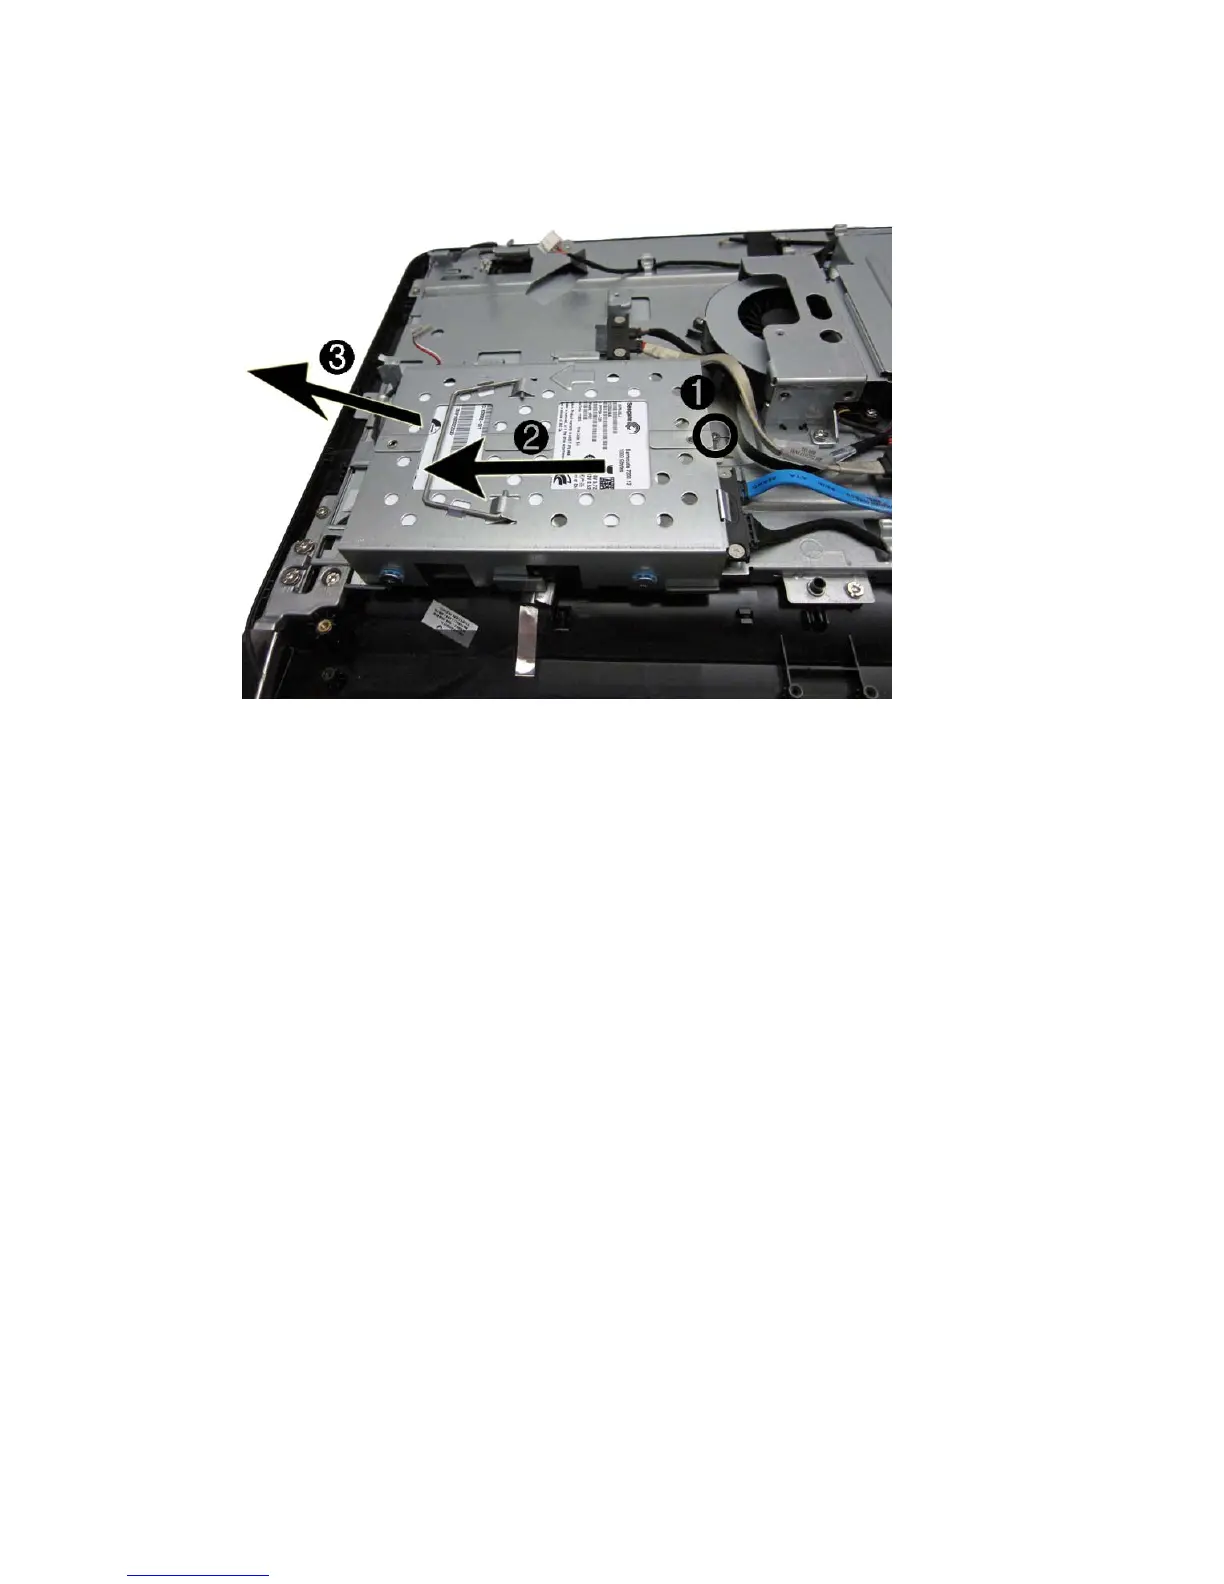
4. Grasp the handle on top of the hard drive cage and slide the cage toward the outer edge of the
computer (2), then lift the cage out of the computer (3).
Figure 7-17 Removing the hard drive cage
5. Remove the four mounting Phillips screws (1) that secure the drive to the cage. Do not remove
the blue rubber grommets behind each screw. They must stay attached to the cage when
installing a new hard drive.
50 Chapter 7 Removal and Replacement Procedures All-in One (AIO) Chassis