EasyManuals Logo

HP ProDesk 400 G5 Desktop Mini User Manual

HP ProDesk 400 G5 Desktop Mini
113 pages
To Next Page IconTo Next Page
To Previous Page IconTo Previous Page
Page #29 background imageLoading...
Page #29 background image
Hard drive connector
The hard drive connector is installed in the hard drive cage and connects to the system board.
1. Prepare the computer for disassembly (Preparation for disassembly on page 15).
2. Remove the access panel (Access panel on page 16).
3. Remove the hard drive (Hard drive on page 20).
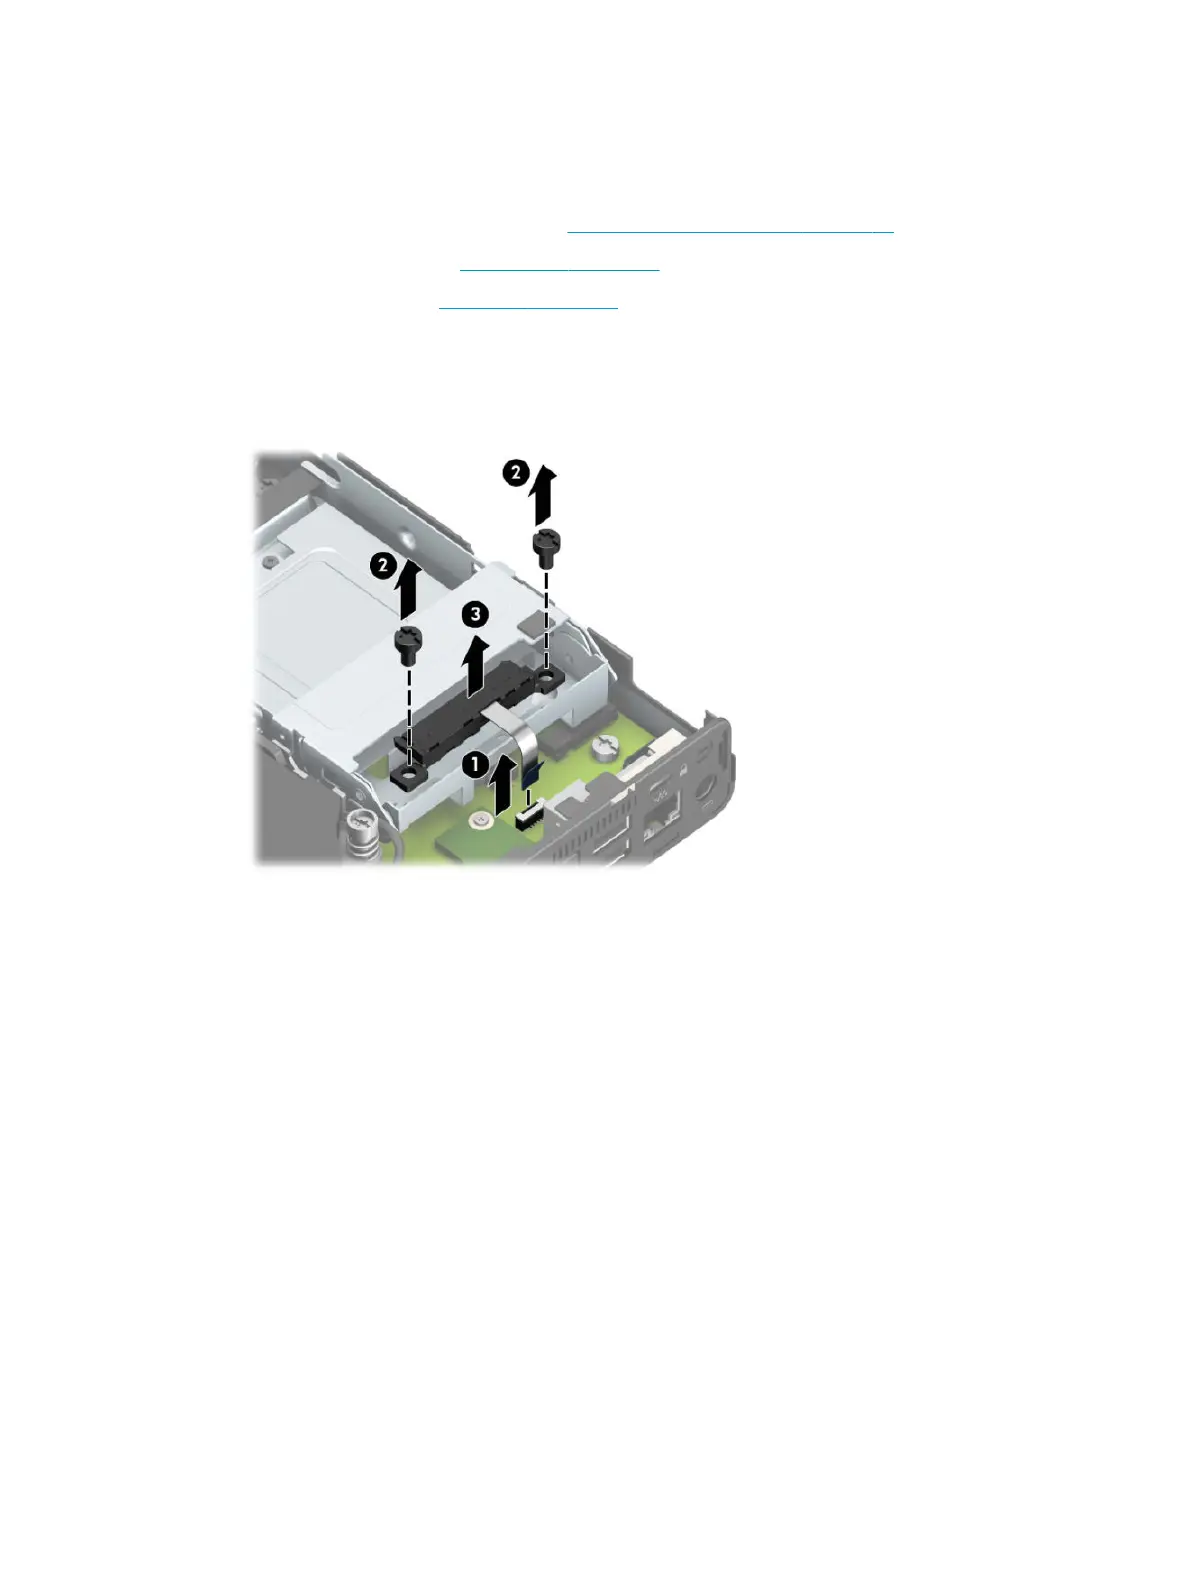
4. Disconnect the cable from the system board (1).
5. Remove the two Torx T15 screws that secure the connector to the drive cage (2).
6. Lift the hard drive connector out of the computer (3).
To install the hard drive connector, reverse the removal procedure.
Hard drive connector 21

Table of Contents

Questions and Answers:

Question and Answer IconNeed help?

Do you have a question about the HP ProDesk 400 G5 Desktop Mini and is the answer not in the manual?

HP ProDesk 400 G5 Desktop Mini Specifications

General IconGeneral
ChipsetIntel Q370
MemoryUp to 32 GB DDR4-2666 SDRAM
Operating SystemWindows 10 Pro
Power Supply65 W external power adapter
ProcessorCore™ i3, Core™ i5, Core™ i7 (8th Gen)
StorageUp to 2 TB HDD
GraphicsIntel UHD Graphics 630
Form FactorDesktop Mini
Ports (Front)1x headphone/microphone combo; 2x USB 3.1 Gen 1
Ports (Rear)2x USB 2.0; 2x USB 3.1 Gen 1
Dimensions177 x 175 x 34 mm
Weight1.26 kg
NetworkGigabit Ethernet
WirelessBluetooth 5.0

Related product manuals