System board
NOTE: All system board spare part kits include replacement thermal material.
NOTE: System board appearance may vary.
1. Prepare the computer for disassembly (Preparation for disassembly on page 15).
2. Remove the access panel (Access panel on page 16).
3. In models with a hard drive, remove the hard drive (Hard drive on page 20) and drive cage Drive cage
on page 22.
4. Remove the fan (Fan on page 31).
5. Remove the heat sink (Heat sink on page 32).
6. When replacing the system board, make sure the following components are removed from the defective
system board and installed on the replacement system board (as applicable):
● Memory modules (Memory modules on page 28)
● M.2 solid-state drive (M.2 PCIe solid state drive (SSD) on page 23)
● Processor (Processor on page 34)
● WLAN module (WLAN module on page 24)
● Expansion connector board (Expansion connector board on page 27)
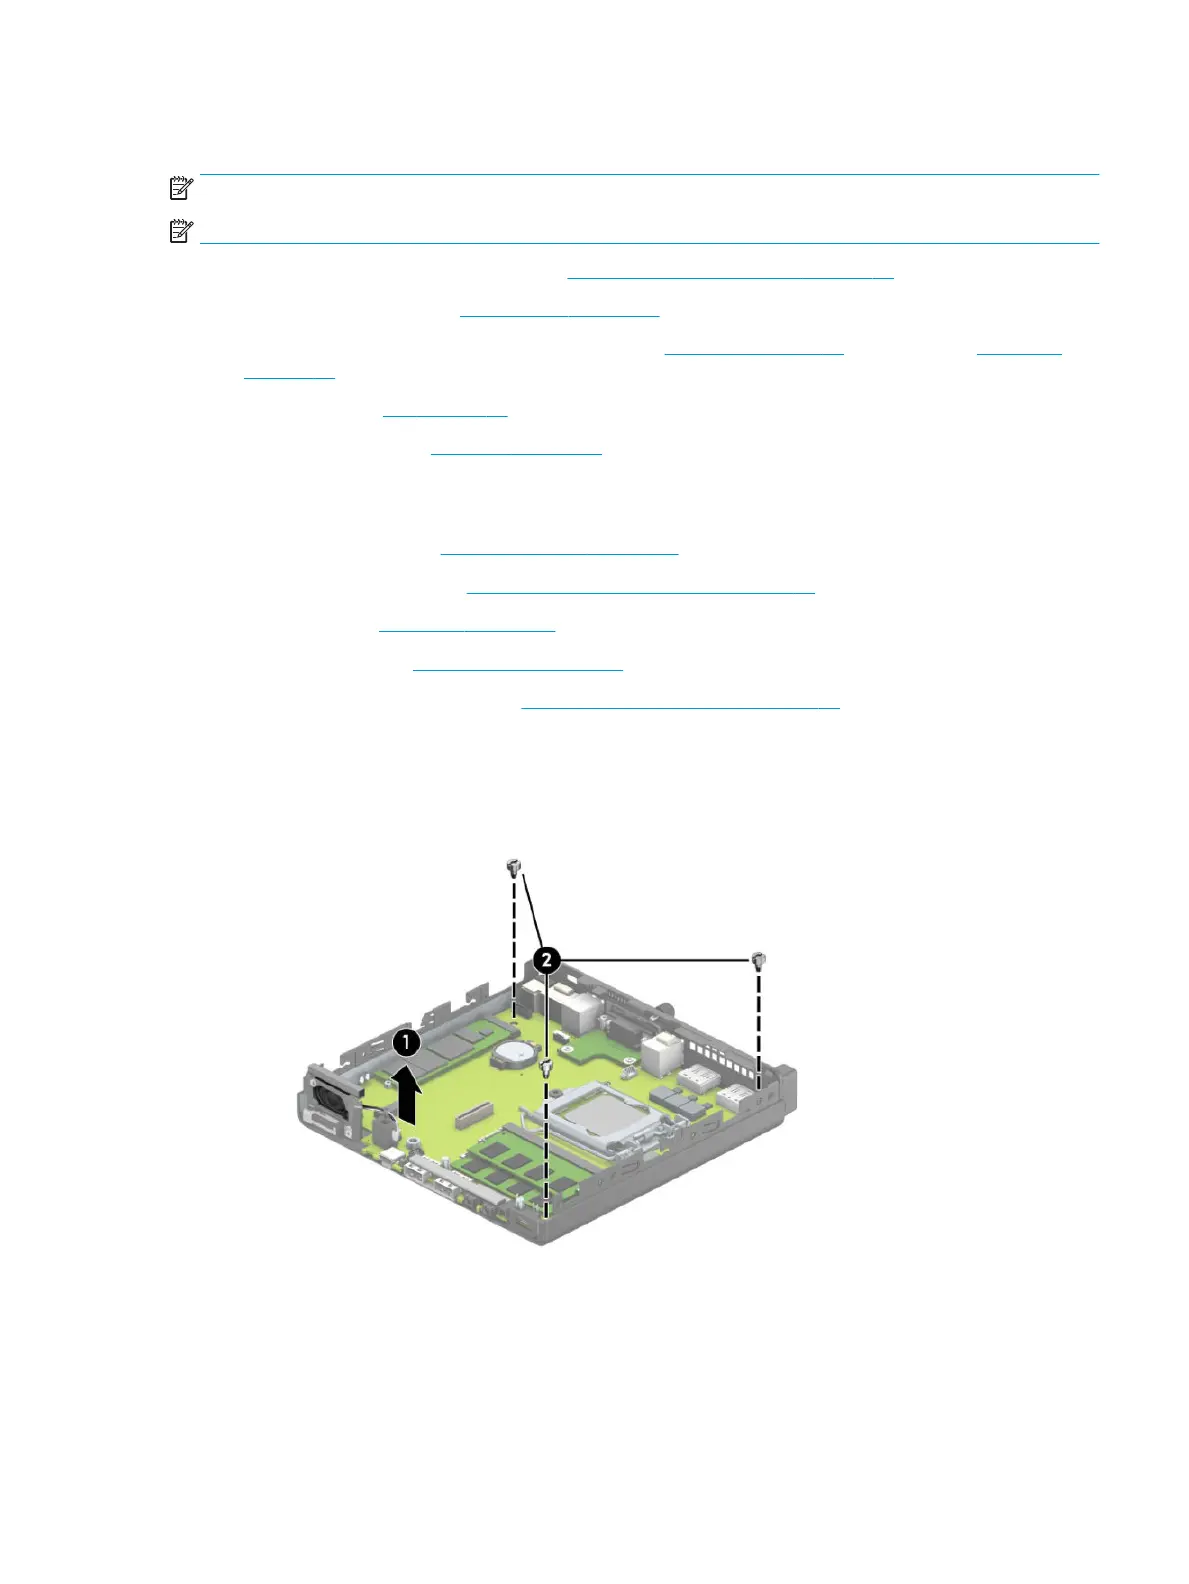
7. To remove the system board:
a. On models with a hard drive, disconnect the speaker cable from the system board (1), and then
remove the three Torx T15 screws (2) that secure the system board to the computer.
System board 35
 Loading...