Power supply
Follow these steps to remove the power supply:
1. Prepare the computer for disassembly (see Preparation for disassembly on page 20).
2. Remove the access panel (see Access panel on page 21).
3. Remove the drive cage (see Drive cage on page 36).
4. Position the computer with the rear panel toward you.
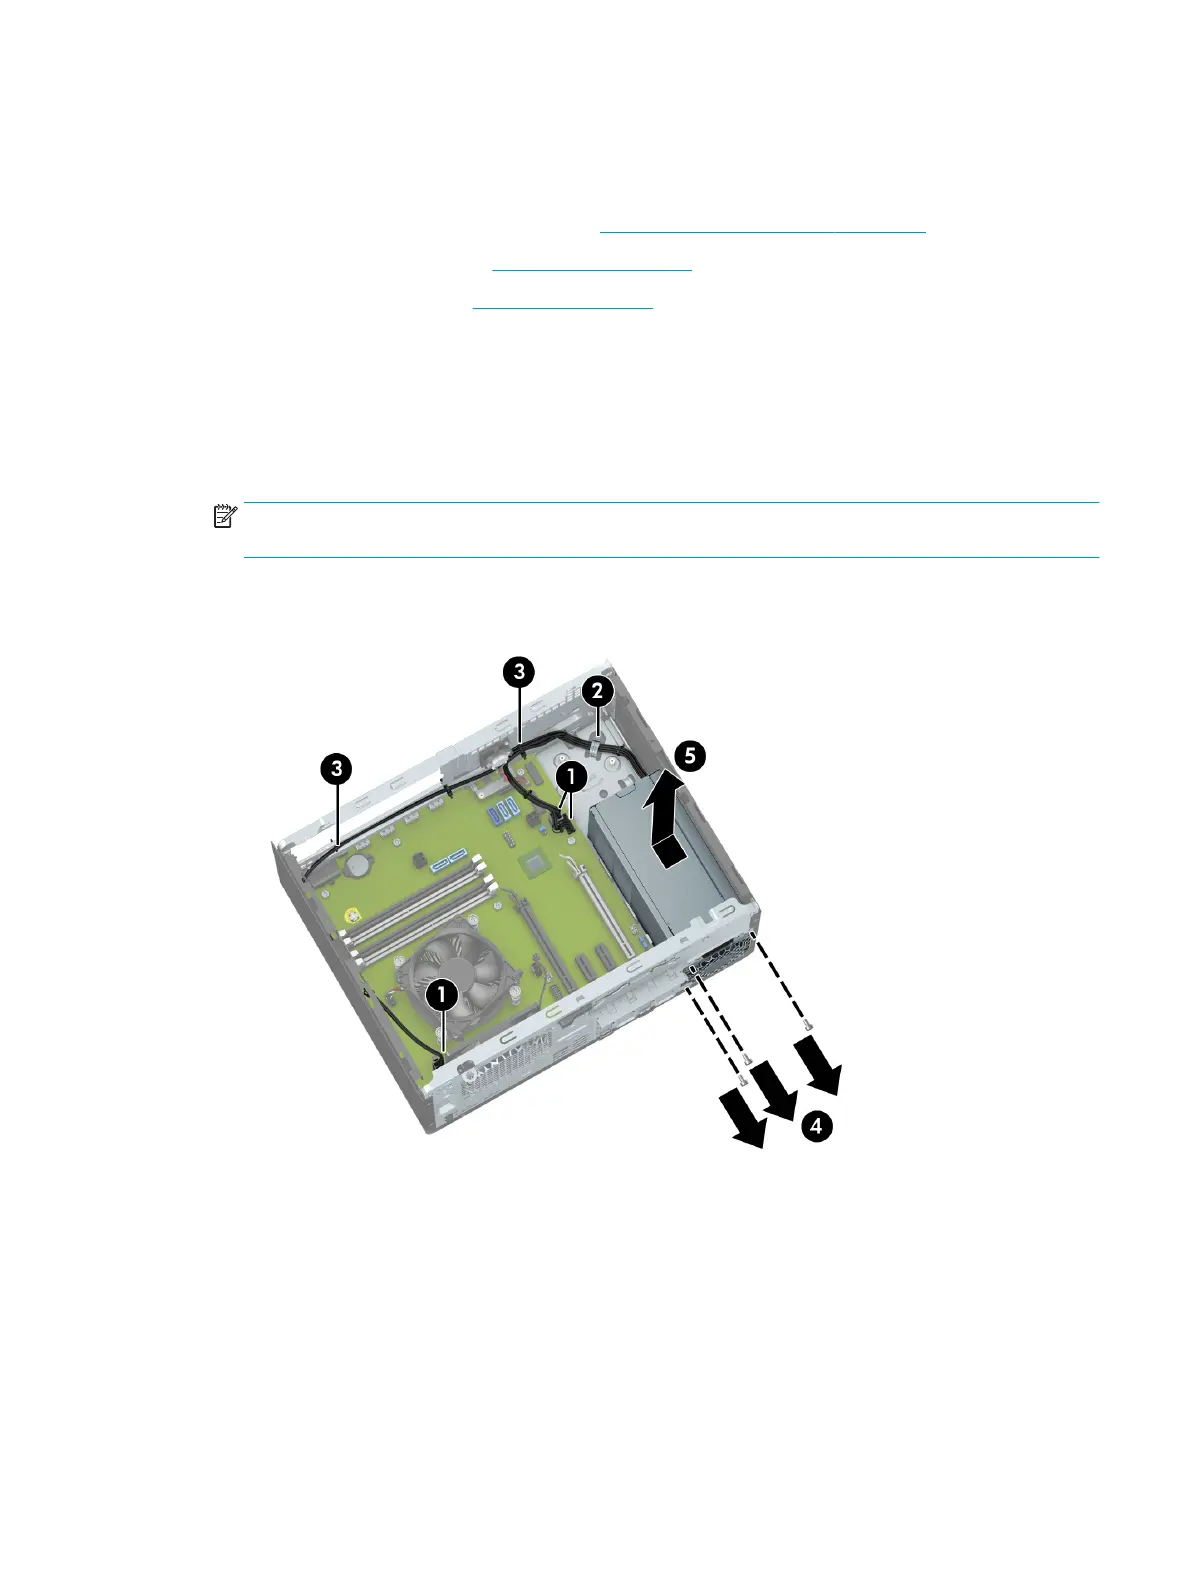
5. Disconnect the power supply cables (1) from the three power supply cable connectors on
the system board.
6. Release the power supply cable from the retention clip (2) built into the computer chassis.
7. Release the power supply cable from the two cable tie wraps (3).
NOTE: The cable tie wraps will be destroyed in this step. Replacement cable tie wraps are included in
the power supply spare part kit.
8. Remove the three Torx-15 M3.5×9.2 screws (4) that secure the power supply to the computer chassis.
9. Slide the power slide forward, and then lift and remove the power supply (5).
Reverse this procedure to install the power supply.
Power supply 41
 Loading...