Removal and replacement procedures 42
6.
Remove the heatsink ("Heatsink" on page 39).
CAUTION: To avoid damage to the processor, do not touch the bottom of the processor,
especially the contact area.
CAUTION: The pins on the processor socket are very fragile. Any damage to them may require
replacing the system board.
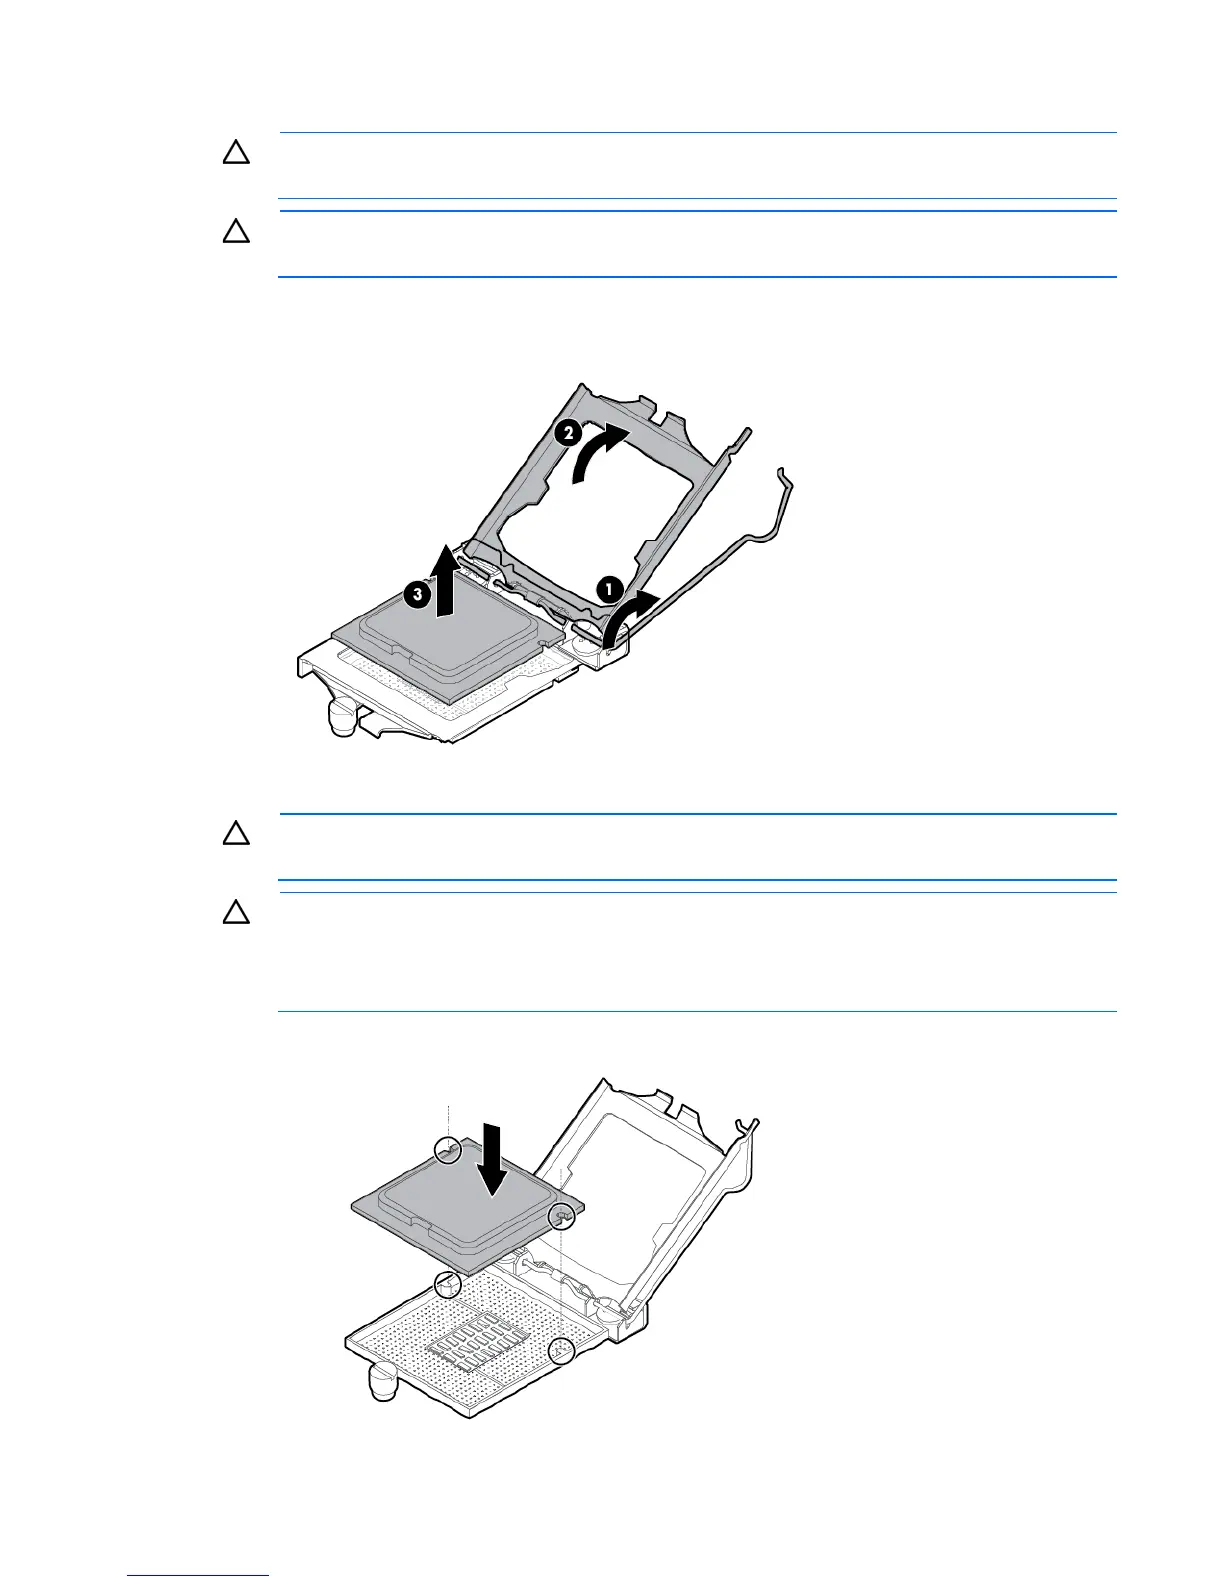
7. Open the processor locking lever, and then open the processor retaining bracket.
8. Grasp the processor by the edges, and then lift it out of the socket.
To replace the component:
CAUTION: Failure to completely open the processor locking lever prevents the processor from
seating during installation, leading to hardware damage.
CAUTION: THE PINS ON THE SYSTEM BOARD ARE VERY FRAGILE AND EASILY DAMAGED. To
avoid damage to the system board:
• Do not touch the processor socket contacts.
• Do not tilt or slide the processor when lowering the processor into the socket.
1. Install the processor. Use the notches on both sides of the processor to properly align it into the socket.
 Loading...