EasyManuals Logo

HP ProLiant ML310e Gen User Manual

HP ProLiant ML310e Gen
92 pages
To Next Page IconTo Next Page
To Previous Page IconTo Previous Page
Page #55 background imageLoading...
Page #55 background image
Removal and replacement procedures 55
c.
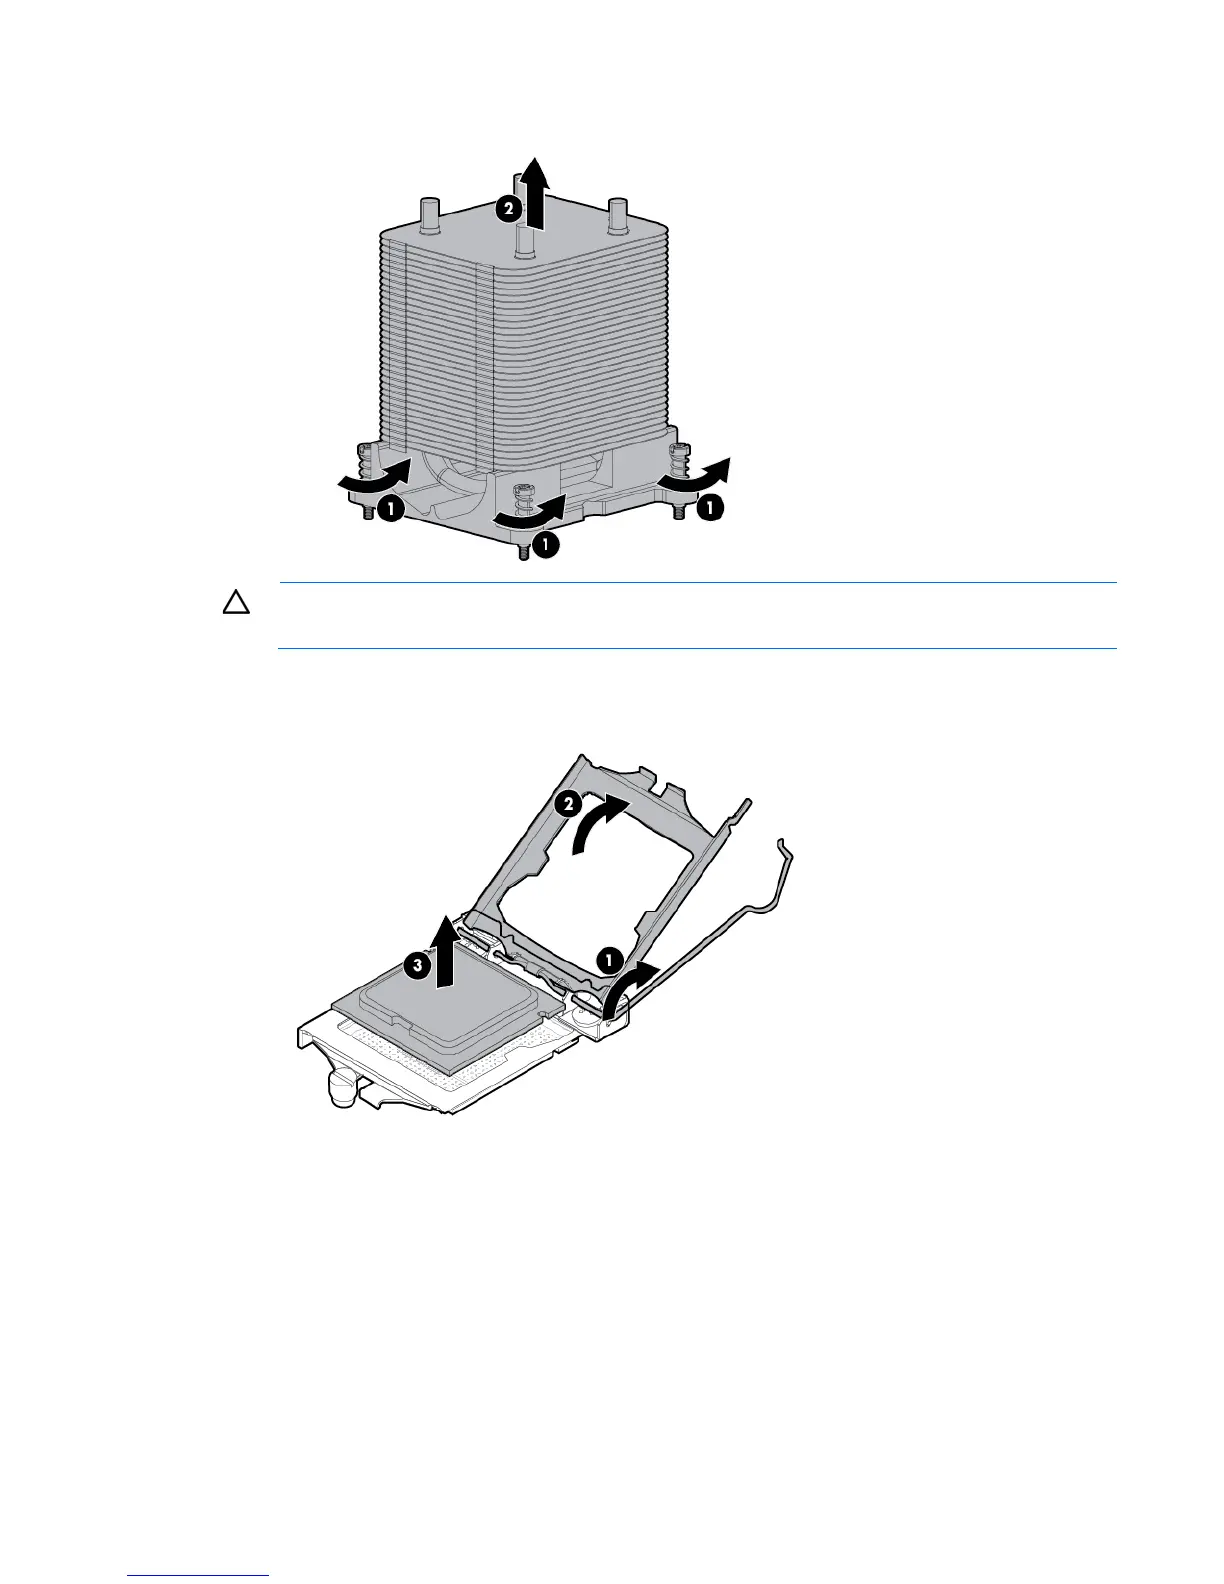
Remove the heatsink from the processor backplate.
CAUTION: To avoid damage to the processor, do not touch the bottom of the processor,
especially the contact area.
9. Open the processor locking lever, and then open the processor retaining bracket.
10. Grasp the processor by the edges, and then lift it out of the socket.
11. Remove all DIMMs ("Removing a DIMM" on page 38).
12. Remove all expansion boards ("Expansion board" on page 44).
13. If installed, remove the dedicated iLO module ("Dedicated iLO management port" on page 50).
14. Disconnect all cables connected to the system board.
15. Remove the system board:
a. Remove the system board screws.

Table of Contents

Questions and Answers:

Question and Answer IconNeed help?

Do you have a question about the HP ProLiant ML310e Gen and is the answer not in the manual?

HP ProLiant ML310e Gen Specifications

General IconGeneral
Product TypeServer
Form FactorTower
Processor Sockets1
Memory Slots4
RAID SupportHP Dynamic Smart Array B120i Controller
MemoryUp to 32GB
Network ControllerHP 1Gb 332i Ethernet Adapter 2 Ports per controller
Operating System SupportMicrosoft Windows Server Red Hat Enterprise Linux (RHEL) SUSE Linux Enterprise Server (SLES) VMware

Related product manuals