Removal and replacement procedures 50
c.
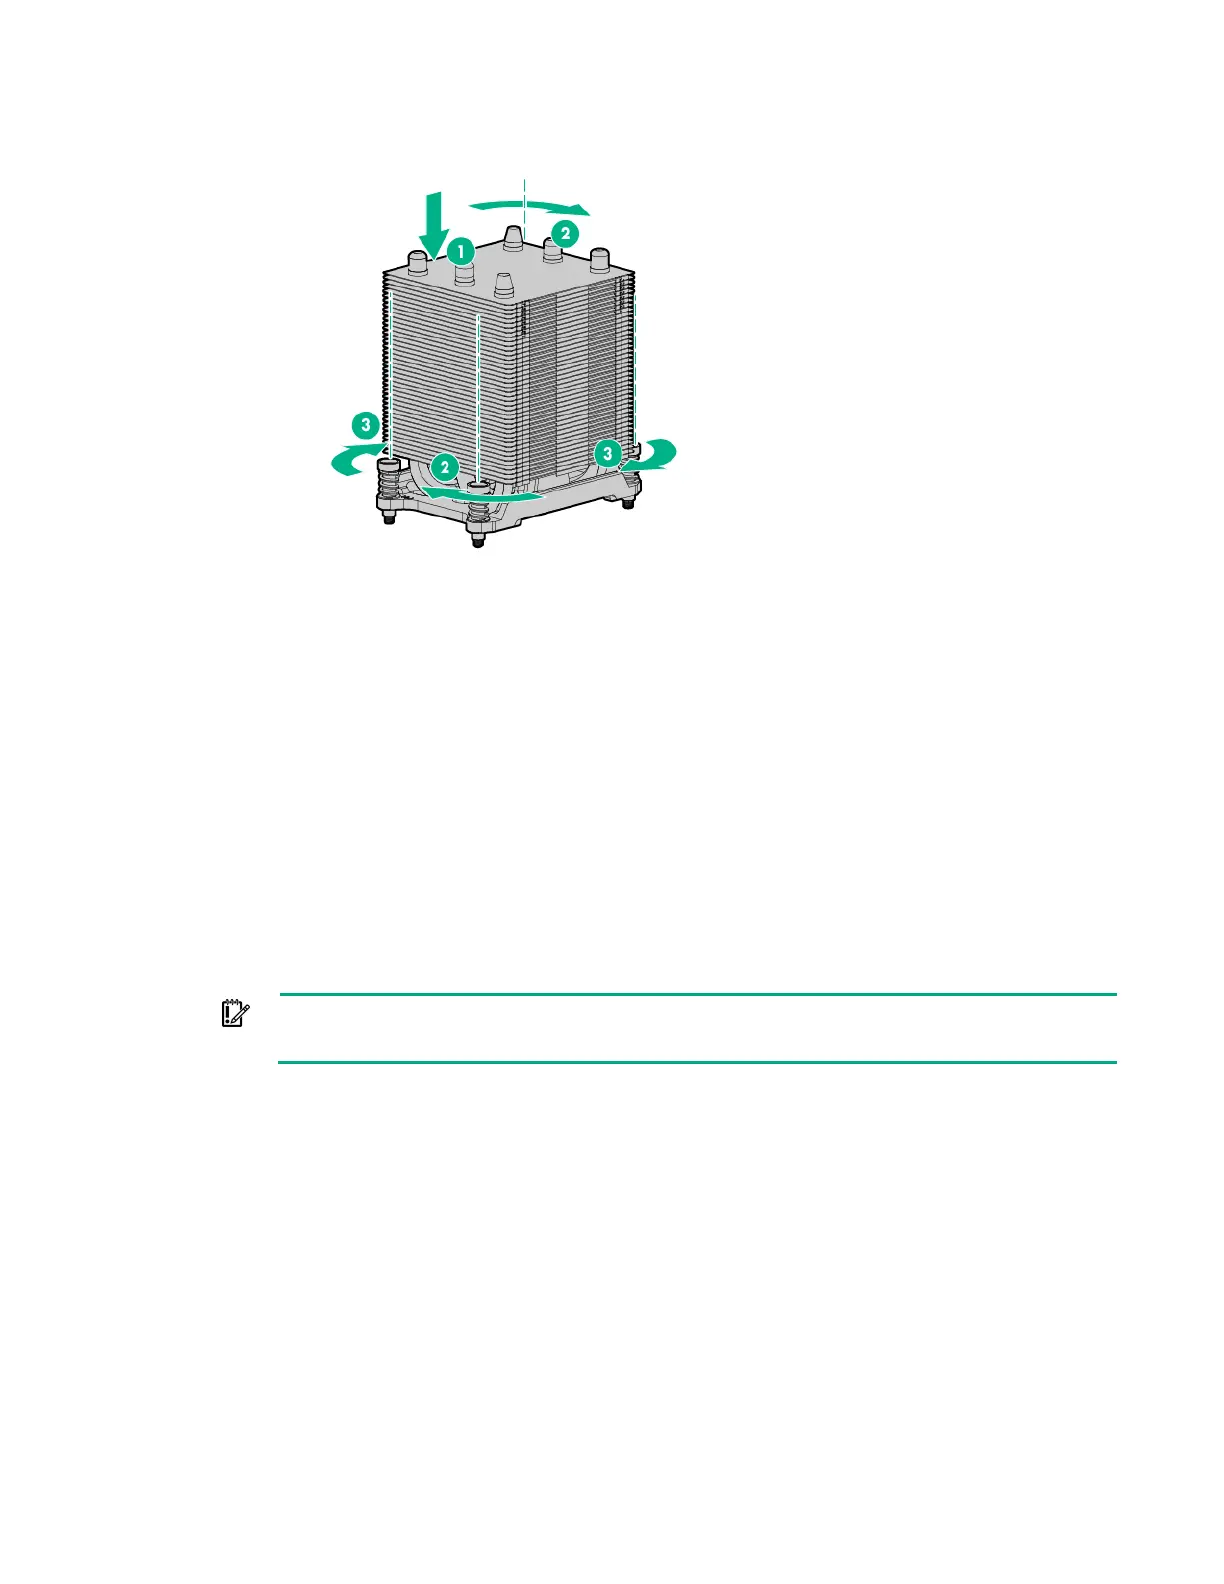
Finish the installation by completely tightening the screws in the same sequence.
7. Install the air baffle.
8. Install the access panel.
9. Do one of the following:
o If the server is in a tower configuration, return the server to an upright position.
o If the server is in a rack configuration, slide the server into the rack.
10. Connect each power cord to the server.
11. Connect each power cord to the power source.
12. Power up the server ("Powering up the server" on page 28).
13. Do one of the following:
o For tower models, install the tower bezel.
o For rack models, install the security bezel.
DIMMs
IMPORTANT: This server does not support mixing LRDIMMs and RDIMMs. Attempting to
mix any combination of these DIMMs can cause the server to halt during BIOS initialization.
To identify the DIMMs installed in the server, see "DIMM slots (on page 87)."
1. Do one of the following:
o For tower models, open and remove the tower bezel (on page 28).
o For rack models, if installed, remove the security bezel ("Remove the security bezel (optional)"
on page 28).
2. Power down the server (on page 29).
3. Remove all power:
a. Disconnect each power cord from the power source.
b. Disconnect each power cord from the server.
4. Do one of the following:
a. For tower models, place the server on a flat, level surface with the access panel facing up.
b. For rack models, extend the server from the rack (on page 29).

 Loading...