Removal and replacement procedures 51
5.
Remove the access panel ("Access panel" on page 33).
6. Remove the air baffle (on page 31).
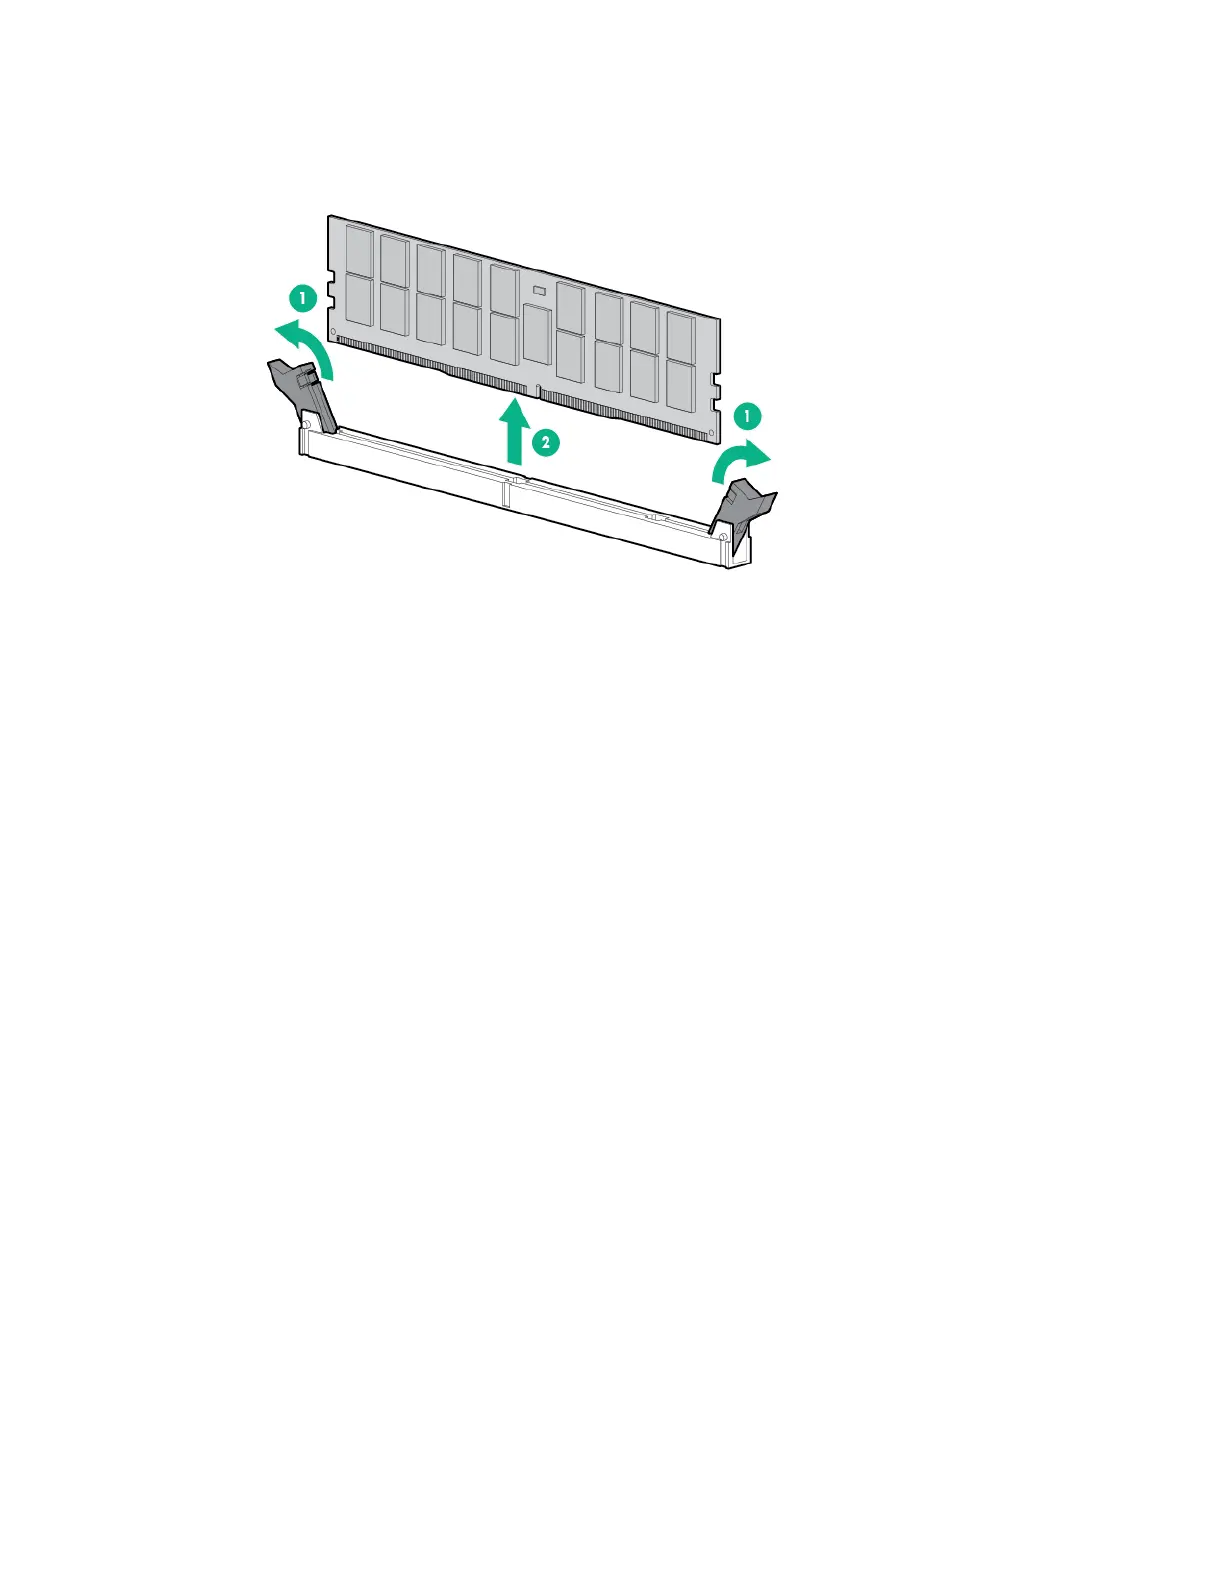
7. Remove the DIMM.
To replace the component, reverse the removal procedure.
For DIMM configuration information, see the server user guide.
System board
To remove the component:
1. Do one of the following:
o For tower models, open and remove the tower bezel ("Remove the tower bezel" on page 28).
o For rack models, if installed, remove the security bezel ("Remove the security bezel (optional)"
on page 28).
2. Power down the server (on page 29).
3. Remove all power:
a. Disconnect each power cord from the power source.
b. Disconnect each power cord from the server.
4. Do one of the following:
o For tower models, place the server on a flat, level surface with the access panel facing up.
o For rack models, extend the server from the rack (on page 29).
5. Remove the access panel ("Access panel" on page 33).
6. Remove the air baffle (on page 31).
7. Remove the fan cage (on page 31).
8. Remove all DIMMs ("DIMMs" on page 50).
9. Disconnect all cables connected to the system board.
10. Remove all components on the failed system board.
11. Remove the heatsink:
a. Loosen one pair of diagonally opposite screws halfway, and then loosen the other pair of screws.
b. Completely loosen all screws in the same sequence.

 Loading...