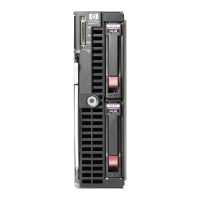
Chapter 2: Install the server components 12
• Each server is 2U. Ensure the rack has sufficient space for all systems.
• For full power redundancy across all servers, you need a rack with two power distribution units (PDU) feeding
separate outlet strips, with sufficient vacant outlets on each strip.
• Ensure the rack is installed and stabilized or bayed according to the manufacturer's instructions.
WARNING:
When servicing a server in a rack, extend only one server at a time to prevent the rack from tipping.
Rack installation guidelines
There are guidelines to help you successfully install each server in a rack.
• Follow all safety guidelines stated in the documentation that came with the rack, particularly when installing
components into the locations at the top of the rack.
• Ensure the rack meets the requirements.
• Install the servers in the same rack when possible.
• Install the servers in a rack starting from the bottom of the rack.
• Always install the servers in a horizontal position, or you void your warranty and support contract.
Install the server in a rack
Before you begin
• You have read the safety instructions in the Product Information Guide supplied with your server.
• You have read the Rack Installation Instructions, included in the rack mount kit in the shipping carton, for
installing the left and right rails in the rack. The rack mount kit instructions also explain how to stabilize the
rack, install devices, and configure power distribution.
Procedure overview
You install the rails and, optionally, the Cable Management Arm (CMA), which are included in the shipping carton
with installation instructions, at the lowest available U space in the rack. You then work up from the bottom of the
rack to add additional rails. With the rails installed, you can then mount each server into the rails.
Caution:
Two people are required to safely install the server hardware in a rack. The Rack Installation Instructions
included in the rack mount kit box contains important safety and procedural information.
Procedure
1. Install the left and right inner slide rails on the server:
a) Position the keyhole rail cutouts over the lugs on the server sides.
b) Slide the rails toward the rear of the server to lock them in place.
2. Install the slide mounting brackets into the rack: by
a) Align the front lugs in the appropriate rack location.
b) Slide the rear lugs into position from the rear of the rack.