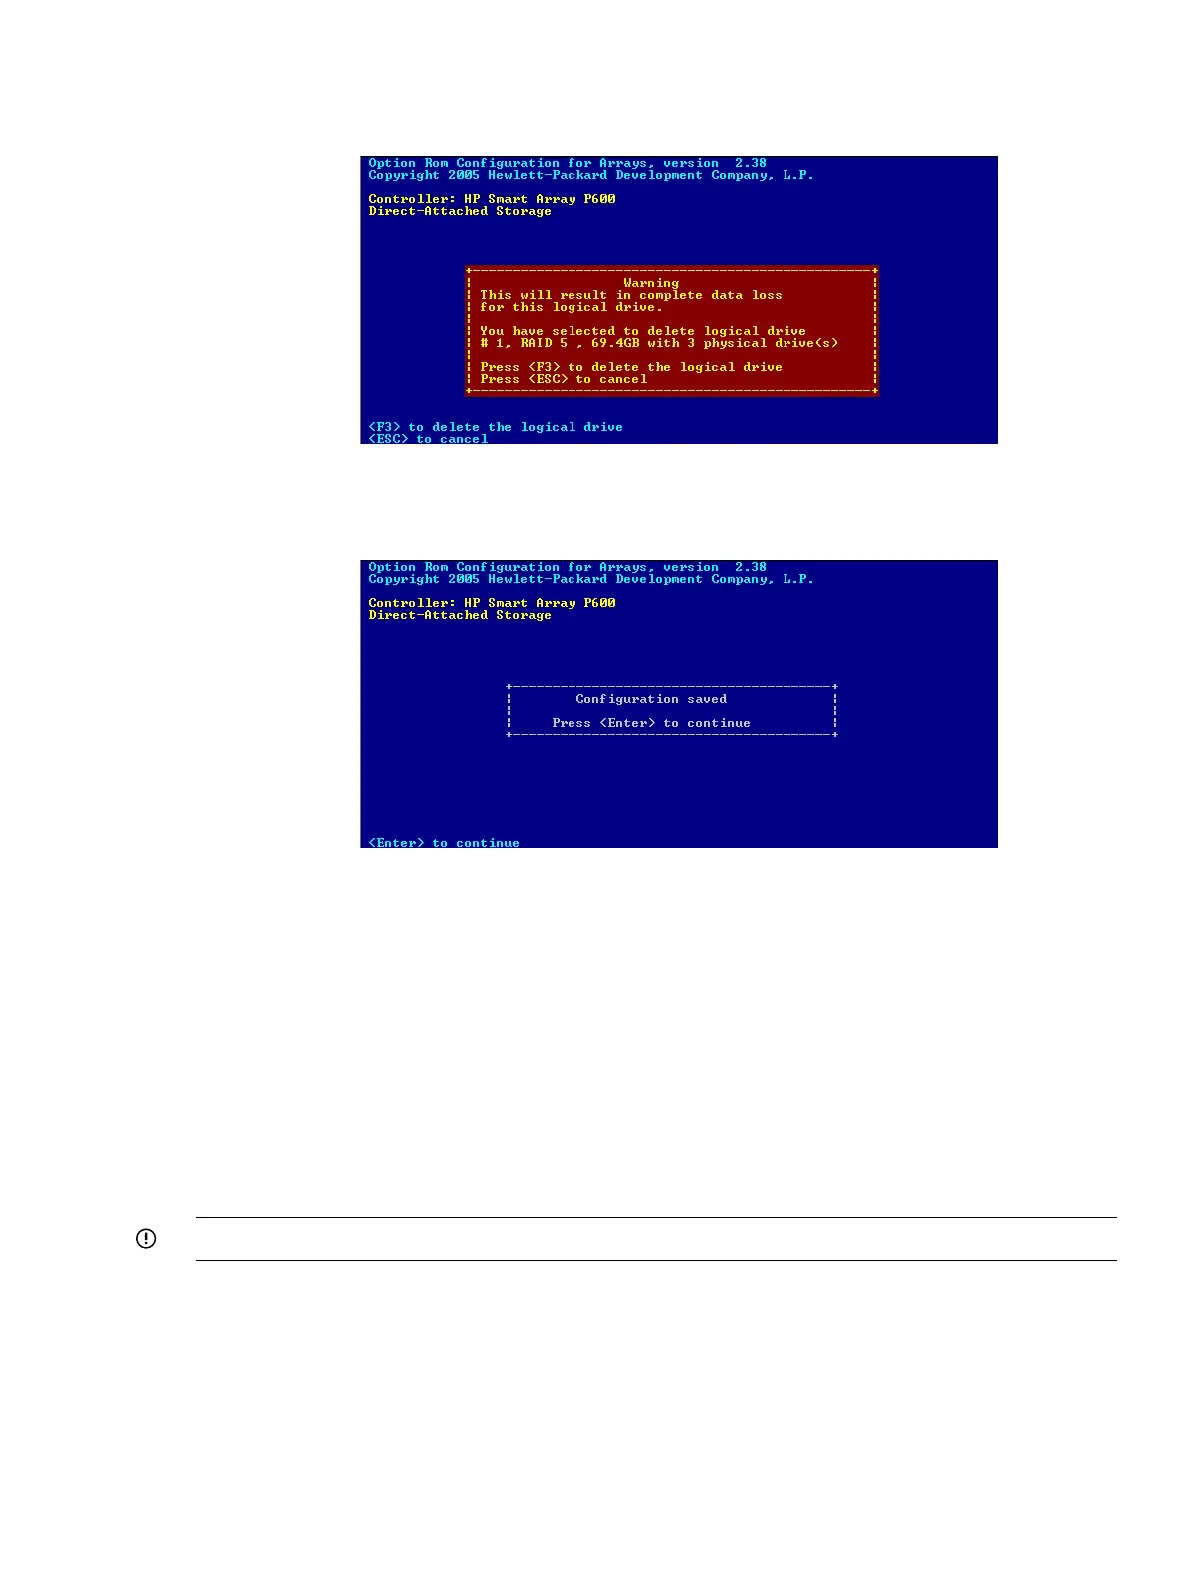
3. To delete the logical drive, press F8.
A warning and confirmation screen appears:
4. After you carefully review your selection, press F3 to delete the logical drive.
A confirmation screen appears.
5. To acknowledge that the configuration was saved and return to the ORCA Main Menu, press
Enter.
Moving disks and arrays to different positions or controllers
You can move disks and arrays to different positions or controllers. The following movements are
supported for physical disks and arrays:
• To a different ID position on the same controller.
• To a Smart Array controller of the same type, on the same server or on a different server; for
example, from one P400 to another.
• To a Smart Array controller of a different type, on the same server or on a different server;
for example, from a P400 to a P800.
IMPORTANT: When you move an array, the disks must remain in the same order.
Prerequisites
Before moving a disk or array on a Smart Array Series Controller, be sure the following hardware
and software prerequisites are met:
Moving disks and arrays to different positions or controllers 55