5. Use the lscfg command to identify the AIX disk device's corresponding array LDEV
designation.
For example, enter the following command to display the emulation type, LDEV number, CU
number and array port designation for disk device hdisk3.
# lscfg –vl hdisk3
Configuring disk array devices
Disks in the disk array are configured using the same procedure for configuring any new disk on
the host. This includes the following procedures:
• “Changing the device parameters” (page 91)
• “Assigning the new devices to volume groups” (page 93)
• “Creating the journaled file systems” (page 95)
• “Mounting and verifying the file systems” (page 97)
Creating scripts to configure all devices at once can save you considerable time.
Changing the device parameters
When the device files are created, the system sets the device parameters to the system default
values. You might need to change a few of those values for each new OPEN-x device: For more
information, see Table 24 (page 91) and Table 25 (page 91).
• Read/write (R/W) timeout value
• Queue depth
• Queue type
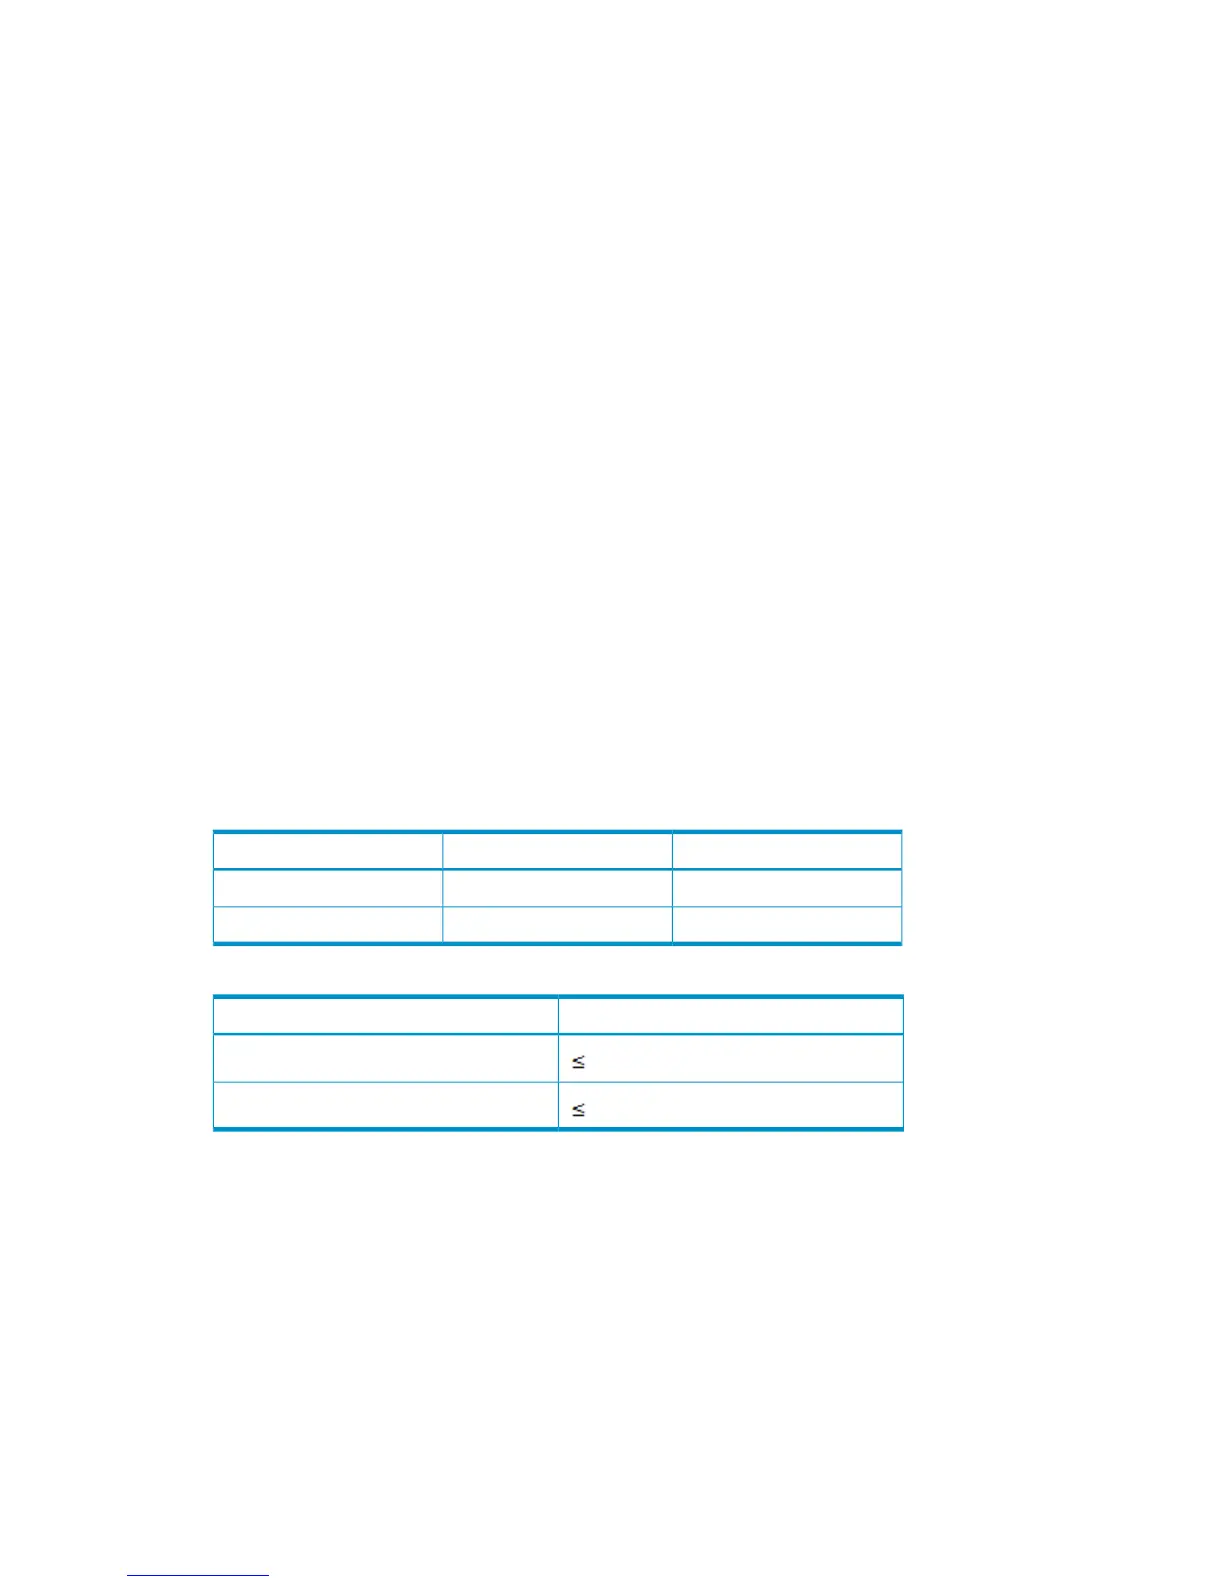
Table 24 Device parameters-read/write timeout and queue type (IBM AIX)
Required ValueDefault ValueParameter
6030Read/write timeout
SimpleNoneQueue type
Table 25 Device parameters-queue depth (IBM AIX)
Recommended ValueParameter
32
Queue depth per LU
1024
Queue depth per port (MAXTAGS)
The recommended queue depth settings might not provide the best I/O performance for your
system. You can adjust the queue depth setting to optimize the I/O performance of the disk array.
Displaying the device parameters using the AIX command line
At the command line prompt, enter lsattr -E -l hdiskx, where hdiskx is the device file
name.
Example
# lsattr –E -l hdisk2
Changing the device parameters using the AIX command line
1. To change the R/W timeout parameter, enter:
chdev –1 hdiskx –a rw_timeout='60'
Configuring disk array devices 91
 Loading...


