Do you have a question about the HP Z25xs G3 and is the answer not in the manual?
Cautions and notes to minimize personal injury and equipment damage during service.
Professional repair requirements, high voltage area, ROHS, capacitor replacement, and soldering.
Requirements for professional repairers regarding technical competence and insurance.
Legal requirement for RoHS compliance for products sold in the EU and other countries.
General information about the manual and two levels of service.
Information on where to find firmware updates for the monitor.
Procedures for AC leakage current check and safety verification before customer return.
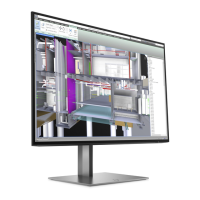
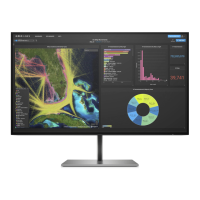
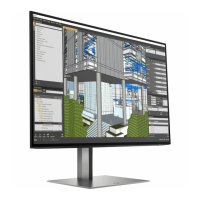
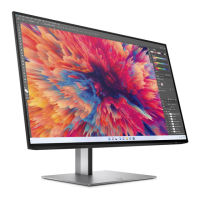
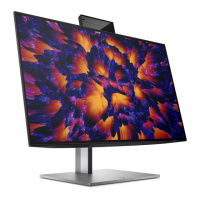
Overview of the monitor's display, physical, and usability features.
Identification and description of front panel controls like brightness buttons and power button.
Identification of rear and side ports, connectors, and controls like OSD, security slot, and various I/O ports.
Location of the serial number and product number label on the monitor's rear panel.
Visual identification of major monitor components with item numbers and descriptions.
Information on how to order the power board, including part numbers.
Details on ordering connectors by manufacturer, including distributor part numbers.
Instructions for preparing the workspace and gathering essential equipment and materials for disassembly.
Step-by-step instructions for removing the monitor's rear cover using tools and manual force.
Instructions for locating and removing the power board, including a warning about charged capacitors.
General information and requirements for connector repair, including warranty and tool usage.
Step-by-step guide to repair the HDMI connector (CN5101) using soldering and desoldering tools.
Step-by-step guide to repair the DisplayPort 1 connector (CN551) using soldering and desoldering tools.
Step-by-step guide to repair the DisplayPort 2 connector (CN501) using soldering and desoldering tools.
Step-by-step guide to repair the USB Type-C connector (CN5302) using soldering and desoldering tools.
Step-by-step guide to repair the USB 3.0 A 1 connector (CN1103) using soldering and desoldering tools.
Step-by-step guide to repair the USB 3.0 A 2 connector (CN1105) using soldering and desoldering tools.
Step-by-step guide to repair the USB 3.0 connector (CN154) on the connector board.
Step-by-step guide to repair the USB Type-C connector (CN152) on the connector board.
Procedures to confirm all monitor functions are working correctly after repair.
Table of common issues, their possible causes, and recommended solutions for troubleshooting.
This document serves as a Maintenance and Service Guide for the HP Z25xs G3 monitor, providing comprehensive information for trained service personnel. It outlines procedures for spare parts, removal and replacement of components, diagnostic tests, and problem troubleshooting.
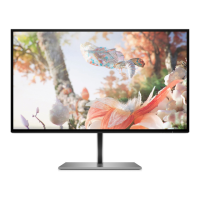
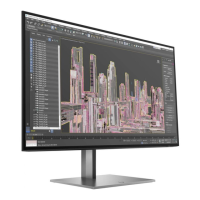
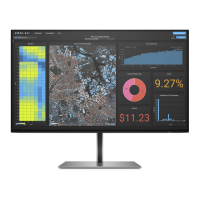
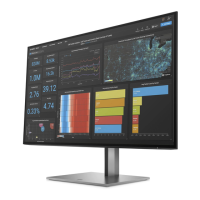
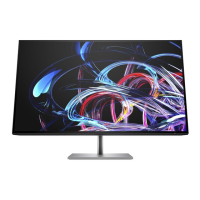
The HP Z25xs G3 monitor is designed for a variety of display needs, offering a 63.5 cm (25-inch) diagonal viewable screen area with a QHD resolution of 2560 × 1440. It supports lower resolutions with custom scaling to maintain the original aspect ratio while maximizing image size. The display utilizes a liquid crystal display (LCD) with active matrix and in-plane switching (IPS) technology, ensuring wide viewing angles from various positions. A nonglare panel with an LED backlight enhances visibility.
For color accuracy, the monitor features a wide color gamut that covers the P3 color space, and includes workflow-based color space presets for both standard and wide gamut applications. Users can optimize their viewing experience through on-screen display (OSD) adjustments available in multiple languages.
Ergonomically, the monitor offers tilt, swivel, and height adjustment capabilities, along with pivot functionality to rotate the monitor head between landscape and portrait orientations.
Connectivity options are extensive, including DisplayPort™ and High-Definition Multimedia Interface™ (HDMI) inputs. The monitor supports Dual Picture in Picture (PIP) and Picture beside Picture (PbP) functionality, allowing two inputs to be viewed simultaneously on each half of the screen. It also features multiple USB ports for connecting peripheral devices like keyboards, mice, or USB hard drives. Specifically, it includes USB Type-C ports (one upstream and one downstream) and USB 3.0 A downstream ports. The upstream USB Type-C port can deliver up to 100 W of power to a connected device, with power outputs at 5 V, 9 V, 12 V, 15 V, and 20 V.
For security, a security cable slot is located on the rear of the monitor, accommodating an optional security cable. Cable management features are integrated to help organize cables and cords. The monitor also incorporates an energy saver feature to meet requirements for reduced power consumption.
Maintenance procedures are detailed for professional service technicians. The guide emphasizes important safety information and precautions, including the necessity of disconnecting power before opening the cabinet, following electrostatic discharge (ESD) safety procedures, and handling batteries carefully. It also highlights RoHS (Restriction of Hazardous Substance) requirements, specifying that lead-free solder wire must be used for soldering and that replacement parts must comply with RoHS if the original parts were compliant.
The service levels described are:
Firmware updates, when available, can be found on support.hp.com. Before returning a repaired product to the customer, an AC leakage current check on exposed metallic parts is mandatory to ensure electrical safety.
Disassembly preparation involves cleaning the work area, identifying the disassembly zone, and ensuring the availability of necessary equipment such as a press fixture, working table, screwdriver, knife, gloves, cleaning cloth, ESD protection, and a scraper bar of specific dimensions.
Detailed steps are provided for removing the rear cover, which involves detaching the stand lid, unscrewing the rear case, splitting the middle frame and rear case using a scraper bar, and then fully disassembling the rear cover. Subsequent steps include removing connect boards, tearing off tapes, unscrewing the mainframe, disconnecting light bar cables, and removing the main board, connector board, power board, middle frame, panel, and key board. All wires must be disconnected from the boards.
For power board replacement, the guide specifies the part number (ADPCJ20180AH1) and warns about residual capacitance after unplugging the power supply, advising against touching and discharging the capacitor without proper precautions.
Connector repair procedures are outlined for HDMI, DisplayPort (1&2), USB Type-C, and USB 3.0 A connectors on both the main board and the connector board. These procedures involve using a soldering iron, de-soldering pump, and hot air gun to remove solder, lift the old connector, place the new component, and solder it in place. Critical warnings are provided for connector repair, stating that it is only for out-of-warranty situations and must be performed by professional repairers in a repair center. Electrostatic protection is required, and technicians must ensure the new connector matches specifications and part numbers. The guide strictly prohibits any liquid on the board to prevent short circuits and malfunctions. It also emphasizes working quickly to avoid overheating the circuit board and keeping the soldering iron tip clean. After repair, a functional check of all ports is required.
A function test section ensures that all functions are working correctly after repair, covering HDMI, DP, USB-C, and USB tests to confirm image and sound display.
The troubleshooting section provides a table of common issues, their possible causes, and recommended solutions. These issues include a blank or blinking screen, the monitor being off, a blurred or indistinct image, low contrast/saturation, and the monitor waking slowly from sleep mode. Solutions range from connecting power cords and video cables properly, pressing the power button, adjusting brightness, to changing video level settings or DisplayPort modes. It also addresses issues like "OSD Lockout" and "Power Button Lockout" by describing how to disable these features.
| Screen Size | 25 inches |
|---|---|
| Resolution | 2560 x 1440 (QHD) |
| Panel Type | IPS |
| Refresh Rate | 60 Hz |
| Brightness | 350 cd/m² |
| Contrast Ratio | 1000:1 |
| VESA Mount Compatible | Yes, 100 x 100 mm |
| Aspect Ratio | 16:9 |
| Integrated Speakers | No |
| Height Adjustment | Yes |
| Swivel | Yes |
| Viewing Angle | 178° horizontal, 178° vertical |
| Color Gamut | 99% sRGB |
| Response Time | 5 ms |
| Connectivity | USB-C |
| Tilt | Yes |
| Pivot | Yes (90°) |