Do you have a question about the HP Z24U G3 and is the answer not in the manual?
Crucial safety guidelines to minimize risk of personal injury during service.
Guidelines for professional technicians, including voltage warnings and soldering practices.
Information on RoHS compliance for replacement parts and their usage.
Overview of service levels for the monitor.
Instructions on how to obtain and apply firmware updates.
Procedures for AC leakage current checks before returning the serviced product.
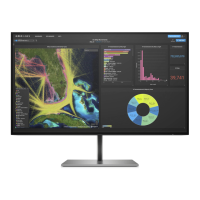
Details on screen size, resolution, display technology, and viewing angles.
List of available input/output ports like DisplayPort, HDMI, USB, and RJ45.
Information on stand features, mounting options, and VESA compatibility.
Guidance on purchasing spare parts, including distributor information.
Steps and materials needed before starting monitor disassembly.
Step-by-step instructions to remove the monitor's rear cover.
Detailed procedure for removing and replacing the power board.
Instructions for repairing HDMI, DP, USB-C, RJ45, and USB-A connectors on the main board.
Confirms proper operation of all monitor functions after repair.
Lists common issues, their causes, and recommended troubleshooting steps.
This document serves as a Maintenance and Service Guide for the HP Z24u G3 monitor, providing comprehensive information for trained service personnel on its features, repair procedures, and troubleshooting. It emphasizes safety precautions and proper service methods to ensure the safe and reliable operation of the equipment.
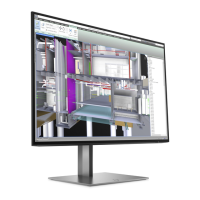
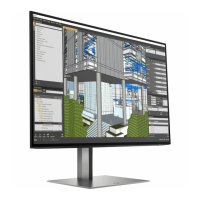
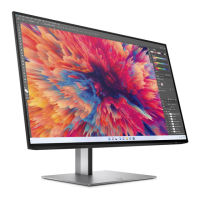
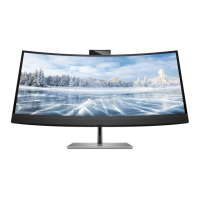
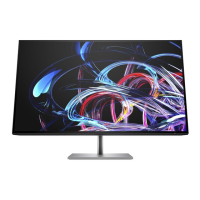
The HP Z24u G3 monitor is designed with a focus on visual performance and user flexibility. It features a 61 cm (24-inch) diagonal viewable screen area, offering a 1920 × 1200 resolution with full-screen support for lower resolutions, while maintaining the original aspect ratio through custom scaling. The display utilizes a Liquid Crystal Display (LCD) with active matrix and in-plane switching (IPS) technology, ensuring wide viewing angles suitable for various sitting or standing positions. A wide color gamut provides extensive coverage of sRGB color spaces, enhancing color accuracy and vibrancy. The nonglare panel, coupled with an LED backlight, further contributes to comfortable viewing by reducing reflections.
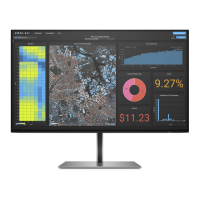
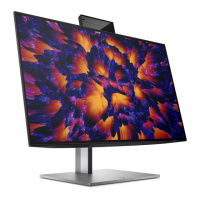
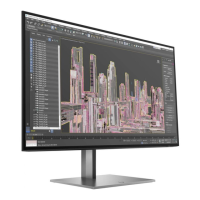
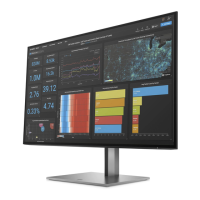
For ergonomic comfort and adaptability, the monitor offers tilt, swivel, and height adjustment capabilities. Its pivot functionality allows the monitor head to rotate from landscape to portrait orientation, which can be particularly useful for specific tasks or content viewing. Select models of the Z24u G3 include Dual Picture in Picture (PiP) and Picture beside Picture (PbP) functionalities, enabling simultaneous viewing of inputs from DisplayPort, HDMI, and USB Type-C sources on different halves of the screen.
User interaction and customization are facilitated through On-Screen Display (OSD) adjustments, available in multiple languages for easy setup and screen optimization. The monitor also includes color space presets for sRGB and BT.709, catering to different professional requirements. An energy saver feature is integrated to meet requirements for reduced power consumption, aligning with environmental standards. For physical security, a security cable slot is located on the rear of the monitor, allowing for the attachment of an optional security cable. Cable management features are also incorporated to help organize and route cables and cords neatly.
Connectivity options are robust, including a DisplayPort video input and output, with cables typically included. A High-Definition Multimedia Interface (HDMI) video input is also present. The monitor is equipped with a USB Type-C port that supports DP Alt Mode 1.4, USB upstream data, and provides up to 100 W of power delivery, allowing it to charge most USB Type-C devices even in sleep mode (when the monitor is set to Performance Mode). This USB Type-C port also enables the functionality of the USB Type-A ports. The monitor acts as a USB hub, featuring one USB Type-C port for connection to the computer (upstream) and four USB ports for connecting various USB devices such as keyboards, mice, or USB hard drives. Some USB Type-A ports also support Battery Charging 1.2. Additionally, an RJ-45 (network) jack is available on select models for network connectivity. The monitor supports Plug and Play capability, if supported by the operating system.
The monitor stand is removable, offering flexible mounting solutions. It incorporates an HP Quick Release 2 device for quick attachment and removal of the monitor head from the stand with a simple click and sliding tab release. The monitor is VESA® mounting compliant (100 × 100 mm), allowing it to be attached to wall-mount devices or swing arms, and supports a mounting bracket for attachment to a workstation.
For maintenance and service, the guide outlines detailed procedures for disassembly and replacement of parts. It emphasizes that repair should only be performed by professional service technicians in a repair center, not by end-users. Key precautions include ensuring a dry and clean working environment, using proper safety devices and approved tools, and always disconnecting power before opening the product. Modules with electrical components are sensitive to electrostatic discharge (ESD), necessitating adherence to ESD safety procedures. The guide also warns about multiple batteries in some products and the risks associated with disassembling or exposing them to high temperatures.
The service information highlights that the primary side of the monitor is a high voltage area. The monitor meets RoHS requirements, and lead-free solder wire should be used for soldering. When replacing capacitors, matching polarity, specification, and part number to the Bill of Materials (BOM) and location are crucial. Technicians are advised to avoid getting the board wet, work quickly when soldering to prevent overheating, keep the soldering iron tip clean, and perform a thorough inspection and function test after repair.
The guide provides an illustrated parts catalog, detailing major components such as the LCM Module, Main Chassis Bracket, Power Board, Interface Board, and various screws and covers. It also includes instructions on how to order spare parts, specifically noting that the power board can be purchased from HP authorized repair centers, and capacitors and connectors are available from specified EU distributors.
Removal and replacement procedures are meticulously described, starting with preparation for disassembly, which involves cleaning the work area, identifying the disassembly zone, and having necessary equipment like a press fixture, screwdriver, knife, gloves, cleaning cloth, ESD protection, and a scraper bar. Specific steps are provided for removing the rear cover, USB board, OSD key board, IO cover, bracket assembly, and bezel bottom. Detailed instructions are also given for repairing connectors such as HDMI, DisplayPort, USB-C, USB-A, and RJ45, including steps for de-soldering, lifting the old component, placing the new one, and soldering.
After any repair, a function test is mandatory to confirm that all monitor functions are working correctly. The guide includes a function test table covering HDMI, DisplayPort, DisplayPort out, Type-C, RJ45, and USB Hub tests, specifying the operating description and the tools to be used (e.g., computer, DVD player, notebook, network socket).
Finally, a support and troubleshooting section provides a table of common problems, their possible causes, and recommended solutions. This includes issues like a blank or flashing screen, the monitor being turned off, master power switch being off, improperly connected video cables, the monitor being in Sleep mode, incompatible video cards, blurred images, "Check Video Cable" messages, "Input Signal Out of Range" messages, the monitor not entering low-power sleep state, "OSD Lockout" messages, and "Power Button Lockout" messages. Solutions range from connecting power cords and powering on the monitor to adjusting OSD settings, replacing video cards, and connecting appropriate cables.
| Screen Size | 23.8 inches |
|---|---|
| Resolution | 1920 x 1200 |
| Panel Type | IPS |
| Aspect Ratio | 16:10 |
| Contrast Ratio | 1000:1 |
| Refresh Rate | 60 Hz |
| Color Gamut | 99% sRGB |
| Viewing Angle | 178° horizontal, 178° vertical |
| Adjustability | Height, Tilt, Swivel, Pivot |
| Response Time | 5ms |
| Ports | 1 x DisplayPort 1.4, 1 x USB-C |
| VESA Mount | 100 x 100 mm |
| Brightness | 300 cd/m² |
| Pixel Pitch | 0.2745 mm |