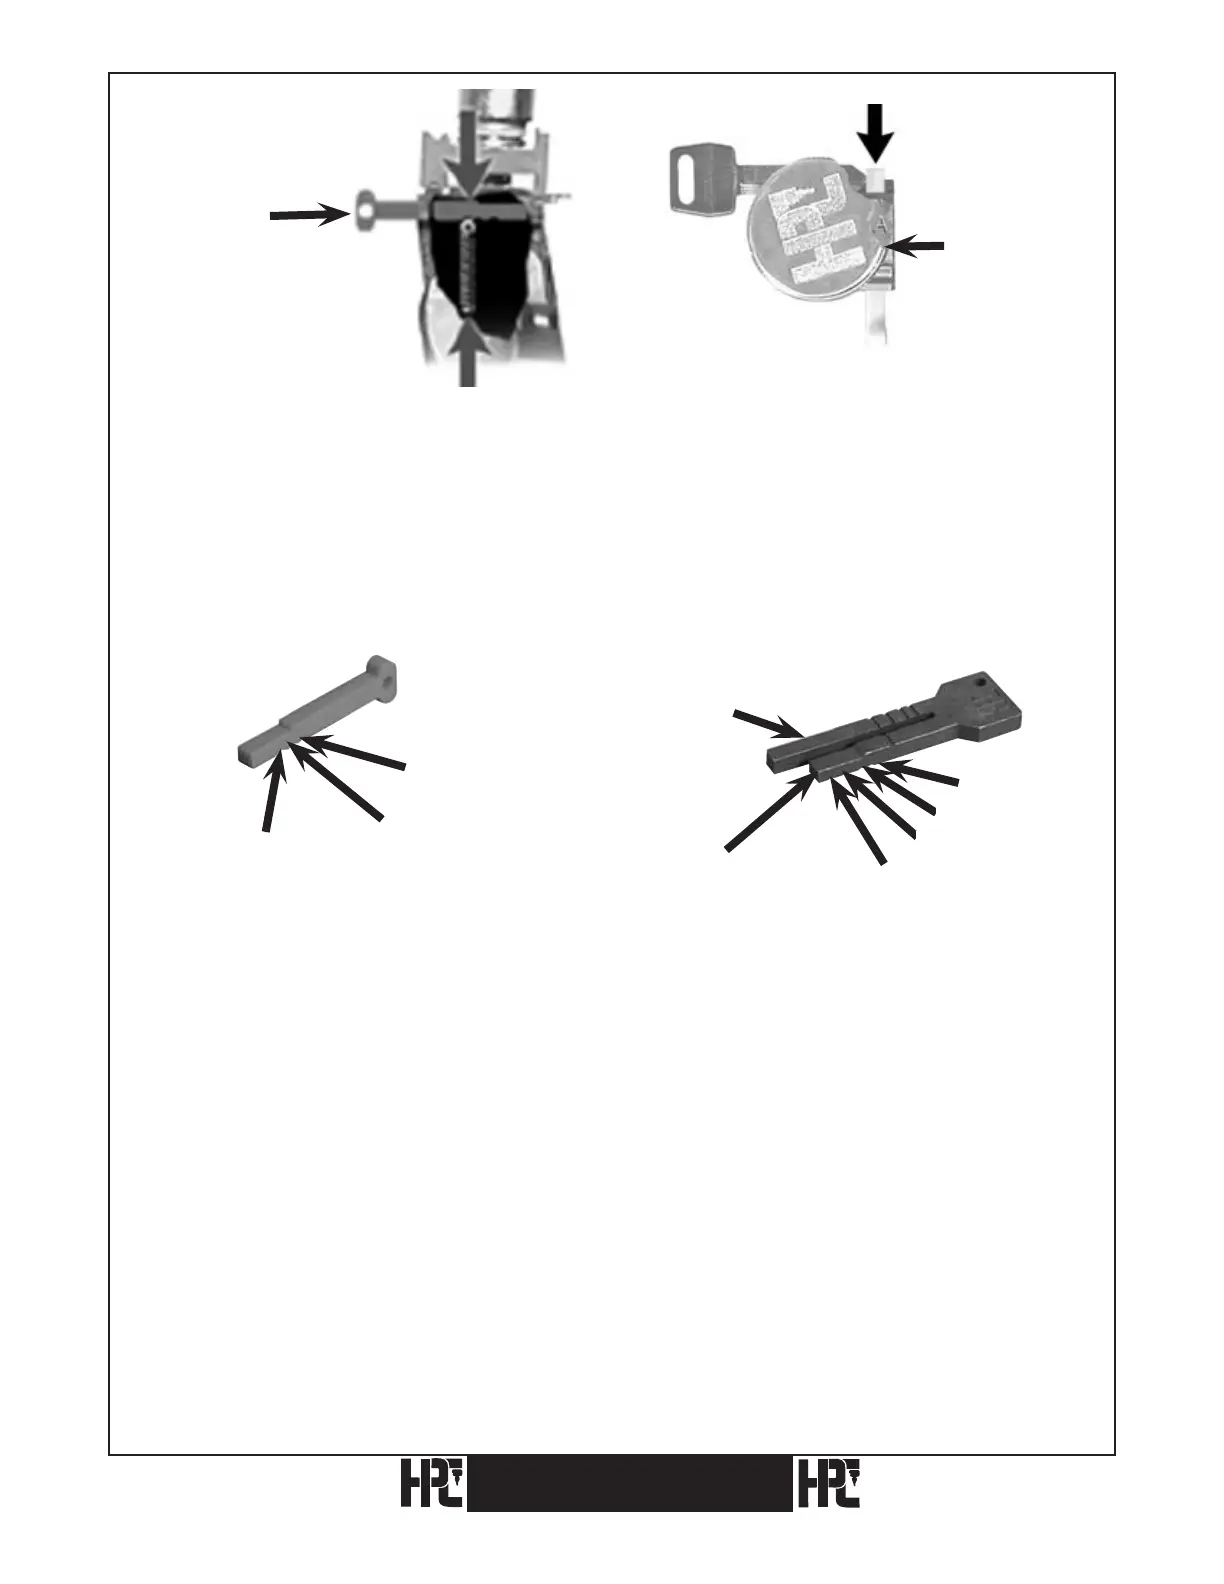
Fig. 11. Fig. 12. 5 Pin Ford.
In the third position, the Red Tip Gauge is sent forward into the third groove and this is
the proper setting for old, 5-pin Ford keys (see Figs. 11 & 12). To clamp and gauge double
sided Ford type keys, the offset of the key is set against the face of the jaw. Slide the key to
the right until the tip butts against the tip gauge and tighten the wing nut. The blank is held
off the key rest by this method, thereby eliminating the need for any special blocks (see
Figs. 11 & 12).
Red (Plastic) Tip Gauge (CM-1054MA) (Black) Horseshoe Tip Gauge (CM-1054R)
Position 1: Out of the way Position 1: Best – Right Leg
Position 2: Best Position 2: Ford – Right Leg
Position 3: Ford Position 3: Best – Left Leg (same as 2 red)
Position 4: Ford – Left Leg (same as 3 red)
Note: Red Tip Gauge should be pulled back to position 1 or removed when
cutting shoulder gauged keys.
Remove Black Horseshoe Tip Gauge completely when gauging or cutting shoulder gauged
keys or when gauging from positions 3 and 4 prior to cutting.
Positions 1 and 2 of Horseshoe Tip Gauge are designed to bring the tips of key blanks even
with the right side of the jaw. If the right leg is bent inward (so the tip gauge doesn’t enter
the jaw) or bent outward (so key blanks gauge beyond the right side of the jaw) the right leg
should be gently tapped back into alignment.
18
Position 1
Position 2
Position 3
Position 3
Position 2
Position 1
Position 4
Right Leg
Left Leg
Red Tip Gauge
Red Tip
Gauge
Wing Nut
CodeMax
®
CodeMax
®
Position 3