d. Place the heatsink on a flat work surface with its contact side facing upward.
12. Clean the old thermal grease from the processor with the alcohol wipe.
Allow the alcohol to evaporate before continuing.
Installing the heatsinkInstalling the heatsink
PrerequisitesPrerequisites
Before you perform this procedure, make sure that you have a T-15 Torx screwdriver or a torque screwdriver with T-15 Torx bit available.
About this taskAbout this task
CAUTION:CAUTION: A discharge of static electricity from a finger or other conductor might damage system boards or other static-
sensitive devices. To prevent damage, observe antistatic precautions.
ProcedureProcedure
1. Remove the thermal interface protective cover from the heatsink.
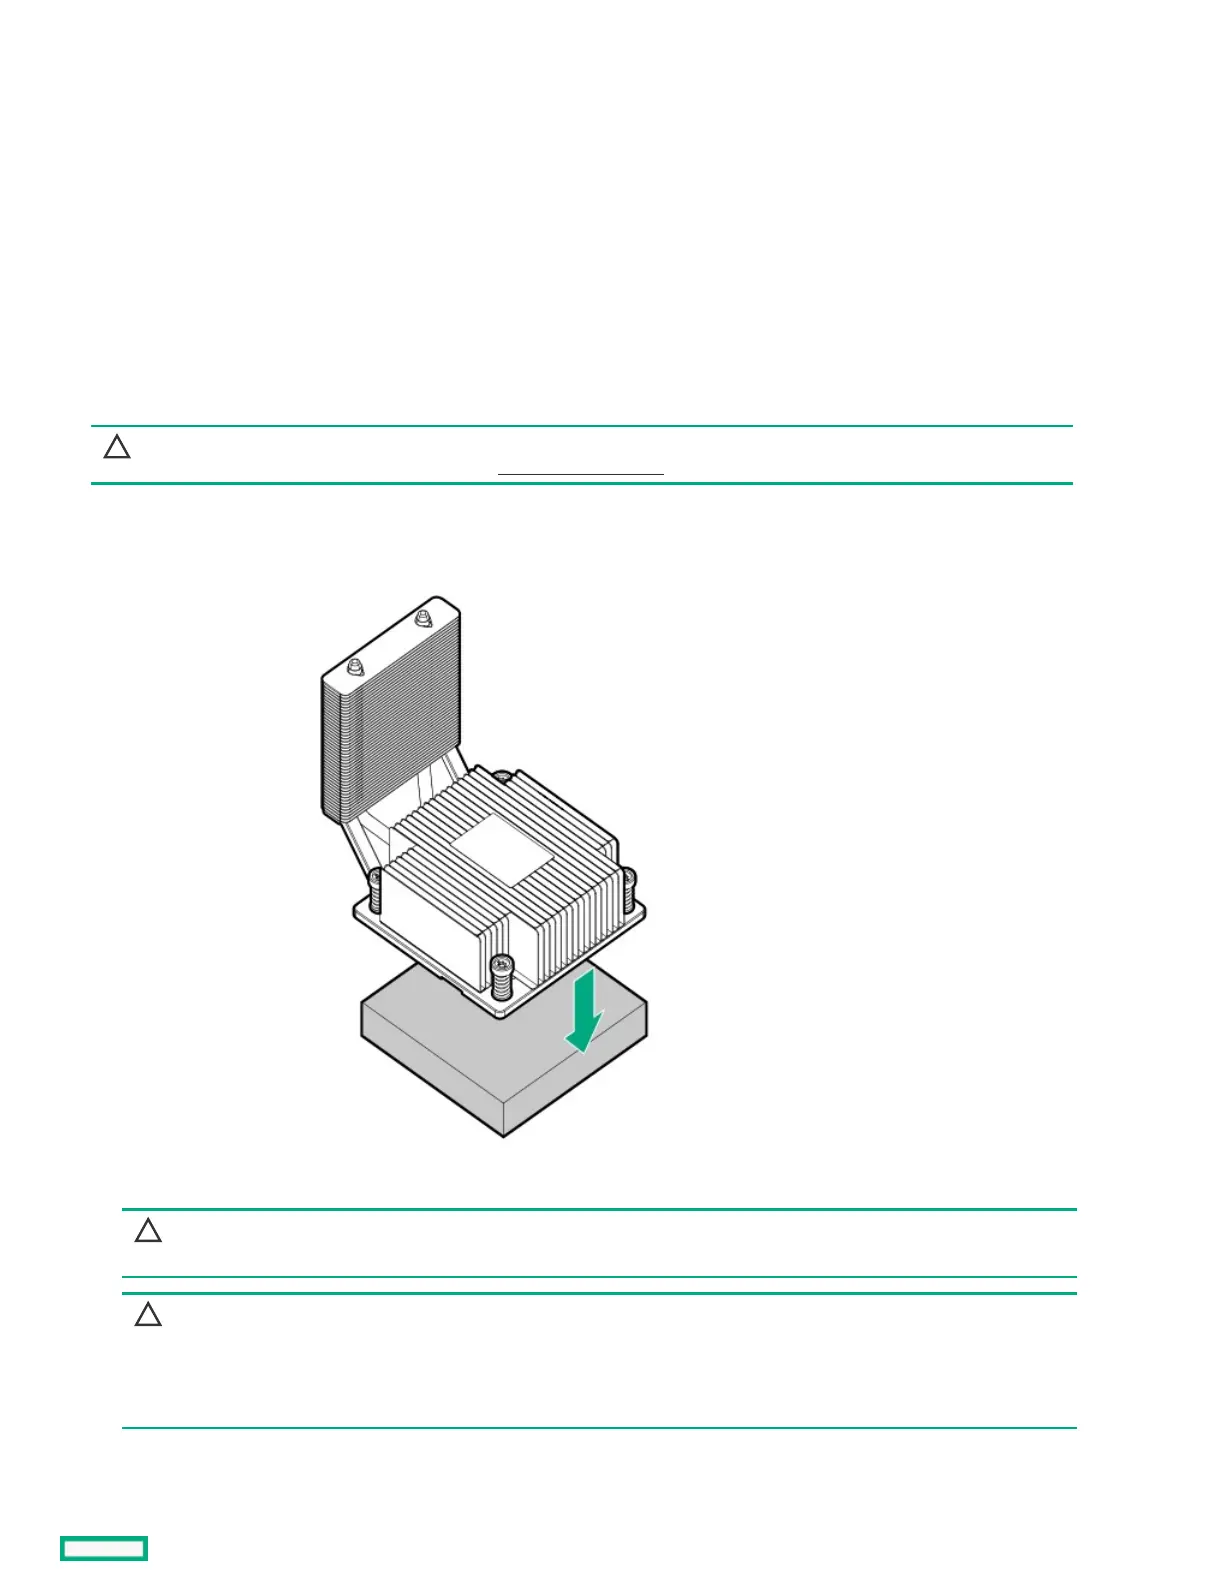
2. Install the heatsink:
CAUTION:CAUTION: To prevent mechanical damage or depositing oil on your hands or other contaminants to the heatsink contact
surface, hold the heatsink only by the edge of its base plate. Do not touch the heatsink fins.
CAUTION:CAUTION:
To prevent thermal failure or component damage, do not move the heatsink once the bottom of its base plate touches
the top of the processor. Excessive heatsink movement can cause the thermal grease to smear and become uneven.
Voids in the compound can adversely impact the transfer of heat away from the processor.
a. When using a torque wrench to tighten the heatsink screws, set it to 6.0.
b. Note the Front of serverFront of server text on the heatsink label to correctly orient the heatsink over the processor socket.