Do you have a question about the HT THT45 and is the answer not in the manual?
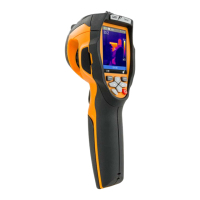
This document describes the THT45, THT45W, and THT46 digital thermal cameras, designed for carrying out infrared temperature measurements of objects and providing thermographic images. These instruments are easy to use and require little maintenance.
The thermal cameras are capable of measuring temperatures ranging from -20°C to 350°C. They feature a built-in photo camera for visual images and offer a Picture-in-Picture (PIP) fusion function, as well as an Auto Fusion Function (AUF) for enhanced image analysis. Users can select from three measurable cursors and choose between four standard color palettes. The cameras include an electronic zoom (1x-32x) and an automatic selection of hot/cold spots in the image. A "Screening" function is available for surface temperature rapid measurement.
Images are stored in JPG format on an external micro SD card, with resolutions of 80x80 pixels (THT45, THT45W) and 160x120 pixels (THT46). The devices include a USB port for PC connection and image transfer. The THT45W model also features Wi-Fi for connection with external mobile devices through the THTView APP. Video recording is supported in MPEG4 format on the micro SD card, with video and microphone output. A built-in laser pointer and illuminator are included. The cameras are powered by a rechargeable Li-ION battery and come with a dedicated software provided for analysis and printing of images.
The digital thermal cameras offer predictive and preventive maintenance of electrical and mechanical appliances, monitoring of the temperature of working processes, maintenance and troubleshooting on forced ventilation ducts, domestic/industrial use in troubleshooting environmental insulation problems, and general safety problems.
The instrument is equipped with 8 function keys, including a trigger key "T" for multiple functions. To switch the instrument on/off, press the power button for approximately 10 seconds. After initial auto-test, the instrument shows its normal measuring screen. To switch off, press and hold the power key for 2 seconds.
The main interface displays various information such as WiFi connection status, Micro SD card status, zoom level, temperature unit, battery level, fixed spot temperature, hour, high level, color palette, low level, status bar, and image adjustment mode.
To ensure accurate temperature measurements, always focus the image before saving it. The instrument features an electronic digital zooming function of the IR image and the framed visual image. The zoom can be adjusted from 1x to 32x.
In "Fusion" display mode, the instrument allows adjusting the distance between the lens and the object. This is crucial because the visible image tends to become bigger, while the IR image tends to reduce. The instrument allows setting the distance of the object in order to compensate the effect at distances shorter than 2m. Options include 0.5m, 1m, 1.5m, and >2m.
The instrument shows the following general menu, which allows accessing the internal functions:
The settings menu allows users to define various system parameters, including:
The measure menu allows setting three measuring cursors:
This menu allows setting the emissivity and reflected temperature parameters. The instrument provides a table of typical emissivity values for common materials. Users can select from predefined materials or set a custom emissivity value between 0.01 and 1.00.
The "Temp. Comp." parameter allows setting a positive or negative compensation value which is added or subtracted from the temperature measured only in the Screening function.
The "Alarm" parameter allows activating/deactivating a visual (THT45W), visual and audible (THT45, THT46) alarm on temperature measurement. Users can set the desired value of temperature threshold.
This setting allows users to define the desired value of reflected temperature.
This menu allows selecting the display mode of IR and visual images, including:
The AUF function is a special internal algorithm that allows the instrument to display automatically, via comparison of the central spot temperature and the remaining part of the screen, the optimum level of mixing percentage between IR and visible part of the image. This allows saving of better quality pictures even in low-contrast conditions.
This menu allows selecting the color palette associated with the IR image. Available options include Iron, Rainbow, Grey, and Grey Inv.
This menu defines the temperature measuring range of the instrument and the activation/deactivation of the Screening function. Available ranges are -20°C ÷ 150°C, 0°C ÷ 350°C, and Screening.
This section allows defining the adjusting mode of the temperature associated with the image framed on the display. The following modes are available:
To save the image, insert a micro SD card. The icon "SD" is shown in the top left-hand part of the display. Press the "T" (Trigger) key to freeze the image shown on the display. Press the "Save" key to save the image.
To record a video, insert a micro SD card. The icon "SD" is shown in the top left-hand part of the display. If necessary, insert the jack of the headphones into the camera. Select the desired image display mode. Press and hold the "T" (Trigger) key for some seconds to activate video recording. The message "YYYYMMDD_xxxx.mp4" appears in the status bar and the timer appears at the bottom of the display. To stop recording, press the "T" (Trigger) key again.
The instrument allows recalling and watching on the display every image/video saved on the micro SD card. Press the "Browse" key to access the gallery of saved images/videos. To delete an image or video, select the desired item and press the "OK" key to delete.
To play a video saved on the instrument's micro SD card, press the "Play" key. Adjust the level of sound volume if necessary. Press the "T" (Trigger) key to activate video playback.
To switch on the instrument, press the power key. After approximately 20 seconds of internal auto-test, the instrument shows its normal measuring screen. Upon start-up, the instrument shows a screen like the one shown in Fig. 34. It takes approximately 30 seconds for the instrument to become fully operating. During this time interval, the instrument carries out an automatic calibration and the internal commutations may produce some noise.
Switch on the instrument by pressing the power key. Press the "Menu" key to enter the general menu. Open the "Emiss" menu and set the emissivity parameter to a value between 0.95 and 0.98. Open "Range" menu and select the "Screening" mode. Open the "Emiss" menu, set the "Alarm" mode and set the maximum temperature threshold. Activate the visualization of the "S" (fixed central spot) cursor on the display inside the "Measure" menu. Select the desired color palette. Select automatic measuring mode. Frame the subject on test at a recommended distance of 1m. With temperature of the subject higher than the set alarm threshold value, the bar associated with the palette turns red and flashes on the display (see Fig. 37) and an acoustic alarm is activated (THT45, THT46).
The instrument allows saving the images/videos on an external micro SD card and to transfer them onto the PC by using the USB cable. Both the micro SD card and the cable are provided with the instrument. Insert the micro SD card into the dedicated slot. Connect the USB cable to the instrument and to the PC. The following screen is shown on the display. Use the keys to select the option "PC Transfer" and press the "Select" key. The screen shows the display. Inside "My Computer", search for the removable disk associated to the micro SD card and copy the files. Disconnect the USB cable to go back to the instrument's main screen.
The instrument allows displaying on the PC in real time the image shown on the display. To carry out this operation, proceed as follows: Connect the USB cable to the instrument and to the PC. The following screen is shown on the display. Use the keys to select the option "PC Camera" and press the "Select" key. The screen shows the display. Inside "My Computer", search for the "USB video device" which is automatically recognized by the PC and allows displaying the (IR or visual) image on the instrument's display in real time. Disconnect the USB cable to go back to the instrument's main screen.
The video output available in the instrument enables displaying the IR image acquired on an external monitor/device capable of managing HDMI Systems. To connect the instrument, proceed as follows: Switch on the instrument. Connect the instrument to the external monitor/device using the HDMI video cable provided. Turn on the external monitor or device. Check for the presence of the IR image both on the instrument's display and on the monitor or external device with contemporary management of the operations. Detect/monitor the image on the external monitor or device. At the end of the operations, switch off the monitor or external device and disconnect the HDMI video cable from the instrument.
The THT45W instrument allows operation in conjunction with the THTView APP available for iOS / Android systems freely downloadable from the related stores. The THTView APP allows the following features:
Enable the WiFi connection on the instrument. Switch on the mobile device and search for the "THT45W-Camera" instrument in the WiFi connection settings. At the Password request, enter "12345678" and make the connection. Start the THTView APP. Touch the menu icon and select the "WiFi" option to activate the real-time display of the image on the instrument on the mobile device display.
The THTView APP offers various functions for real-time analysis, including:
THTView APP allows to import images from the instrument in the following ways:
Touch the menu icon and select the "Library" option to open the gallery and select an image. The APP allows to:
The software "THTLink" can be used to analyse the images saved on the micro SD card inserted in the instrument.
Insert the installation CD-ROM into the reader of the PC. Launch the file "THTLink.exe" found inside the CD-ROM and follow the guided installation procedure.
The PC shows the following initial screen. Main characteristics of the THTLink software:
The instrument is a precision instrument. While using and storing the instrument, carefully observe the recommendations listed in this manual in order to prevent possible damage or danger during use. Do not use the instrument in environments with high humidity levels or high temperatures. Do not expose to direct sunlight. Always switch off the instrument after use. In case the instrument is not to be used for a long time, remove the battery to avoid liquid leaks that could damage the instrument's internal circuits.
The instrument is designed to be supplied with a Li-ION rechargeable battery. With the symbol, found on the display, it is necessary to recharge the battery.
Connect the battery charger provided with the instrument to the AC electric mains and the mini USB output to the instrument's input. The green LED of battery charge turns on with steady light. With the instrument turned on, the indicator of the battery charge level takes the symbols " ", " ", " " in a sequence. When the symbol " " appears on the display and the battery charger has been disconnected from the instrument, the charging process is complete. With the instrument turned off, the charging process is complete when the green LED of battery charge turns off. Disconnect the battery charger from the instrument and from the electric mains.
Use a soft and dry cloth to clean the instrument. Never use wet cloths, solvents, water, etc.
This symbol found on the instrument indicates that the appliance, its accessories and the batteries must be collected separately and correctly disposed of.
HT ITALIA guarantees that the instrument is free from any material or manufacturing defect, in compliance with the general sales conditions. During the warranty period, defective parts may be replaced. However, the manufacturer reserves the right to repair or replace the product. Should the instrument be returned to the After-sales Service or to a Dealer, transport will be at the Customer's charge. However, shipment will be agreed in advance. A report will always be enclosed to a shipment, stating the reasons for the product's return. Only use original packaging for shipment. Any damage due to the use of non-original packaging material will be charged to the Customer. The manufacturer declines any responsibility for injury to people or damage to property. The warranty shall not apply in the following cases:
The content of this manual cannot be reproduced in any form without the manufacturer's authorization. Our products are patented and our trademarks are registered. The manufacturer reserves the right to make changes in the specifications and prices if this is due to improvements in technology.
If the instrument does not operate properly, before contacting the After-sales Service, please check the conditions of the batteries and replace them, if necessary. Should the instrument still operate improperly, check that the product is operated according to the instructions given in this manual. Should the instrument be returned to the After-sales Service or to a Dealer, transport will be at the Customer's charge. However, shipment will be agreed in advance. A report will always be enclosed to a shipment, stating the reasons for the product's return. Only use original packaging for shipment. Any damage due to the use of non-original packaging material will be charged to the Customer.
| Brand | HT |
|---|---|
| Model | THT45 |
| Category | Thermal cameras |
| Language | English |