18. Using wire cutters, trim the new gun liner
to approximately 3/16 inch beyond the
edge of the Cable Holding Clamp. ( The
goal is to make sure that the end of the
gun liner will be visible after the Cable
Holding Clamp is assembled. This will
make installing the welding wire much
easier. )
19. Reassemble the Cable Holding Clamp at
feeder, tightening the four screws.
20. Reinstall the welding wire according to
specifications in INSTALL THE WELDING
WIRE section.
21. Close side panel.
22. Plug welder into power supply and turn
POWER SWITCH to ON position.
PREVENTIVE MAINTENANCE
Except for internal and external cleaning,
cleaning the nozzle, and occasionally retight-
ening screws, there is no periodic mainte-
nance recommended for your welder.
TROUBLESHOOTING
The following TROUBLESHOOTING informa-
tion is provided as a guide to help resolve
some of the more common problems that
could be encountered.
Table 4 is a troubleshooting table provided to
help you determine a possible remedy when
you are having a problem with your welder.
This table does not provide all possible solu-
tions, only those possibilities considered to
likely be common faults. The table consists of
a TROUBLE or symptom, a POSSIBLE CAUSE
for the symptom, and a POSSIBLE REMEDY for
that symptom.
26
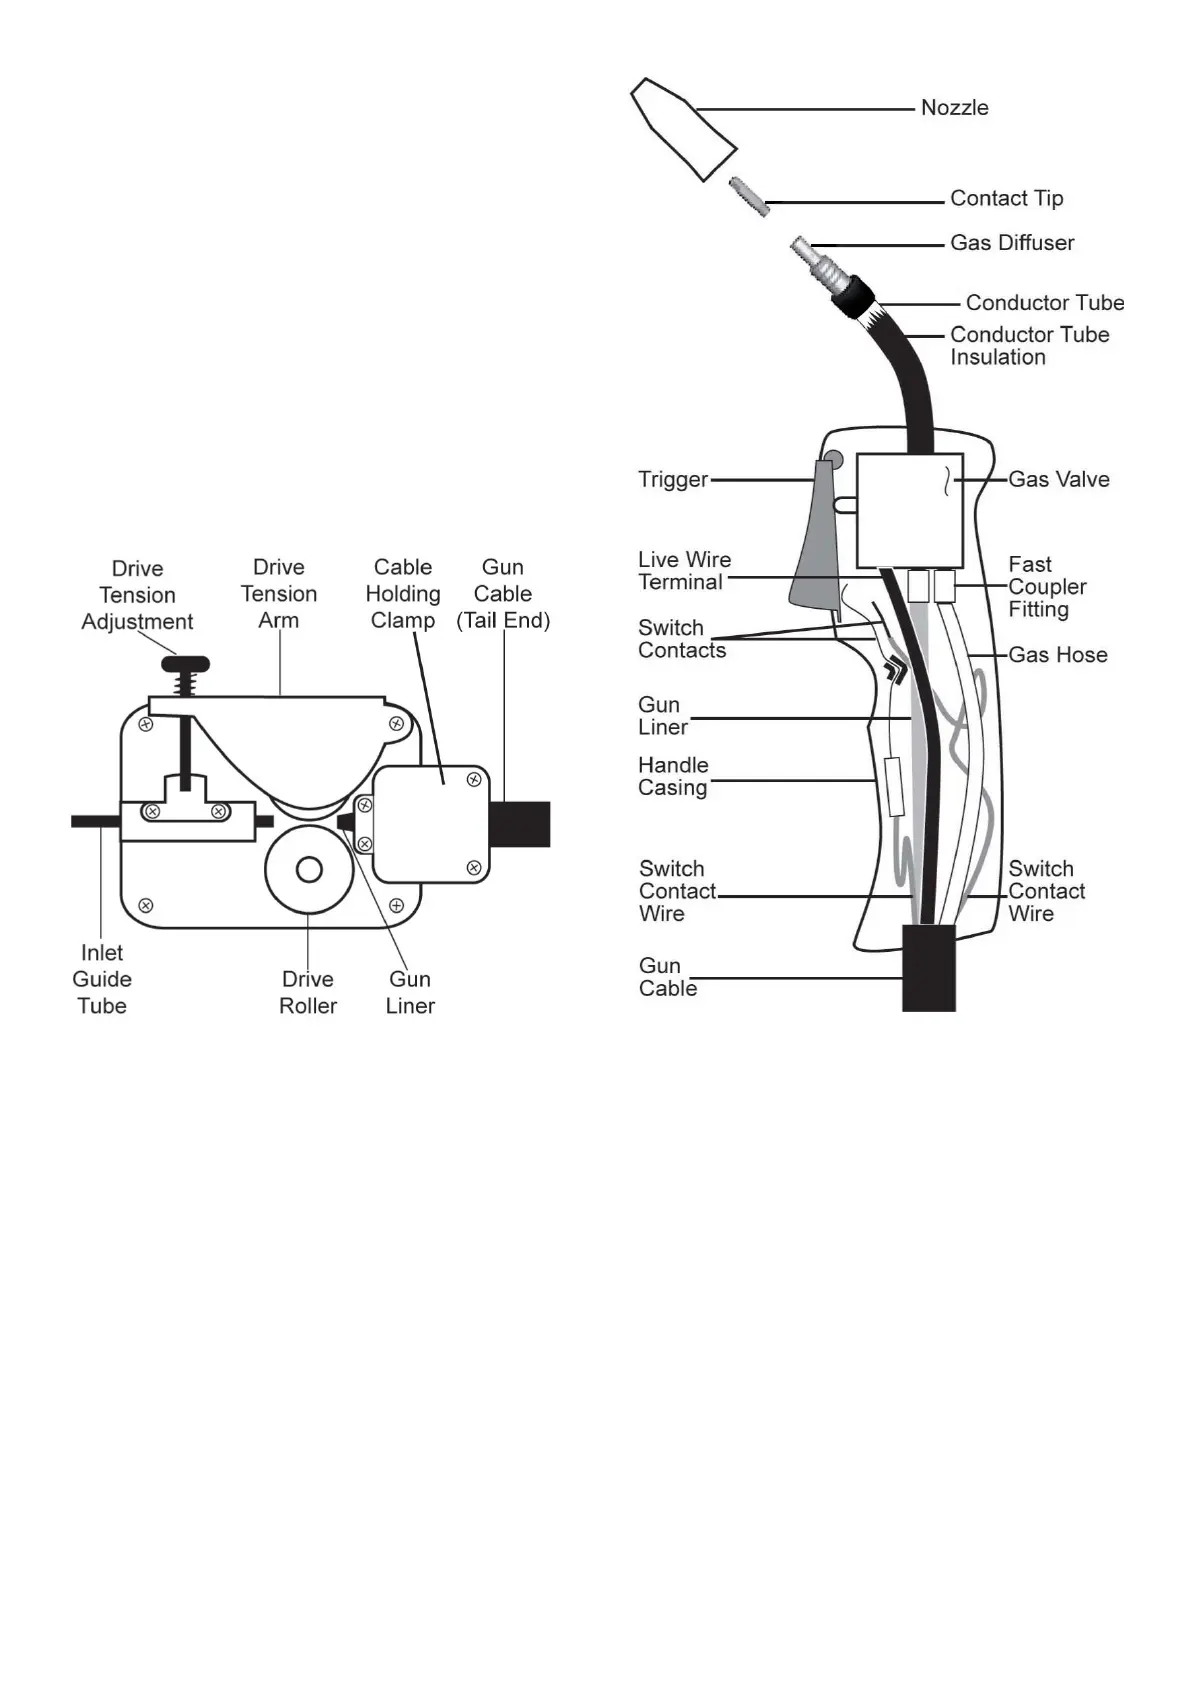
Figure 20. Drive Assembly
Figure 21. Gun Assembly