NOTE
Place the dust plug in an appropriate place. After optical fibers are removed from the optical module,
cover the optical module with the dust plug to protect it from dust.
Step 3 Before connecting optical fibers, attach temporary labels on both ends of each optical fiber to
identify them. For details on how to make labels of optical fibers, see 9.5.2 Engineering
Labels for Optical Fibers.
Step 4 Remove the dust caps from the fiber connectors. Connect one end of the optical fiber to the
optical module and the other end to the remote device.
NOTE
Connect the receive and transmit ends of the fiber connector according to the identifiers on receive and
transmit bores of the optical module. Do not connect the two ends reversely.
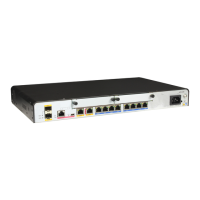
AR2200 Series
FAN
STATUS
10PWR 9PWR
11 SRU
F
A
N
12
STAT US
ON
OFF
~100-240V;50/60Hz;5A
PWR350A
ACT
micro SD
SYS ACT
LINK0 LINK1
ACT0 ACT1
EN EN
CON/AUX RST
GE1
GE0
GE1 GE2
SRU40
Optical fiber
Optical interface of
the remote device
GE1
Step 5 Arrange the optical fibers to make them parallel and bundle them with fiber binding tape at an
interval of 150 mm to 300 mm.
Step 6 Replace all the temporary labels with formal labels on the optical fibers.
----End
7.5.5 Connecting the AC Power Cable
Context
DANGER
To avoid electric shock, do not connect power cables while the power is on.
Huawei
AR100&AR120&AR150&AR160&AR200&AR1200&AR
1600&AR2200&AR3200&AR3600 series Enterprise
Routers
Hardware Installation and Maintenance Guide
7 Installing AR2240/AR2240C/AR3260/AR3670 Routers
Issue 05 (2018-07-30) Huawei Proprietary and Confidential
Copyright © Huawei Technologies Co., Ltd.
117
 Loading...