9.11.1 Creating a Landmark for an address
If you select Enter an address when browsing your landmark list, you will have the opportunity to
type in the address of your choice using the Trek's buttons.
To have Trek guide you to an address:
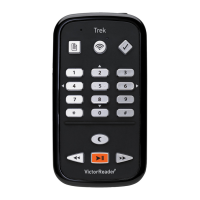
1. Press and hold the Go To button. This will take you to the list of landmarks you can use
as possible destination.
2. Use the Left and Right arrows through the list of landmarks and select Enter an
address. Press Confirm to select this option.
3. The Trek will ask you to select the state/province in which you will be travelling. The
available choices depend on the maps you have installed. Use the Left and Right
arrows to make your selection, followed by Confirm. Note that if a GPS connection is
established, the system will automatically suggest the state/province where you are
located. Press Confirm to select it.
4. You must now enter the name of the city. The previous city name entered will be
announced. If you wish to select this city, or if none have been previously entered, you
will need to enter the city name using the Trek's buttons. Enter the city name and press
Confirm.
5. Select a name from the list of possible choices and press Confirm.
Note: You don't need to enter a complete city name or street name. You can enter a partial name,
followed by Confirm and the Trek will search for names that include the characters entered. Use
arrows to browse the list of names and press Confirm to make your selection.
6. After entering the city name, you must enter the street name. Proceed using same
method as for entering city name. You can press the Explore button to return to the
previous level.
7. Once a street name is entered, you will be asked for a civic number. If you know the
exact civic number, again, use the Trek buttons to enter characters, followed by Confirm.
If you do not know the exact civic number of your destination, when asked to enter a civic
number, simply press Confirm. At this point, the system will provide a list of address
ranges for that given street, followed by a list of intersections where address ranges are
not available. Use the Arrows to browse the list, and press Confirm to make your
selection.
At this point, a new landmark will have been created for this address. To begin guidance
towards this address, when asked, press Confirm again to create a pedestrian route, or
press and hold Confirm to begin a Motorized route.
Note: During the character entry process, you can use the Left arrow at any time to delete a
character. If you wish to return to the previous entry level, press Explore. To have your current
entry spelled to you, press Fast forward.
9.12 Haptic Feedback
Haptic feedback on the Trek is a system that helps you navigate through vibration signals. When
turned on and following a route, Trek will give you vibratory indications in addition to the standard
vocal instructions.
The vibration signals have the following meaning:
3 short vibrations: Turn right