INSTALLATION
6
■
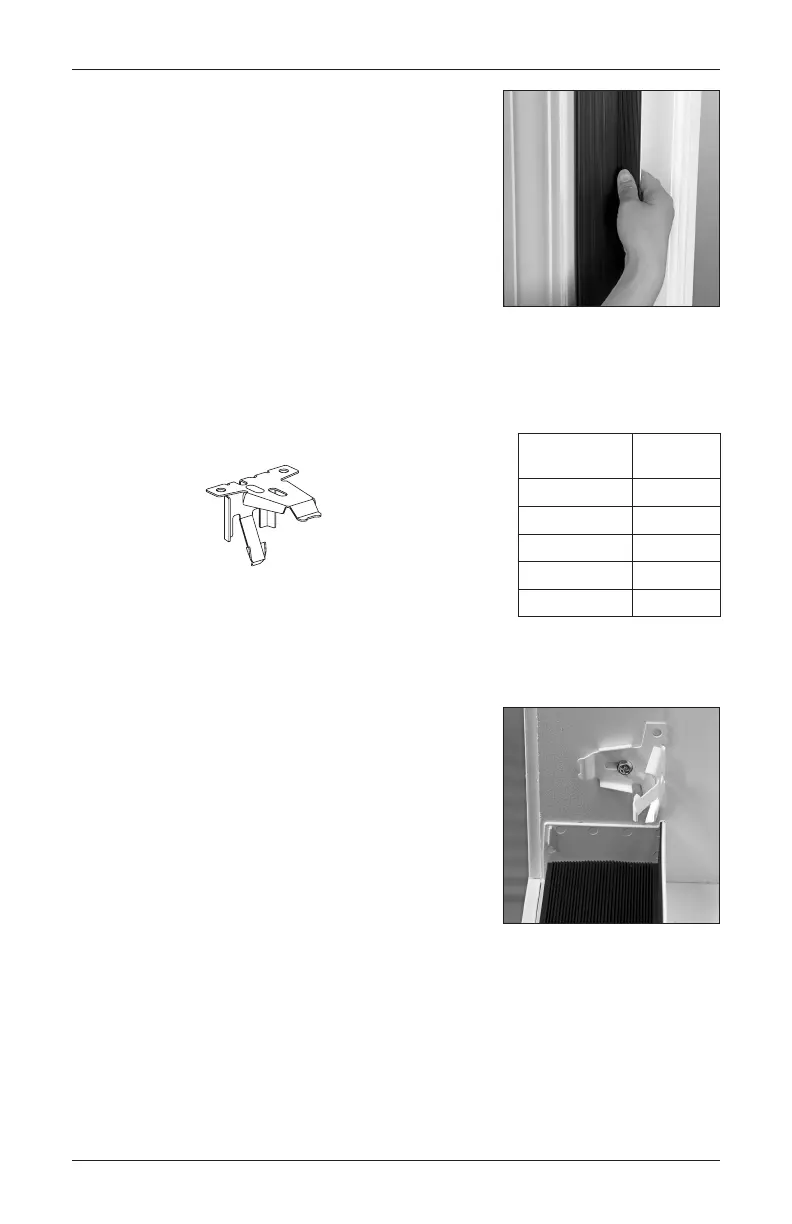
Reach behind the rear channel and make sure there is
no gap between the rear channel and the mounting
channel.
■
Repeat for opposite side.
Install the Brackets
■
Your order will include the correct number of installation brackets for your shade width, as
shown in the table.
■
Install the installation brackets.
➤
Drill the screw holes already marked on the head jamb using a
3
⁄
32
" drill bit.
■
Use a level to check that the mounting surface is level. Shim the brackets if necessary.
■
Attach the installation brackets using the screws
provided.
IMPORTANT: The back edges of the installation
brackets should line up with the back of the rear
channel. If the brackets are closer to the window,
move them forward.
IMPORTANT: The front edges of the installation
brackets must be level and aligned. If mounting to a
heavily textured surface, shim the brackets, if needed.
Install the Shade
■ Refer to the appropriate page based on your order.
➤ For PowerView
®
shades: see the Duette Honeycomb Shades PowerView Motorization
instructions, page 10.
Bracket
Shade
Width
Brackets
Required
12" – 36" 2
36
1
∕
8
" – 72" 3
72
1
∕
8
" – 108" 4
108
1
∕
8
" – 144" 5
144
1
∕
8
" – 174" 6





 To Next Page