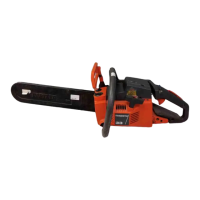
5.17.2 To assemble the control unit
1. Attach the wires to the control unit. Make sure that
the sealing and bracket is correctly attached. First
attach (A) and then (B).
2. Attach the control unit and the battery terminal to the
crankcase.
3. Put the motor connector in the holder. Assemble the
cables as shown in the illustration.
4. Make sure that the gray area in the illustration (A) is
free from cables. This is the battery ejector (B).
Note: There is a risk that cables around the battery
ejector get caught between other parts when the
battery is attached.
5. Assemble the product. See
To assemble the drive
wheel cover and guide bar on page 9
,
To assemble
the crankcase on page 9
and
To assemble the front
hand guard on page 11
.
5.18 Replacing the keypad S/N
-20151600245
5.18.1 To replace the keypad
CAUTION: Do not bend the keypad when you
assemble.
1. Remove the drive wheel cover, saw chain and guide
bar. See
To remove the drive wheel cover and guide
bar on page 9
.
2. Disassemble the crankcase. See
To disassemble
the crankcase on page 9
.
3. Carefully remove the keypad.
4. Disconnect the connection from the keypad.
5. Clean the surface where the keypad is attached.
6. Make sure the temperature is not lower than 15°C or
59°F. The surface where you attach the keypad
must not be more than ± 3°C or 5°F from the air
temperature. The temperature differs.
7. Remove the protective tape from the new keypad
and press the keypad onto the surface. Press the
keypad with 10 N/cm² for no less than 10 seconds.
521 - 002 - Repair instructions - 17

 Loading...