28
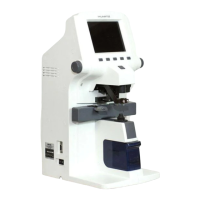
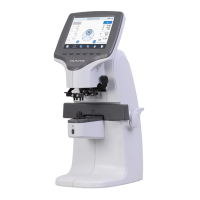
AUTO-LENSMETER
No
Component Removal method
1 PD case
2 PD cover
3 PD lock
4 PD support bracket
5 Nose shaft
6 PD nose spring
7 PD nose
8 Nose rubber
9 PD frame
10 PD shaft(1)
11 PD shaft(2)
12 PD main connect
13 Right / Left PD connect
14 Main encoder
15 Right / Left PD sensor
16 Right / Left moving bracket
17 Encoder shaft
18 Encoder housing
19 Enooder etching
20 PD etching
21
PD shaft
- Remove the 'PD lock 3' and take apart the 'PD support
bracket' through removing M3X6L dish-head screws
and pull out the 'Nose shaft 5' and separate parts
No 6, 7, 8 sequencially.
- Separate the 'PD frame' through removing the M3X6L
dish-head screws and remove the 'Right/left
PD connector 13' and reparate the 'PD shaft1',
the 'PD shaft(1),(2)' and the PD assembly.
- Separate the 'Right/left PD sensor', 'Main connector 14'
and the PD case through removing M2X5L screws.
- Next, take out the 'Moving bracket 16' through removing
the M2X5L screws and separate the 'Encoder housing
sub assembly 18'.
- Separate the 'PD etching 20', the 'Encoder etching' and
the 'Encoder housing sub assembly' through removing
M2X4L screws.
- Be careful not to bend etching parts.
- Assembly is the reverse procedure of disassembly.

 Loading...