Pg 3. 2
BLBL
BLBL
BL
ADE CHANGINGADE CHANGING
ADE CHANGINGADE CHANGING
ADE CHANGING
We can not overstress the safety precautions which should be followed during this operation.
Safety glasses, gloves as well as a long sleeve shirt should be worn. The hydraulics should be off at all
times when the operator has his / her hands in contact with the blade. With safety in mind, the following
procedure should be followed:
1) With the blade stopped and the head in the 90 degree position, open the drive door.
2) Release the carbide guide handles
3) Remove the lower blade guard.
4) Swing the head to approximately 45 degrees and open the idler door.
5) Turn the Blade Tension Switch to "-" to release the tension on the blade until it becomes
free.
6) Remove the blade from both wheels.
7) Push the blade down and out of the carbide guides and remove the blade.
8) Install a new blade on the wheels and slide the blade up and into the carbide guides.
9) Turn the Blade Tension Switch to "+" to put tension on the blade until it stops and close
the door.
10) Install the lower blade guard and turn the carbide guide handles clockwise until they rest
against the stop or the coolant valve.
11) Jog the blade from the control panel, but do not run until this procedure is complete.
12) With the blade stopped, inspect the tracking position and the blade brush position. Refer
to the following pages for correct positions.
13) Swing the head to 90 degrees and close the drive door.
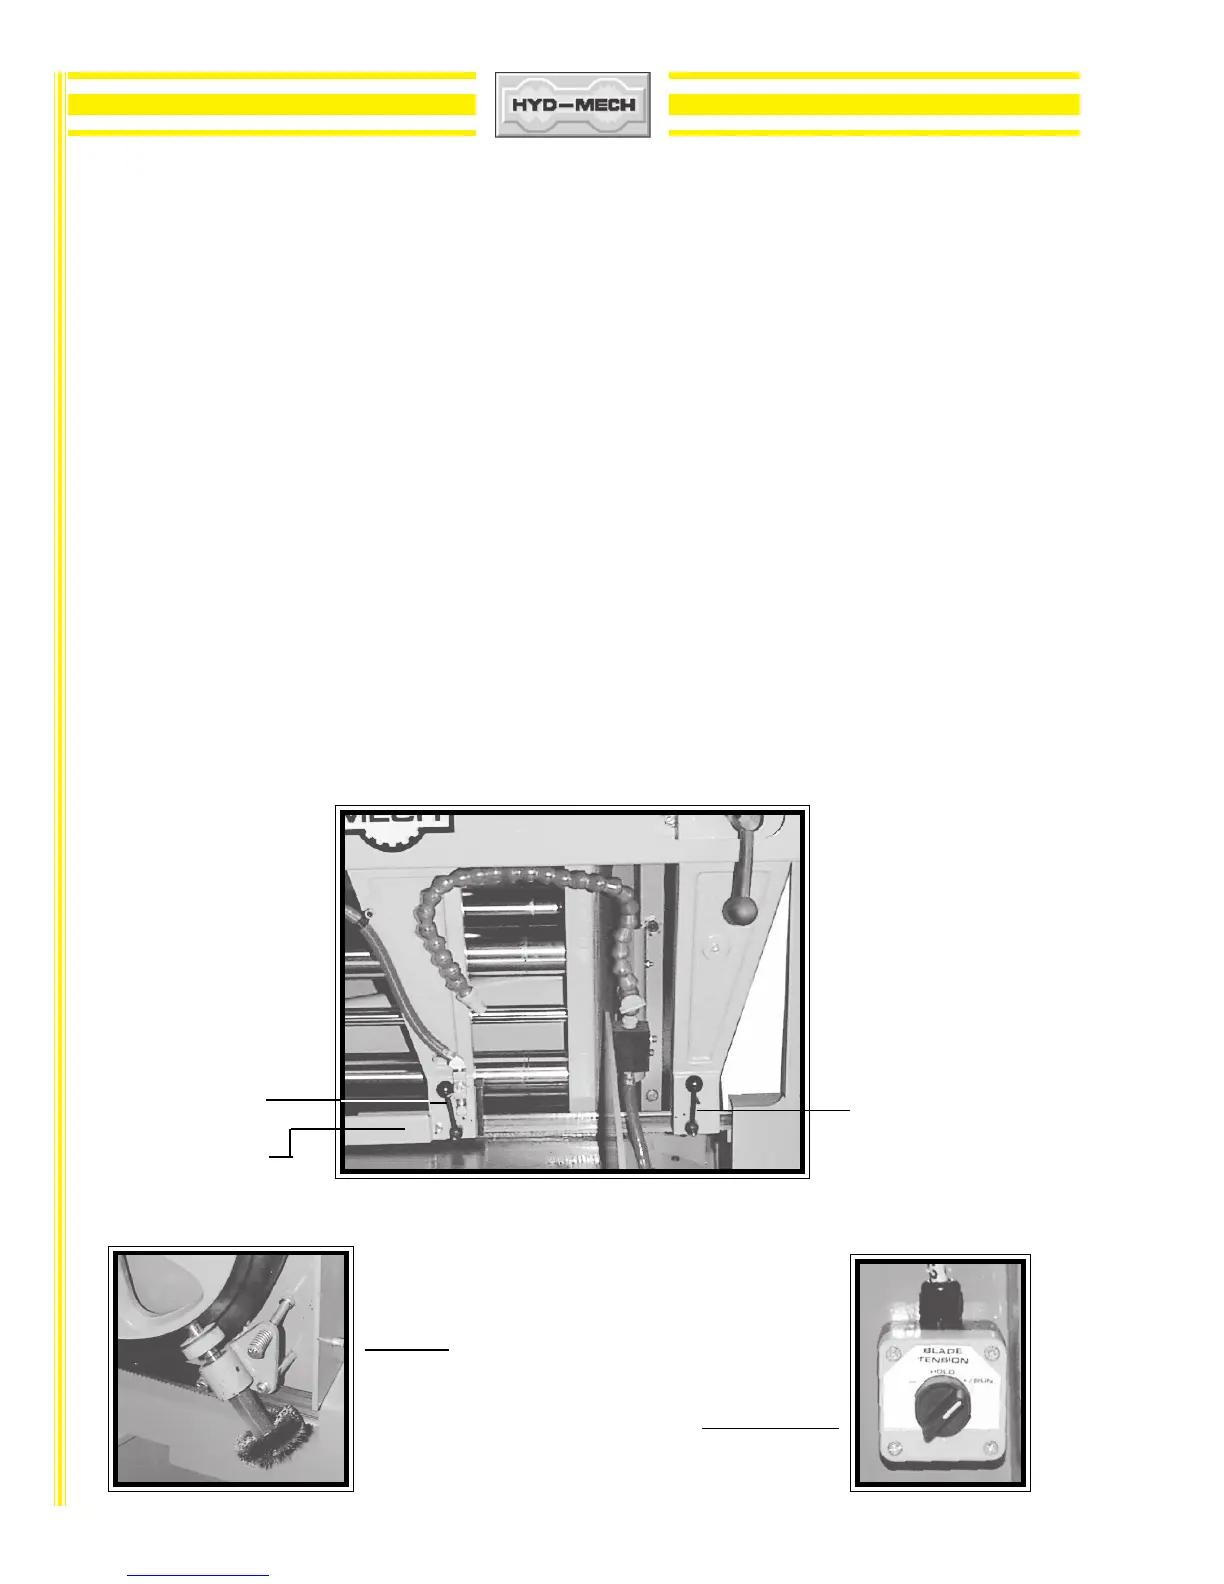
Carbide guide handle, Carbide guide handle,
drive side. idler side.
Lower blade guard
Blade brush assembly,
behind drive door.
Blade tension switch,
behind idler door.