AFE1_AFE2-1:1
8
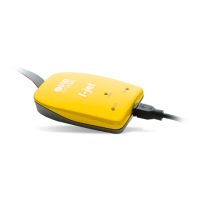
Working with I-jet
IAR Debug Probes User Guide
I-jet®, I-jet Trace, and I-scope™
Working with I-jet
These tasks are covered:
● Setup and installation
● Connecting the target system
● Updating the probe firmware
For information about debugging using I-jet, see the C-SPY® Debugging Guide for
Arm.
SETUP AND INSTALLATION
Software
Before you can use I-jet, you need to install IAR Embedded Workbench for Arm. For
information, see the Installation and Licensing Quick Reference Guide and the
Licensing Guide.
Probe setup
I-jet does not require any special driver software installation. Normally, all drivers for
I-jet are automatically installed as part of the IAR Embedded Workbench installation.
If you need to install the USB driver manually, navigate to
\Program Files
\IAR Systems\Embedded Workbench x.x\arm\drivers\jet\USB\32-bit
or
64-bit (depending on your system). Start the dpinst.exe application. This will
install the USB driver.
For information about using multiple I-jet probes on the same host computer, see the
C-SPY® Debugging Guide for Arm.
CONNECTING THE TARGET SYSTEM
Power-up your I-jet probe
1
Connect I-jet to the target board using the cable that matches the target board connector
(MIPI-20 or MIPI-10). If a standard JTAG connector is used, you must first plug the
ADA-MIPI20-ARM20 adapter into the JTAG connector.
2 Connect I-jet to the host computer using the USB micro cable.
Note: No harm is done if the above order is reversed.
To prevent damage, the target GND and the USB host GND must be at the same level.
When hot-plugging, make sure that the PC and the target board power supply are
connected to the same grounded wall outlet or a common grounded desktop power strip.