a. Loosen the left and right enclosure cover thumbscrews located at the front edge of the chassis
cover. The thumbscrews are identied in the below gure.
Figure 9. Thumbscrews at the front edge of the chassis cover
b. Use both hands to apply a gentle downward pressure on the top cover, and then slide the cover
forward enough to clear the flange at the rear of the enclosure. Aligning the six guide pins (three
on each side of the chassis) with the six guide pin openings (three on each side of the cover).
Figure 10. Slide cover, guide pin and flange
c. Lift the top cover up and away from the enclosure.
6. Make sure it has a half-populated conguration.
Important: If it is NOT a half-populated conguration, STOP, replace the top lid and return the ESS
5147-102 storage enclosure to its operation position. Then, identify again which enclosure it is to
upgrade or contact next-level support for assistance.
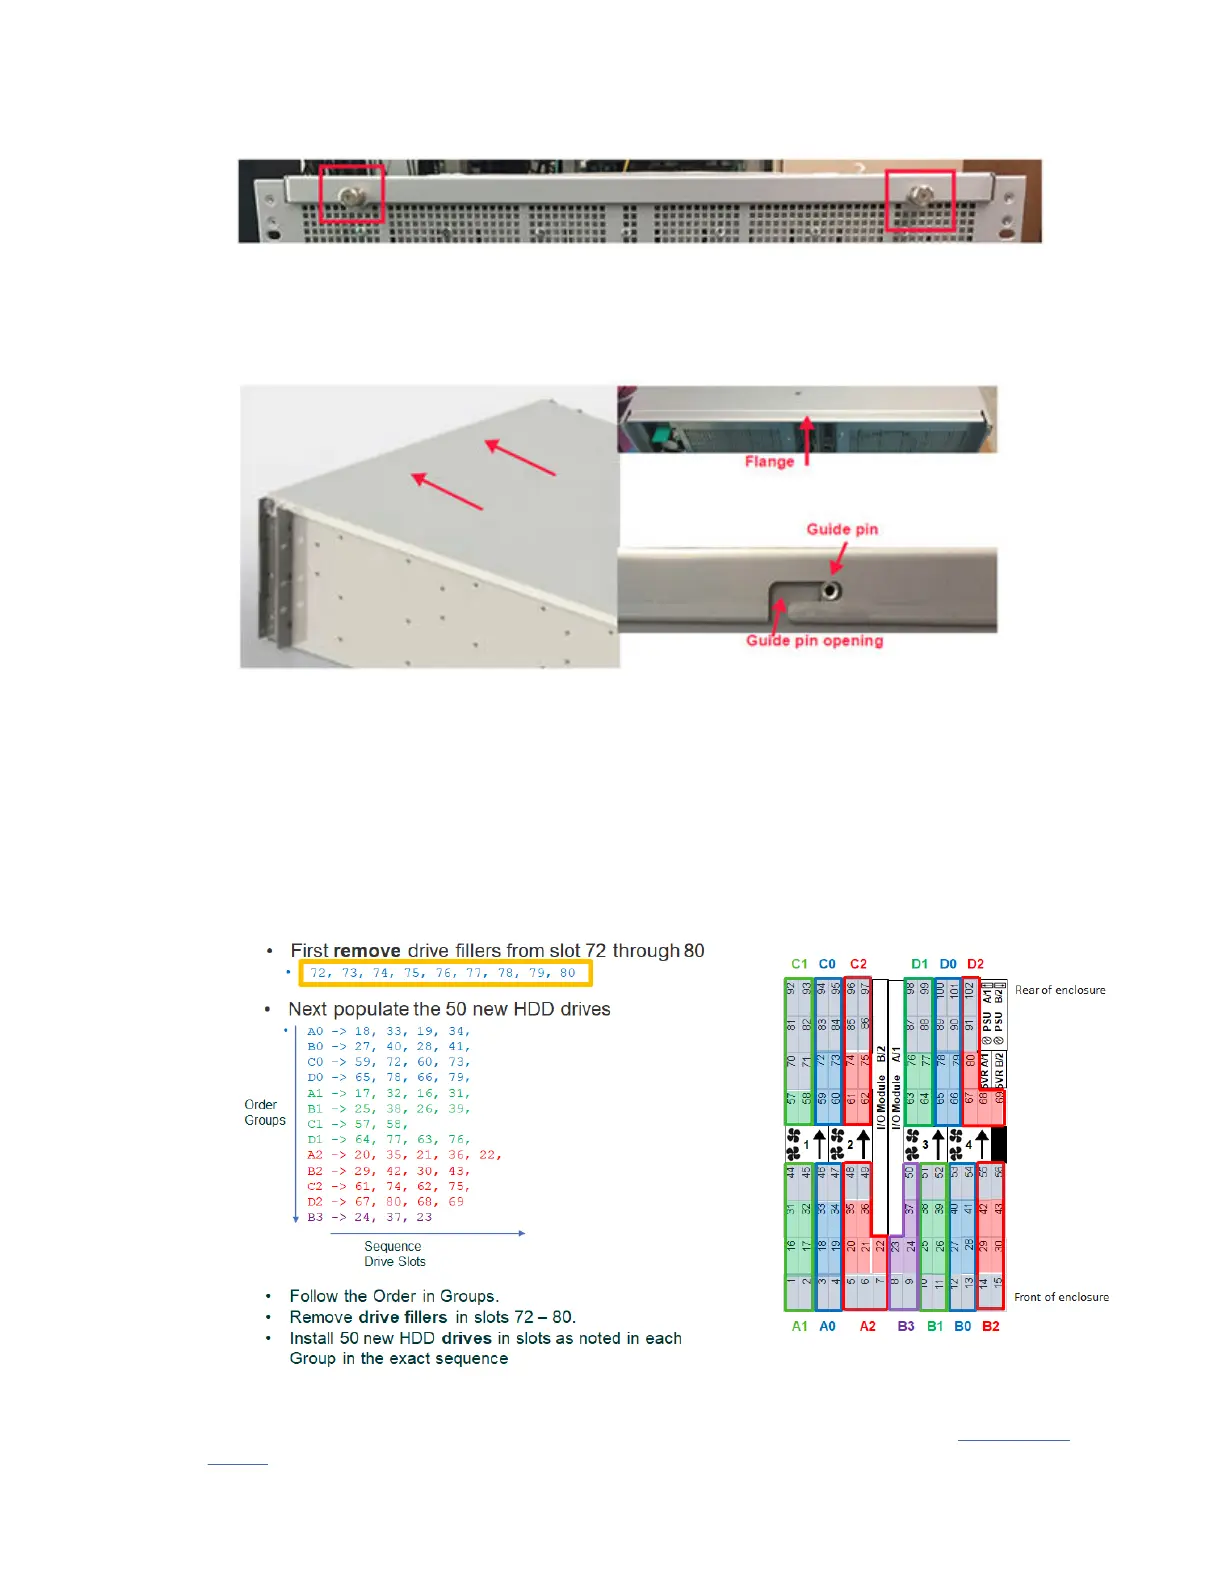
7. Remove all nine drive llers from slots 72 through 80.
a. The population rules to upgrade half-populated to fully populated conguration.
Figure 11. Installation rules to upgrade half-populated to fully populated conguration
8. Populate 50 new HDDs to the storage enclosure in the specied sequence shown in Figure 11 on
page 8.
8
IBM Elastic Storage System 5147-10 Storage Enclosure: Service Guide

 Loading...


