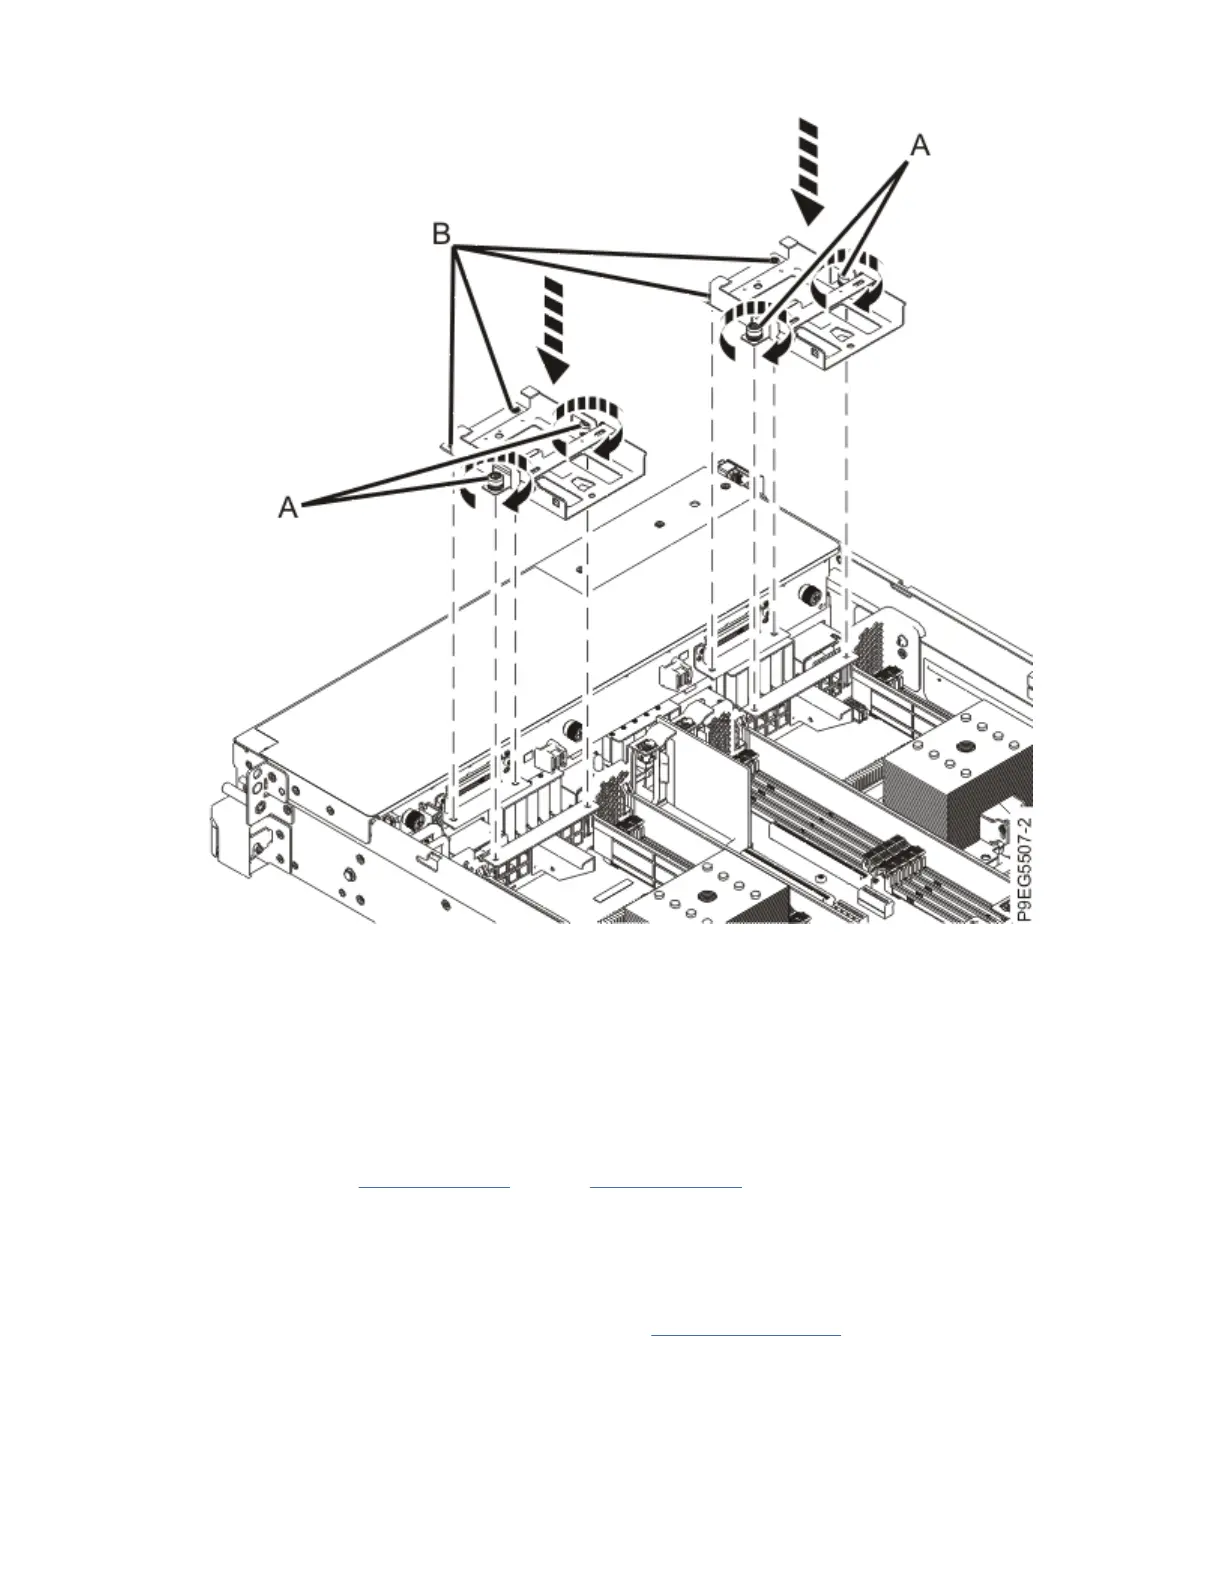
Figure 31. Replacing the drive trays
a) Lower the drive tray into the system.
The bottoms of the trays have a hook that slides into a support. Ensure that hook slides under the
edge of the support.
b) Slide the drive trays forward and align the screws with their holes.
c) Tighten the two screws (A) at the middle of the drive tray.
d) Tighten the two screws (B) at the front of the drive tray.
e) Repeat steps “7.a” on page 32 through “7.d” on page 32 for the second drive tray.
8. Using your labels, replace the internal drives, if present, into the trays. Otherwise, continue to the
next step.
a) Unlock the drive lever by pressing the release tab and pulling out the lever.
If the lever is not all the way out, the drive does not slide into the system.
b) Lower the drive into the drive tray as shown in Figure 32 on page 33.
32
Power Systems: Power Systems: Drive backplane
 Loading...