7. Install the cover (see “Installing the cover” on page 29).
8. Slide the server into the rack.
9. Connect the cables and power cords.
10. Turn on all attached devices and the server.
Removing a SATA RAID back plate
If a SATA RAID kit was installed in the server, the cables in the SATA back plate
attach to a SAS/SATA controller.
To remove the SATA RAID back plate, complete the following steps:
1. Read the safety information that begins on page vii and “Installation guidelines”
on page 25.
2. Turn off the server and peripheral devices, and disconnect the power cord and
all external cables.
3. Remove the server from the rack and place it on a flat, static-protective surface.
4. Remove the cover (see “Removing the cover” on page 28).
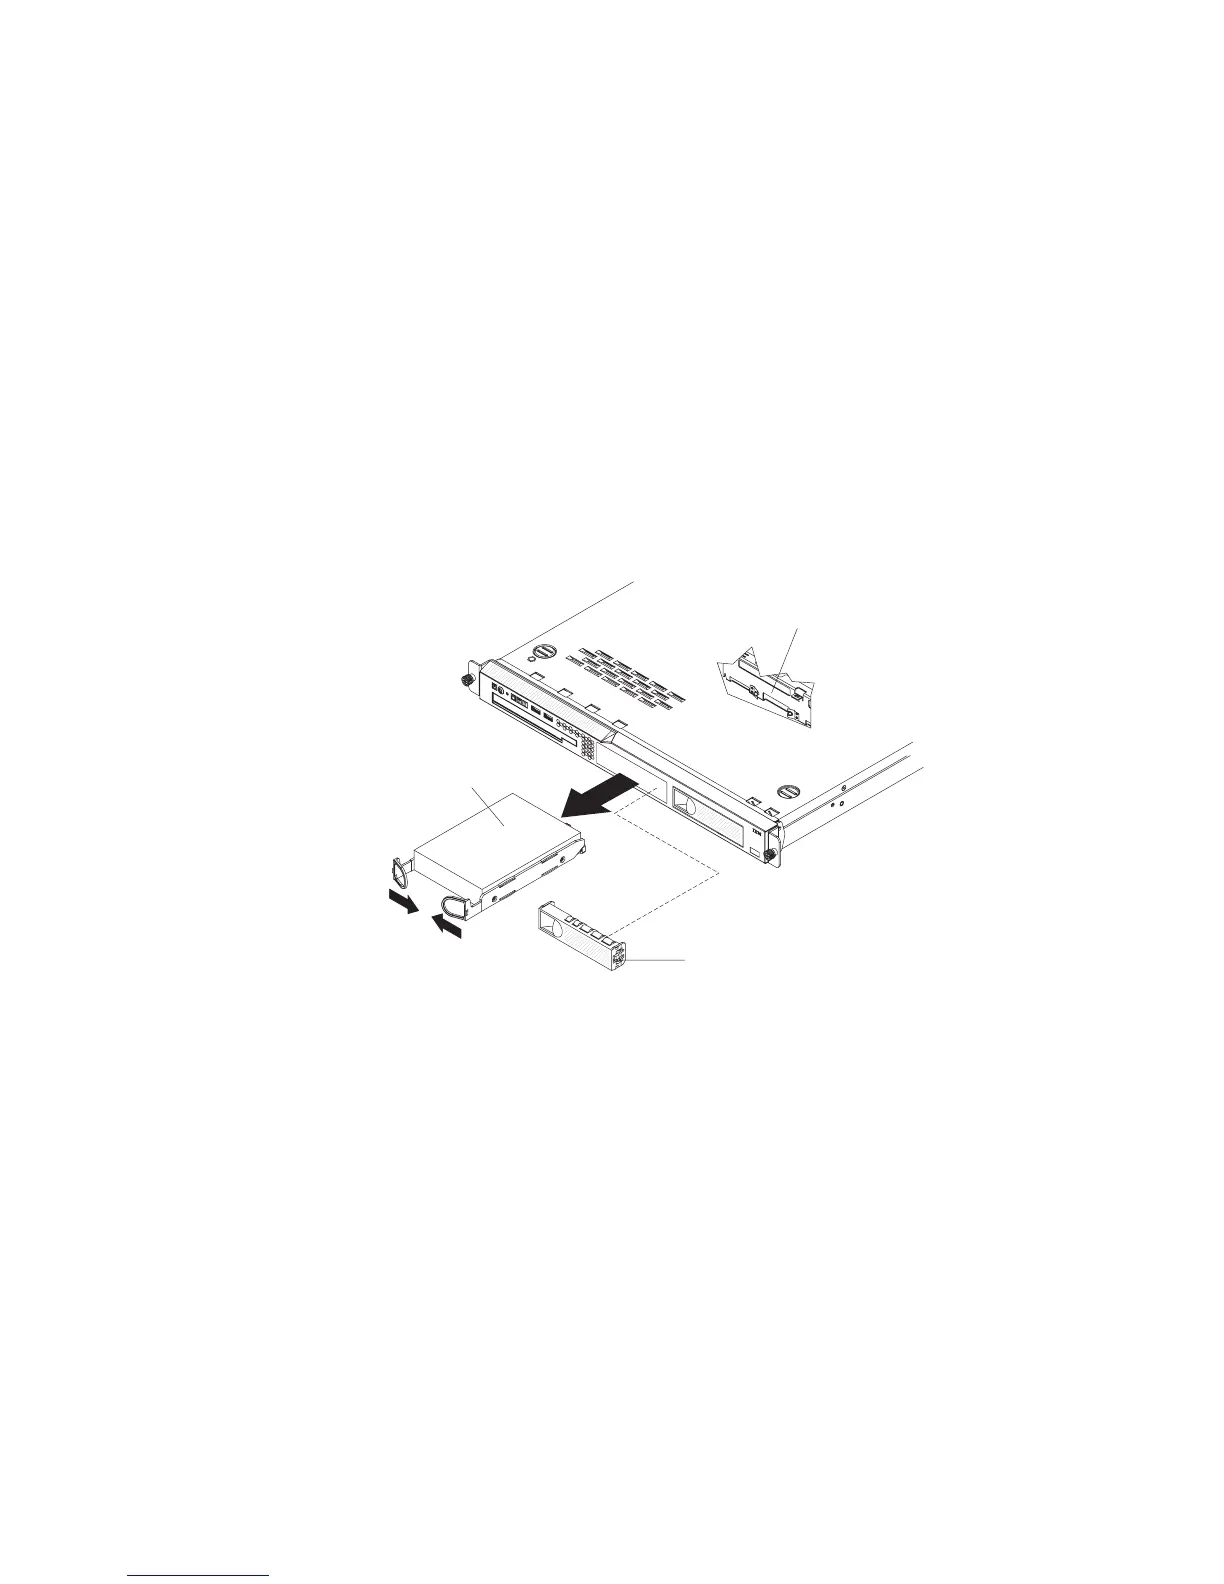
Filler panel
Hard disk
drive assembly
SATA hard disk
drive back plate
5. Pull the hard disk drives out of the server slightly to disengage them from the
backplane or remove the drives completely (see “Removing a simple-swap
Serial ATA hard disk drive” on page 35).
6. Disconnect the SAS signal cable from the SAS/SATA controller.
7. Remove the SATA RAID back plate from the server:
a. Rotate (lift) the air deflector out of the way.
b. Lift the back plate out of the server slightly; then, disconnect the power
cables and remove the back plate.
Installing a SATA RAID back plate
If a SATA RAID kit was installed in the server, the cables in the SATA back plate
attach to a SAS/SATA controller.
56 IBM System x3250 Types 4364, 4365, and 4366: Problem Determination and Service Guide

 Loading...


