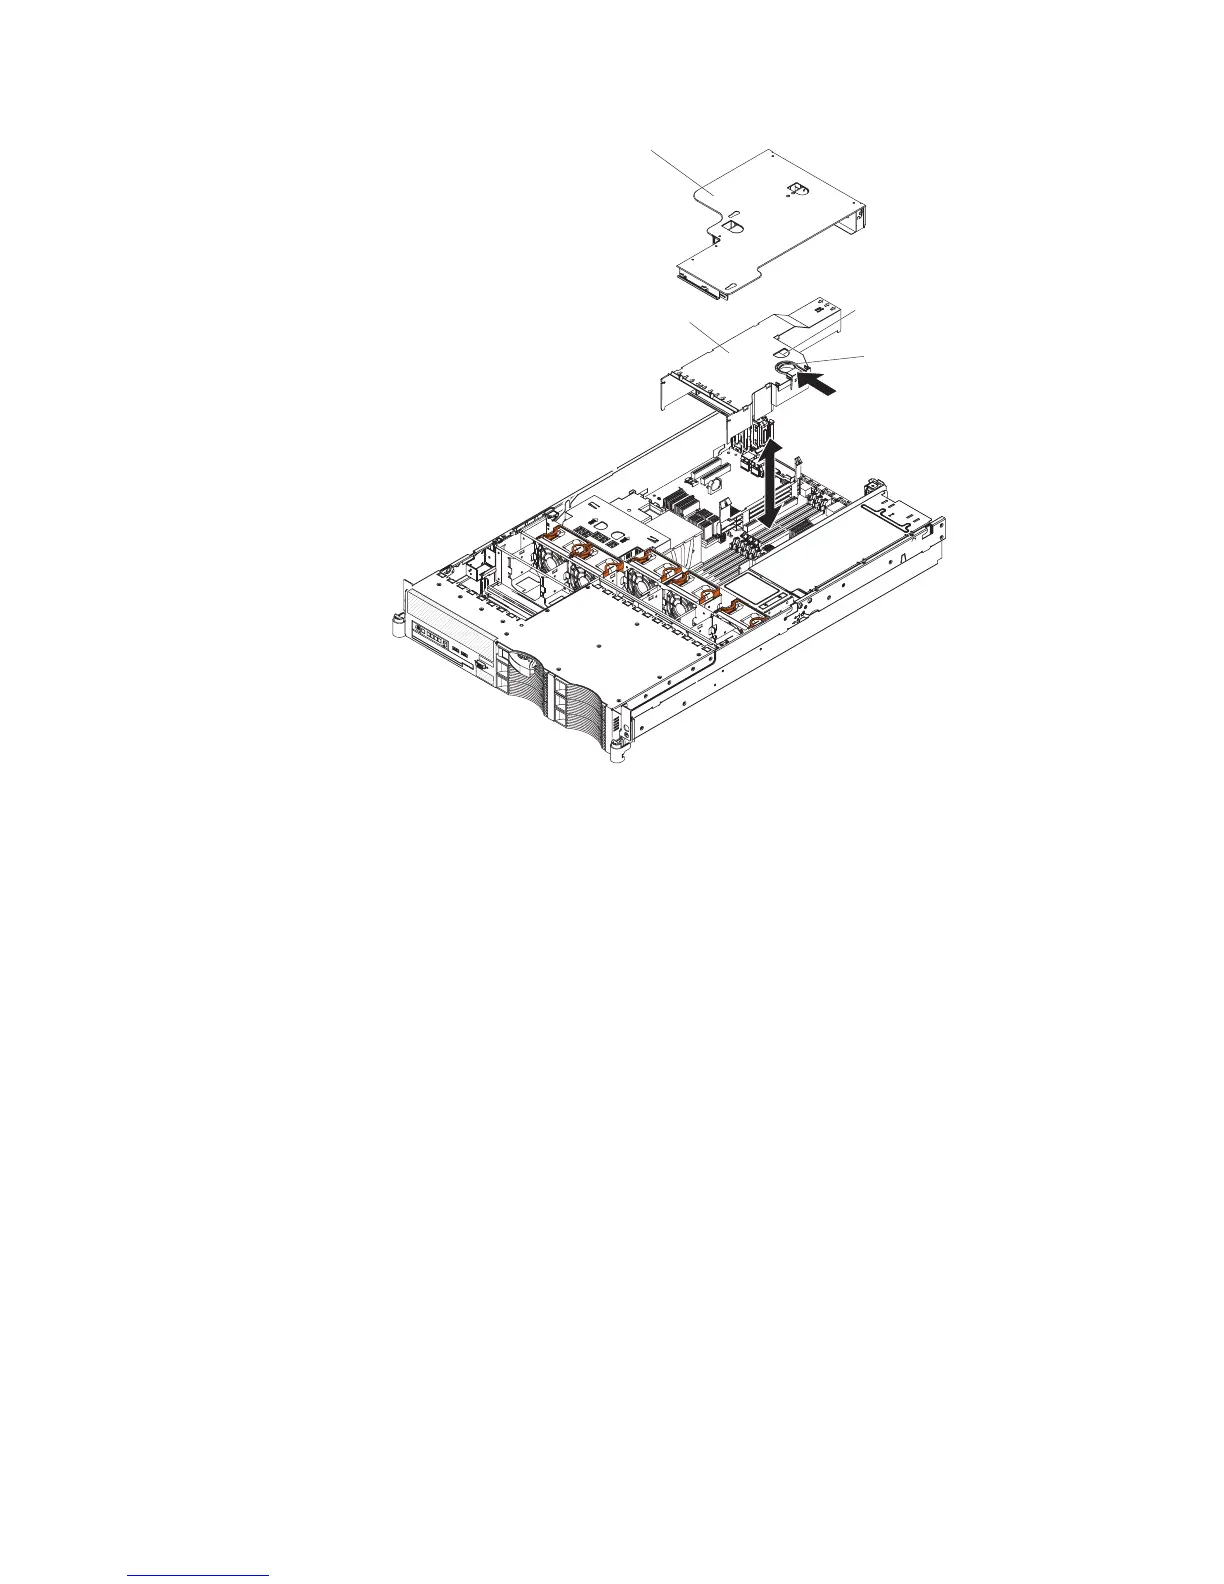
DIMM air baffle
Finger hole
Release ring
Riser card
assembly
4. Remove the riser-card assembly.
5. Remove the DIMM air baffle.
6. Open the retaining clip on each end of the DIMM connector.
7. Touch the static-protective package that contains the DIMM to any unpainted
metal surface on the outside of the server. Then, remove the DIMM from the
package.
8. Turn the DIMM so that the keys align correctly with the connector.
9. Insert the DIMM into the connector. Firmly press the DIMM straight down into
the connector. The retaining clips snap into the locked position when the DIMM
is firmly seated in the connector.
Note: If there is a gap between the DIMM and the retaining clips, the DIMM
has not been correctly inserted; open the retaining clips, remove the DIMM,
and then reinsert it.
10. Replace the DIMM air baffle.
11. Replace the riser-card assembly.
If you have other optional devices to install, do so now. Otherwise, go to
“Completing the installation” on page 32.
Memory mirroring
You can configure the server to use memory mirroring. Memory mirroring stores
data in two pairs of DIMMs simultaneously. If a failure occurs, the memory controller
switches from the active pair to the mirroring pair. Memory mirroring reduces the
amount of available memory. Enable memory mirroring through the
Configuration/Setup Utility program. See the section about using the
Chapter 2. Installing optional devices 15