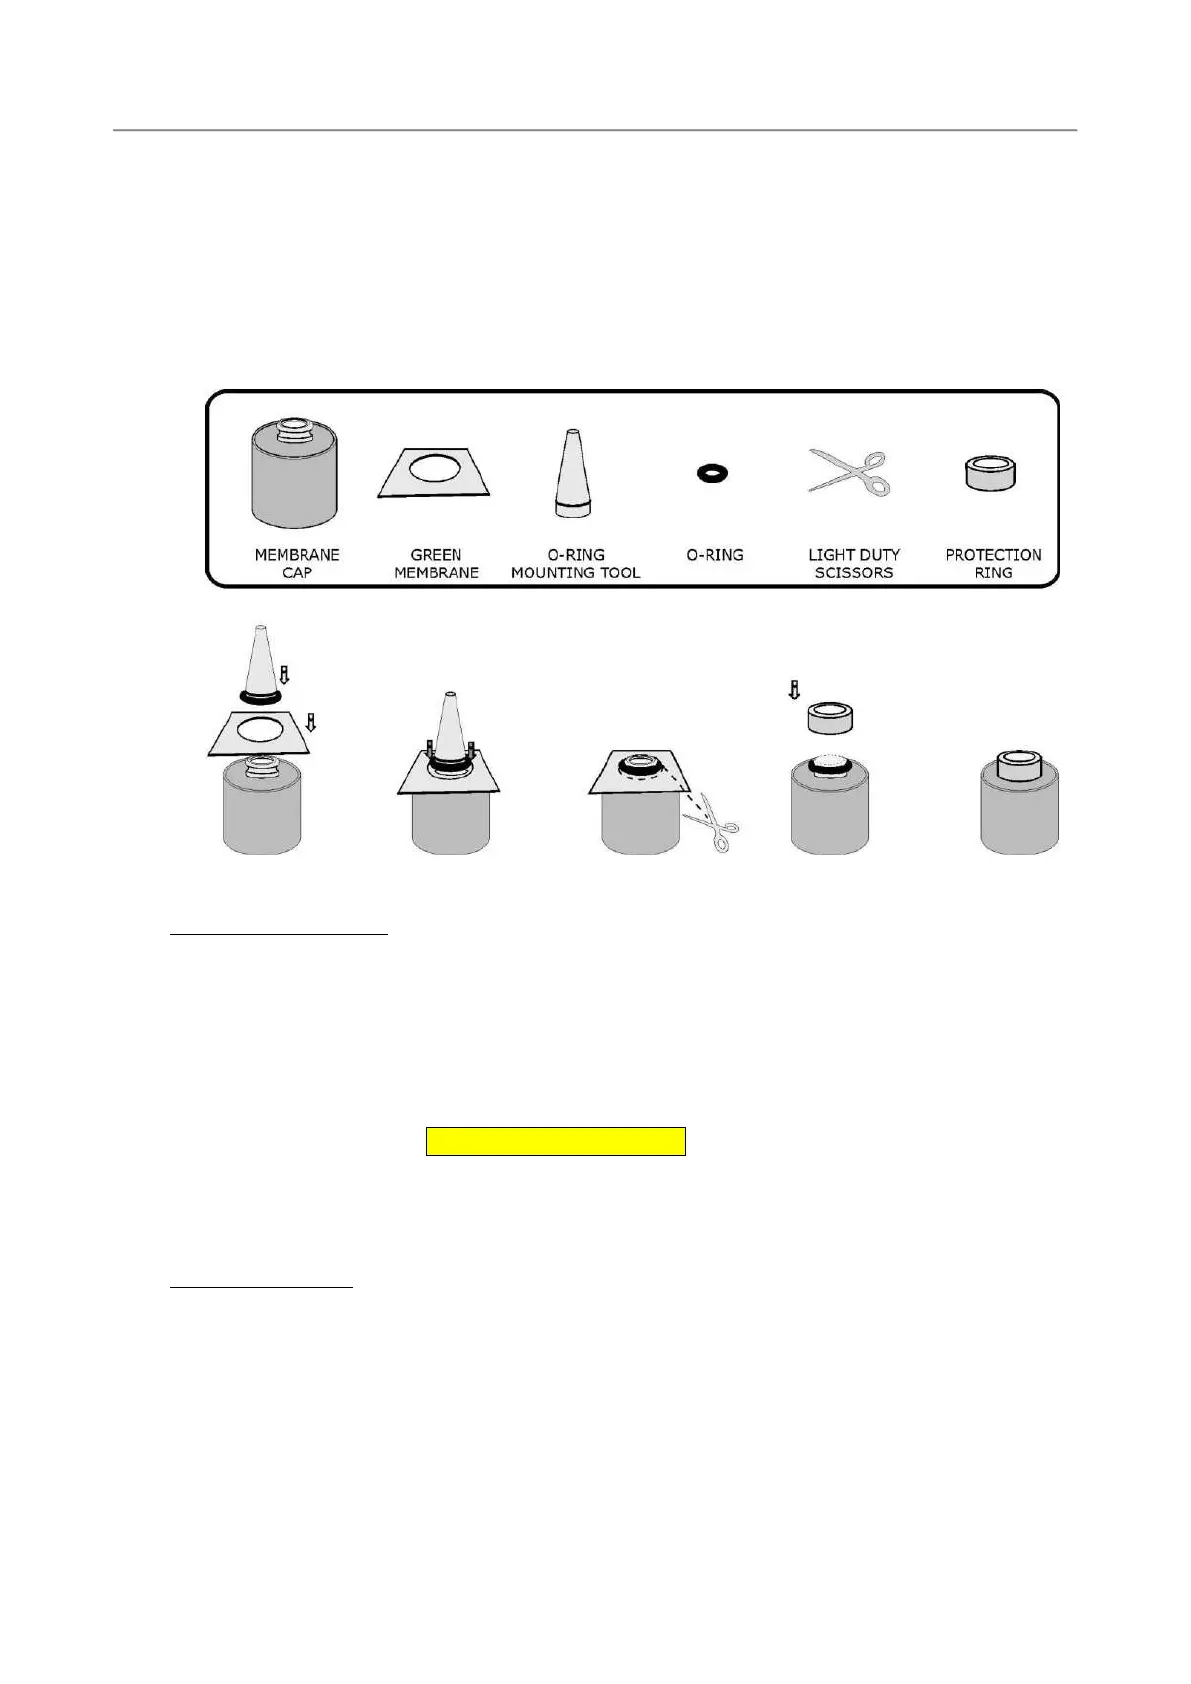
3) Fit the new o-ring over the mounting tool and roll it down to the widest part of the tool.
4) Place the cap on a desktop with its narrow end facing up.
5) Position the measuring membrane ”green” on top of the cap.
6) Place the widest part of the tool against the membrane. Slightly pressing the tool, slide the o-ring
carefully into the slot of the cap thus holding the membrane in position.
7) Cut away the excessive membrane, with fine scissors, far from the o-ring to avoid damaging the
membrane.
8) Finally, recap the protective plastic ring.
7.1.6 Oxygen sensor cleaning
During the calibration procedure, the oxygen sensor current is shown:
Checking oxygen sensor:
Current: XXX nA. % of last calibration. XXX.X%
This acceptable range is:
Membrane Current (nA)
Green 30-90
If, after replacing the membrane cap and cleaning the sensor tip with filter paper, the oxygen sensor
current is too low during calibration, it is necessary to polish the sensor tip with the abrasive paper
(which must be wet) included in the maintenance kit. It is sufficient to slightly rub the tip over the paper
two or three times without applying an excessive pressure. Wash the sensor tip with distilled water, or
with a few drops of electrolyte, to remove residues. If the silver anode appears completely black or
covered with foreign materials, it is necessary to clean it with the abrasive paper. Wrap the paper around
the silver body and rotate it to obtain original silver brightness. Wash the sensor under a tap or, if
possible, use distilled water to remove residuals. The anode cleaning procedure is required every 2 or 3
years only. After these operations, the oxygen current, during calibration, will be higher than the normal
one and will drop during the first few hours to reach the normal stability level of 0.1 to 0.3 ppm/week.