40
ii i
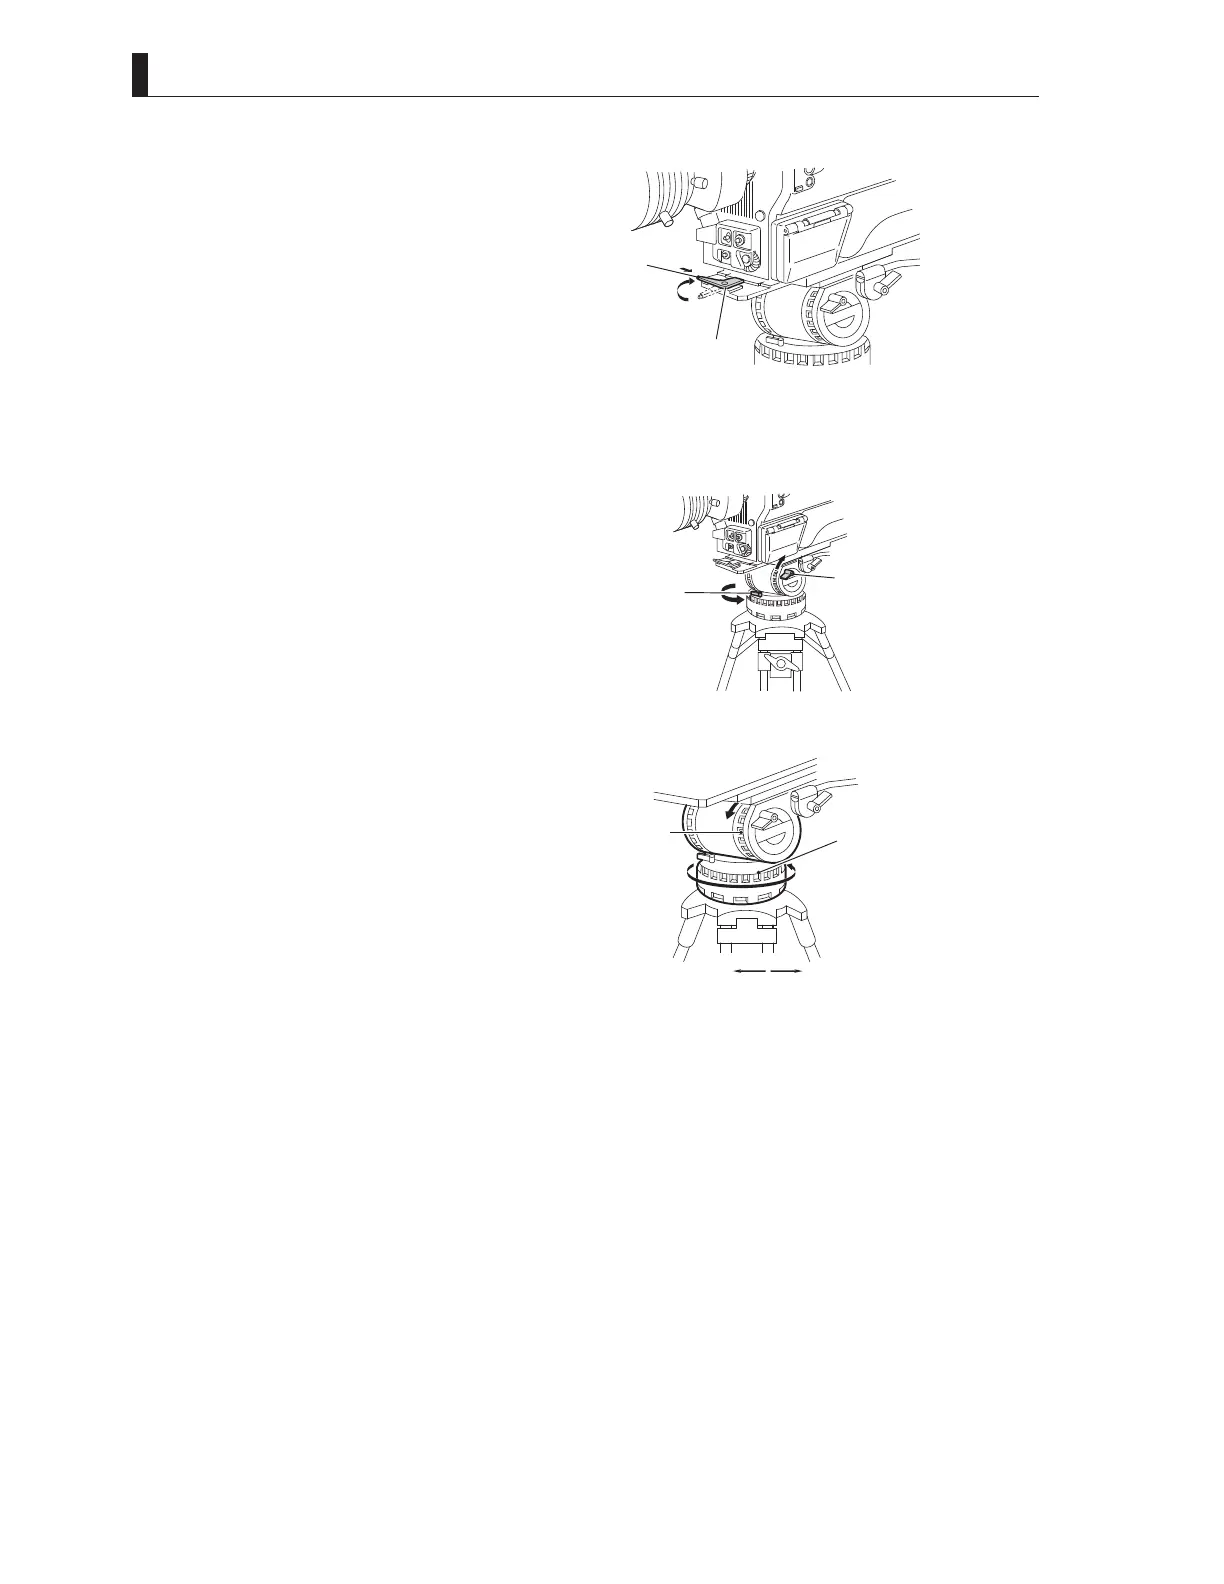
5 After inserting the front wedge of the camera,
tighten the lock lever until the camera is completely
fixed.
7XUQWKHORFNOHYHUXQWLOLWFOLFNV<RXZLOOKHDUDFOLFN
sound when the lock lever is locked.
6 Make sure that the camera is fixed to the tripod
mount plate completely and does not wobble.
CAUTION:
Be sure to mount the camera on a tripod securely, or the camera might fall and get damaged and you can be injured.
7 Loosen the tilt lock and pan lock and adjust the
pan and tilt of the camera.
Setting the pan brake and tilt brake to a low number
ZLOOPLQLPL]HIULFWLRQDQGHQVXUHVPRRWKPRYHPHQW
After positioning the camera to the desired pan
and tilt, tighten the tilt lock and pan lock to lock the
camera.
■
Removing the Camera from the Tripod
This section explains how to remove the camera from the tripod.
Press the red button on the lock lever to unlock the camera.
Be sure to hold the handle while pressing the button to prevent the camera from falling.
2 Lift the camera and remove the wedges from the tripod mount plate.
Red button
Lock lever
⑤ Tighten the lock lever until
the camera is completely fi ed.
T ra e
Pa ra e
01234567
eTe
⑧ Tighten the tilt lock and pan lock to
lock the camera.
⑦ oosen the tilt lock and pan lock and
ad ust the pan and tilt of the camera.
T
Pa
Tr d
 Loading...